
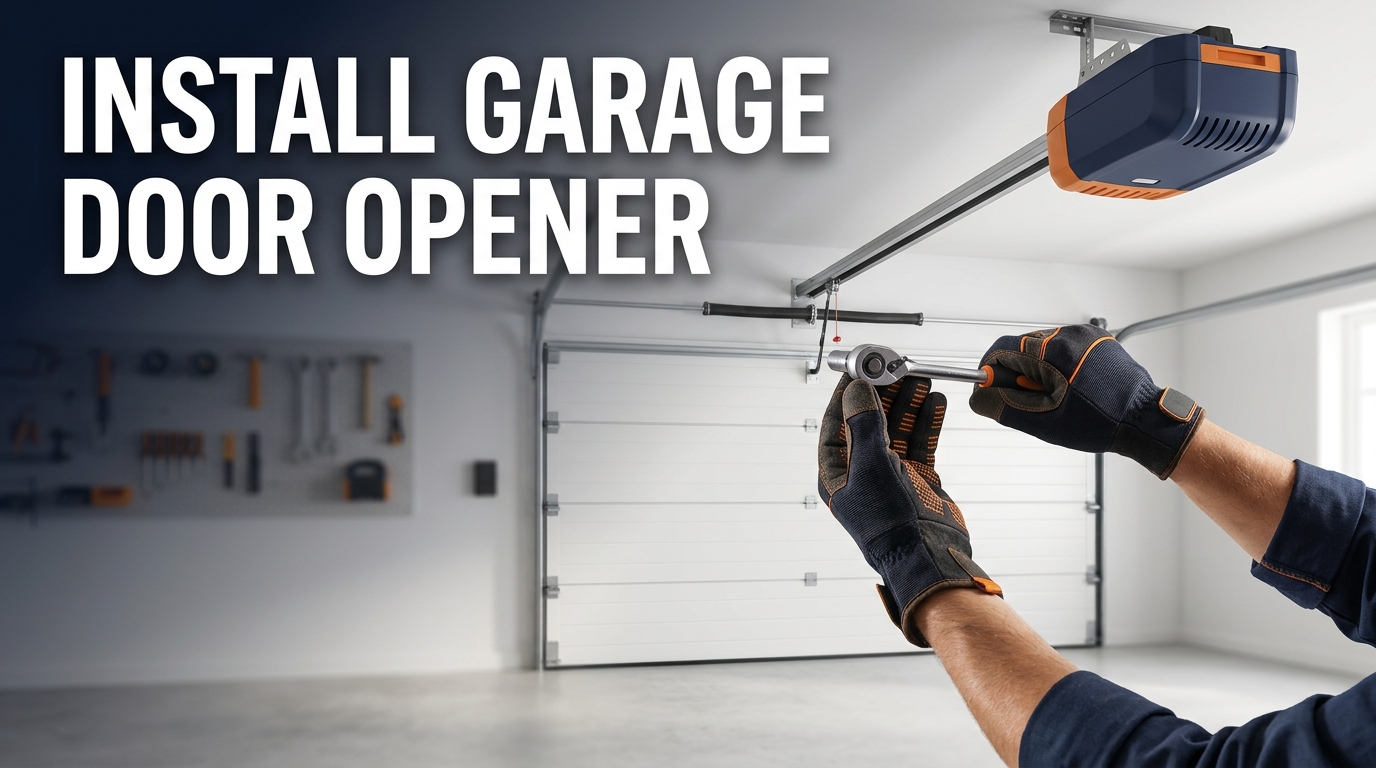
If you want to know how to install garage door opener hardware yourself, the short answer is that it is a doable weekend project for a handy homeowner. You assemble the rail, mount the motor unit to the ceiling, attach the header bracket and door arm, wire the safety sensors and wall control, then set the travel limits and test the safety reversal. Most kits take at least two hours, and some steps go much easier with a helper.
This guide walks you through the full process in plain language. You will also learn what the job costs, how long an opener lasts, how to reset one, and how to swap a remote battery. Safety comes first throughout, because a closing garage door carries real force.
Is Installing a Garage Door Opener a DIY Job?
For most people with basic tools, yes. One major manufacturer says installation takes two hours or more depending on your skill level, and certain steps may need two people. Trade groups also lean cautious. The Door & Access Systems Manufacturers Association says installing an opener is generally easier and safer than installing a door, but it recommends a trained technician because a poor installation can create a hazard.
Here is a quick snapshot to help you decide.
| Factor | What to expect |
|---|---|
| Time | Two hours or more, often an afternoon |
| Difficulty | Moderate, with overhead work and some heavy lifting |
| Helpers | One extra person is strongly recommended |
| Skills needed | Drilling, measuring, basic wiring, reading the manual |
| Stop and call a pro if | The door is unbalanced, a spring is broken, or you need new electrical wiring |
Springs and cables sit in a different risk category from the opener itself. If your door is heavy, stuck, or crooked, read our guide on how to replace garage door spring components and why torsion springs are best left to trained technicians.
Choose the Right Opener Before You Install
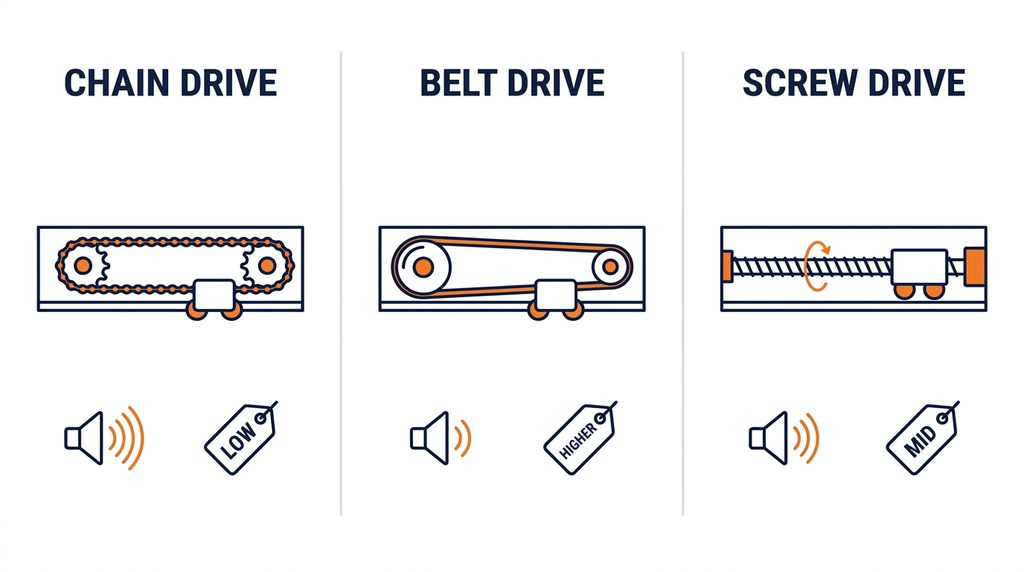
The drive type decides how loud, how pricey, and how long-lasting your new opener will be. Buying the wrong one is the most common regret, and it is easy to avoid.
| Drive type | Noise level | Price level | Best for |
|---|---|---|---|
| Chain drive | Loudest | Lowest | Detached garages and tight budgets |
| Screw drive | Medium | Mid-range | Low-maintenance setups |
| Belt drive | Quietest | Higher | Garages under or beside bedrooms |
Horsepower matters too. A 1/3 or 1/2 horsepower unit suits a standard single door, while a double door usually calls for 1/2 horsepower, and a heavy wood or faux wood overlay door may need 3/4 horsepower. A stronger motor does not open the door faster, because opening speed is set by the design of the unit.
Tools and Parts You Will Need
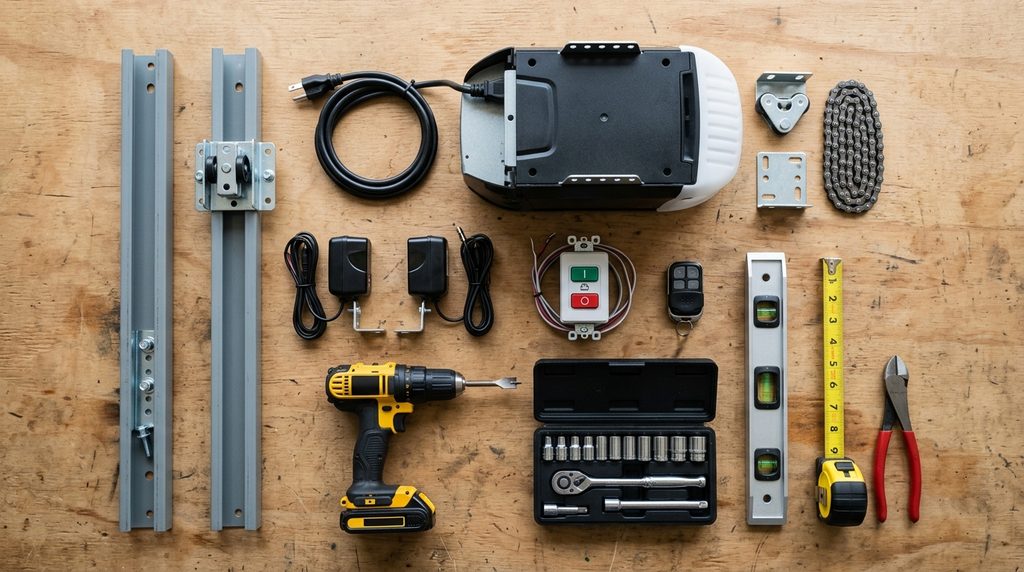
Gather everything before you climb the ladder. Constant trips for a missing socket are what turn a two-hour job into a six-hour one.
- A cordless drill and bits
- A socket set and wrenches
- A level and tape measure
- A sturdy stepladder, and a second ladder if you have a helper
- Wire cutters and strippers
- Lag screws and angle iron if your kit does not include enough
- The opener kit with rail sections, trolley, motor unit, sensors, wall control, and remotes
Prepare the Garage and the Door First
A new opener cannot fix a door that fights it. Start by cleaning the tracks and rollers, and lubricate roller bearings with silicone spray while keeping it off the tracks, since spray on the tracks attracts dirt. Then disconnect any old opener, remove ropes and locks, and clear the ceiling and floor space.
Next, test the door balance. With the old opener disconnected, lift the door to the halfway point and let go. A balanced door stays put, while one that drops or shoots up has a spring problem that needs a professional. If you notice shaking or rattling too, our article on garage door vibration explains the common causes and safe checks.
Also check where power will come from. A ceiling receptacle near the motor unit should be GFCI protected, and if extending power from an existing outlet is beyond your comfort level, hire a licensed electrician. Local electrical codes vary, so confirm your requirements before you start.
How to Install Garage Door Opener Step by Step
The exact order and parts differ by brand, so keep your manual open. The stages below cover what nearly every ceiling-mounted kit involves.
- Step 1: Assemble the Rail and Trolley
Lay the rail sections out in order and join them, using the arrows or markings on most kits as a guide. Slide the trolley onto the rail, fit the belt, chain, or screw as directed, then attach the finished rail to the motor unit. Do this on the floor, since it is far easier than doing it overhead.
- Step 2: Mark and Mount the Header Bracket
Open the door and find its highest point of travel. Use a level to mark that height on the wall above the door, then measure about two inches above it and make a second mark. The bottom edge of the header bracket lines up with that second mark, usually at the center of the door, and it is attached to the wall with the proper fasteners.
- Step 3: Attach the Rail and Hang the Motor Unit
Fasten the front of the rail to the header bracket, then lift the motor unit and rest it on a ladder while you position it. Hang it from the ceiling with angle iron. In an unfinished garage, attach the iron to the face of a joist with 1-inch lag screws, and for finished ceilings use 3-inch lag screws along the bottom of a joist. Check that the rail is level and centered before you tighten everything.
- Step 4: Connect the Door Bracket and Arm
Attach the door bracket to the top section of the door, then connect the arm from the trolley to the bracket. Do not skip the reinforcement bracket recommended in your manual, because leaving it out can damage the top panel of the door. Leave the door disconnected from the trolley until you finish the wiring.
- Step 5: Install the Safety Sensors
Mount one photo-eye sensor on each side of the door opening, facing each other, and keep them low. Federal guidance says electric eyes should sit 4 to 6 inches above the floor. Wire each sensor back to the motor unit, aim the lenses at each other, and confirm both indicator lights glow steadily.
- Step 6: Wire the Wall Control and Power Up
Run the wall control wire to a convenient spot inside the garage, ideally in sight of the door and out of children’s reach. Connect it to the motor unit, plug the opener in, and follow the manual to program the remotes. If your model uses a smart app, set that up now, and test the Wi-Fi signal in the garage first. Our overview of smart home technology for your home can help you decide whether those features are worth using.
- Step 7: Set the Travel Limits and Force
Follow your manual to set the fully open and fully closed positions. The door should seat firmly at the bottom without slamming and stop cleanly at the top. If the force setting is adjustable, avoid cranking it up, because a door that hits too hard is a warning sign rather than a fix.
Test the Safety Reversal Before You Finish
Never call the job done until this test passes. Federal rules have required reversing systems on residential openers for decades, and the U.S. Consumer Product Safety Commission adds that an external entrapment protection system has been required since 1993. To test yours, place a 2×4 flat on the floor in the door’s path and close the door.
If the door does not reverse when it strikes the board, stop using the opener until it is adjusted, repaired, or replaced. Then block the photo-eye beam while the door is closing, and it should stop and reverse. Repeat both tests monthly.
Common Mistakes to Avoid
Most failed installs come from a few repeat mistakes. Knowing them ahead of time saves you a redo.
- Installing on an unbalanced door or one with worn rollers
- Mounting sensors too high or misaligning the lenses
- Skipping the reinforcement bracket on the top panel
- Using the wrong fasteners for the ceiling type
- Forgetting the 2×4 reversal test
- Overriding the force setting to cover a door problem
How Much to Install Garage Door Opener Units Cost
If you are wondering how much to install garage door opener equipment will run, the typical professional price sits in the mid-hundreds. One large cost guide puts the average installed cost at $379, with a range from $218 to $540. The same guide notes the opener itself can run from about $200 to $900 or more, while labor is commonly two to six hours at roughly $60 to $80 per hour.
Costs vary by region and by what you choose, and premium or smart models can push your total higher. Here is how the main factors affect the bill.
| Cost factor | How it changes the price |
|---|---|
| Drive type | Chain is cheapest, belt and jackshaft cost more |
| Horsepower | Heavier or larger doors need stronger motors |
| Smart features | Wi-Fi, cameras, and backup power add cost |
| New vs. replacement | A first-time install needs more wiring and labor |
| Electrical work | A new ceiling outlet adds an electrician’s fee |
Doing it yourself saves the labor portion, but you take on the risk and the time. If you are also considering a new door, our guide to custom garage doors covers materials and design, and it helps to choose the door and opener together.
How Long Do Garage Door Openers Last?
Most residential openers last about 10 to 15 years, and the same cost guide says the number depends on maintenance and usage. A busy household that uses the garage as its main entrance will wear an opener out sooner. A well-balanced door with clean tracks and healthy springs helps the motor last longer.
Age is not the only reason to replace one. If your unit predates the 1993 safety requirements, lacks photo eyes, fails the reversal test, or keeps needing repairs, replacement is the safer choice. Belt drive units are often chosen for longevity and quiet, but the quality of the installation matters just as much.
How to Reset Garage Door Opener Settings and Remotes
Resetting an opener is usually about erasing its memory so lost or old remotes stop working. On many popular models, you find the Learn button on the motor unit, press and hold it until the LED turns off, which takes about six seconds. That erases every remote and keypad, so you then reprogram only the ones you want to keep.
Two details are worth knowing. Unplugging the opener does not erase the programming, so simply cutting power will not remove a lost remote. Some Wi-Fi models also use a longer sequence with several presses and beeps, so check the manual for your exact model before you start. If you just bought a home, this reset is one of the first security steps to take.
How to Change Battery in Garage Door Opener Remotes
Remote batteries are the easiest fix on this list, and they are often the cause when the remote weakens but the wall button still works. Many modern remotes use a 3V CR2032 coin cell, and the manufacturer’s steps are simple: pry the case open, remove the old battery, and insert the new one with the positive side facing up. Some models use two batteries, screws, or a AAA cell, so match the type printed on your remote.
Keep coin cells away from children, since they are a swallowing hazard, and dispose of old ones properly. If your opener also has a backup battery, follow its manual for the replacement schedule. After swapping a remote battery, test the remote from a few feet away, and reprogram it only if it no longer responds.
Quick Troubleshooting After Installation
| Problem | Likely cause | What to try |
|---|---|---|
| Door reverses right after closing | Misaligned or blocked sensors | Clean lenses, realign, confirm steady lights |
| Door will not close fully | Travel limit set too high | Re-adjust the down limit per the manual |
| Remote does not work | Weak battery or memory issue | Replace the battery, then reprogram |
| Loud rattling or shaking | Loose hardware or worn rollers | Tighten bolts and inspect the door |
| Door drops when disconnected | Spring imbalance | Stop and call a professional |
If you would rather have a trained technician handle the setup, a local team such as Overhead Door of Buffalo can install and test the opener for you. Having a professional confirm balance, sensors, and reversal is a smart choice for heavy doors or complicated wiring.
Frequently Asked Questions
How long does it take to install a garage door opener?
Most kits take about two hours or more, and many homeowners finish in an afternoon. A helper, a balanced door, and an existing outlet make the job faster. Extra wiring or repairs to the door can stretch it well beyond that.
How much does it cost to install a garage door opener?
A common professional average is around $379, with a typical range of $218 to $540 for standard installs. Premium models, smart features, and electrical work can raise that total. Doing it yourself removes the labor cost but not the price of the opener.
How long do garage door openers last?
Most last around 10 to 15 years, depending on how often they are used and how well the door is maintained. Worn springs and unbalanced doors shorten that lifespan. Replace an opener sooner if it lacks photo eyes or fails the reversal test.
How do I reset a garage door opener?
On many models, you press and hold the Learn button until the LED goes out, which takes about six seconds. This erases all remotes and keypads, and you then reprogram the ones you want. Always confirm the exact steps in your owner’s manual.
Does unplugging the opener erase the remotes?
No, unplugging it does not clear the programmed remotes. You have to use the Learn button reset to remove old or lost ones. This matters if you have just moved into a new home.
How do I change the battery in a garage door opener remote?
Open the case with a visor clip or small tool, remove the old battery, and insert the new one with the positive side facing up. Many remotes use a CR2032 coin cell, but some use two or a different type. Check the battery marking before buying a replacement.
Where should the safety sensors be placed?
Mount them on both sides of the door opening, facing each other, and no higher than 6 inches above the floor. Federal guidance suggests a range of 4 to 6 inches. Keep the lenses clean and aligned so the beam is not interrupted.
Can I install a garage door opener on any door?
Most residential sectional doors work, but the door must be balanced and in good shape. Heavy wood or overlay doors may need a stronger motor. If the door drops, sticks, or has damaged springs, repair it before adding an opener.
Conclusion
Now you know how to install garage door opener equipment step by step, from choosing the drive type to testing the safety reversal. The keys to a good result are a balanced door, careful bracket and sensor placement, and never skipping the 2×4 test. Keep the manual close, take your time, and use a helper for the heavy lifting.
If anything feels beyond your comfort level, especially wiring or spring-related problems, it is smart to call a professional and protect your family and your warranty. Before you buy your opener, compare drive types, set a budget using the cost ranges above, and add a monthly safety check to your routine. A little planning now means quieter, safer operation for years to come.
This guide is for general information and is not a substitute for your manufacturer’s instructions or a licensed professional’s advice. Always follow the manual for your specific opener and your local building and electrical codes.

