

You carry that stainless steel water bottle everywhere. To the gym, into meetings, on weekend hikes, and even to bed. It is one of the most used items in your daily life, yet it rarely gets the same attention you give your dishes or coffee mug.
Here is the uncomfortable truth: if you are only rinsing your bottle under the tap each day, you are not really cleaning it. Bacteria, mold, and a slippery layer called biofilm can develop on the inside of your bottle within hours, especially if you drink anything other than plain water.
The good news? Cleaning a stainless steel water bottle takes less than five minutes when you know what you are doing. This guide walks you through everything, from the quick daily rinse to a full deep clean, and covers how to tackle stubborn smells, grimy lids, narrow straws, and more.
Whether you are brand new to reusable bottles or you have had yours for years, you will leave this guide knowing exactly how to keep it fresh, hygienic, and working like new.
Why Cleaning Your Stainless Steel Water Bottle Actually Matters
It is easy to assume that because you only drink water, the bottle stays clean on its own. That is a common misconception.
Even plain water leaves behind moisture, and moisture is all bacteria need to multiply. Research shows that reusable bottle lids can harbor more bacteria than a kitchen sink or a pet bowl. When you add coffee, juice, protein shakes, or sports drinks to the mix, the buildup accelerates even faster.
The inner lining of a stainless steel bottle is non-porous and naturally resistant to bacterial growth, which is one of the biggest advantages of stainless steel over plastic. But the lid, the gasket, the straw, and the threads around the mouth are a completely different story. These components have crevices, grooves, and rubber or silicone seals that trap moisture and residue.
Left uncleaned, those are the spots where the musty smell you have probably noticed comes from. That faint sour or stale odor is not “just what happens with water bottles.” It is a sign that the bottle needs more attention.
Beyond odor, consistent cleaning protects your health. Over time, mold and bacteria buildup can lead to digestive issues or allergic reactions in sensitive individuals.
How Often Should You Clean a Stainless Steel Water Bottle?
The frequency depends on what you drink and how often you use the bottle.
General rule of thumb:
| Use Type | Recommended Cleaning Frequency |
|---|---|
| Water only | Thorough wash every 2–3 days |
| Coffee or tea | After every use |
| Protein shakes or juice | After every single use |
| Sports drinks | After every use |
| Not used for several days | Full deep clean before reusing |
For most people, a solid daily rinse with mild dish soap and a weekly deep clean with baking soda or vinegar is the sweet spot. The more often you clean, the less buildup forms, which means your deep cleans will stay quick and easy.
What You Need Before You Start
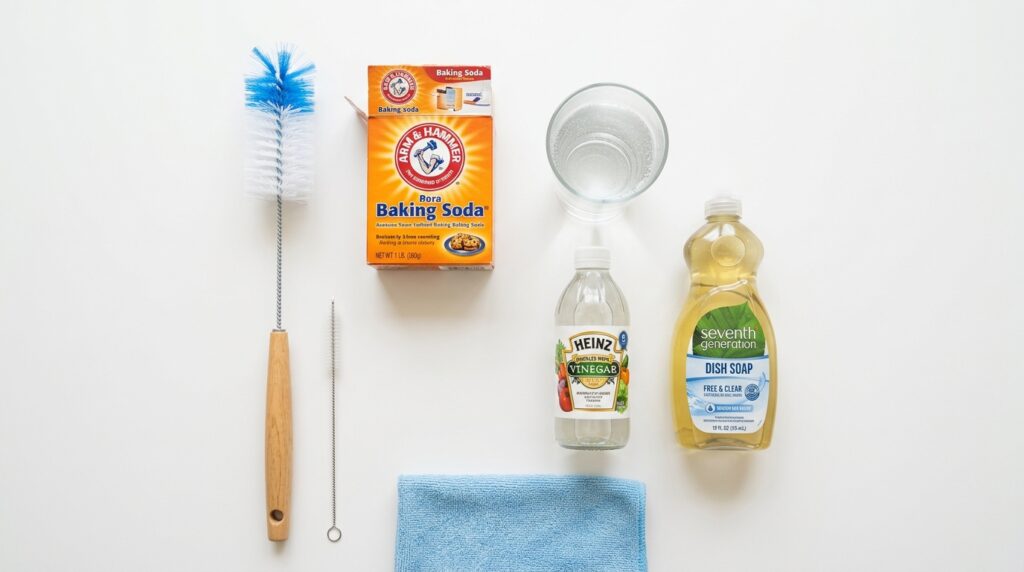
You do not need any fancy or expensive products to keep your bottle spotless. Here is what to gather before you begin:
- A long-handled bottle brush with soft bristles
- A small straw cleaning brush
- Mild dish soap
- Baking soda (for odors and stain lifting)
- Distilled white vinegar (for deodorizing and mineral deposits)
- Warm water
- A clean towel or drying rack
Things to avoid:
- Steel wool or abrasive scrubbers (they scratch the interior)
- Bleach (it can damage the stainless steel and linger in seals)
- Harsh chemical cleaners
A note on brushes: the right brush makes all the difference. Use one that is long enough to reach the bottom of your bottle and soft enough not to scratch the interior finish.
How to Clean a Stainless Steel Water Bottle: Daily Method
This is the quick routine you should do every day, or at least every time you use the bottle.
Step 1: Empty the Bottle Completely
Before anything else, pour out all remaining liquid. Shake the bottle gently to remove any pooled water at the bottom.
Step 2: Add Warm Water and Dish Soap
Fill the bottle about halfway with warm water, then add two to three drops of mild dish soap. The warm water helps activate the soap and loosen any residue clinging to the interior walls.
Step 3: Secure the Lid and Shake
Put the lid on tightly and shake the bottle vigorously for 15 to 20 seconds. This lets the soapy water make contact with the entire interior surface.
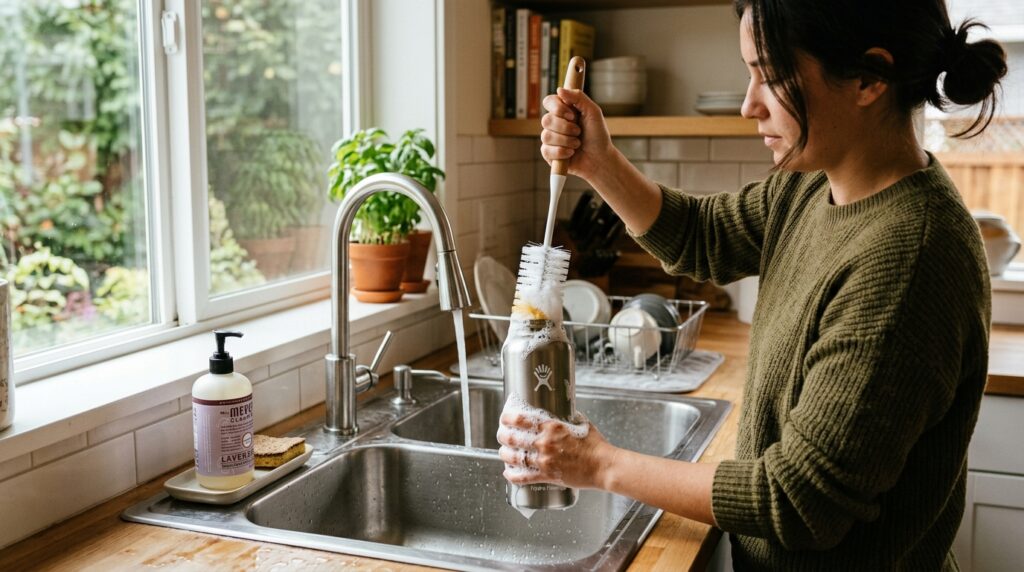
Step 4: Scrub the Inside
Remove the lid and use your bottle brush to scrub the interior walls, reaching all the way down to the bottom. Give the mouth of the bottle extra attention, as this is where your lips make contact.
Step 5: Clean the Lid Separately
The lid is often the most neglected part of the cleaning process. Remove any detachable components — straws, gaskets, O-rings — and wash them separately with warm soapy water and a small brush.
Step 6: Rinse Thoroughly
Rinse everything under running warm water until you can no longer see or smell any soap residue. Any soap left behind will affect the taste of your next drink.
Step 7: Air Dry Completely
This step matters more than most people realize. Stand the bottle upside down on a drying rack or clean towel with the lid off. Do not reassemble the bottle until every single part is completely dry.
Trapped moisture is the primary reason mold forms. If you close a bottle that still has a few drops inside, you are creating exactly the environment that causes that sour smell.
How to Deep Clean a Stainless Steel Water Bottle
Even with daily washes, a deeper clean once a week helps remove residue, mineral deposits, and lingering odors that regular soap cannot fully tackle.
Method 1: Baking Soda Soak (Best for Odors)
Baking soda is alkaline, which means it naturally neutralizes the acidic compounds responsible for most bottle odors. It is also mildly abrasive in a way that lifts buildup without scratching stainless steel.
How to do it:
- Add 1 to 2 tablespoons of baking soda to the empty bottle
- Fill the bottle with warm water until about halfway full
- Seal the lid and shake for 30 seconds
- Let it sit for at least 30 minutes, or overnight for stronger odors
- Use your bottle brush to scrub the interior
- Rinse thoroughly with warm water
- Air dry completely
For the lid and gasket, mix baking soda with just enough water to form a paste. Apply it with a small brush, scrub into all crevices, and rinse well.
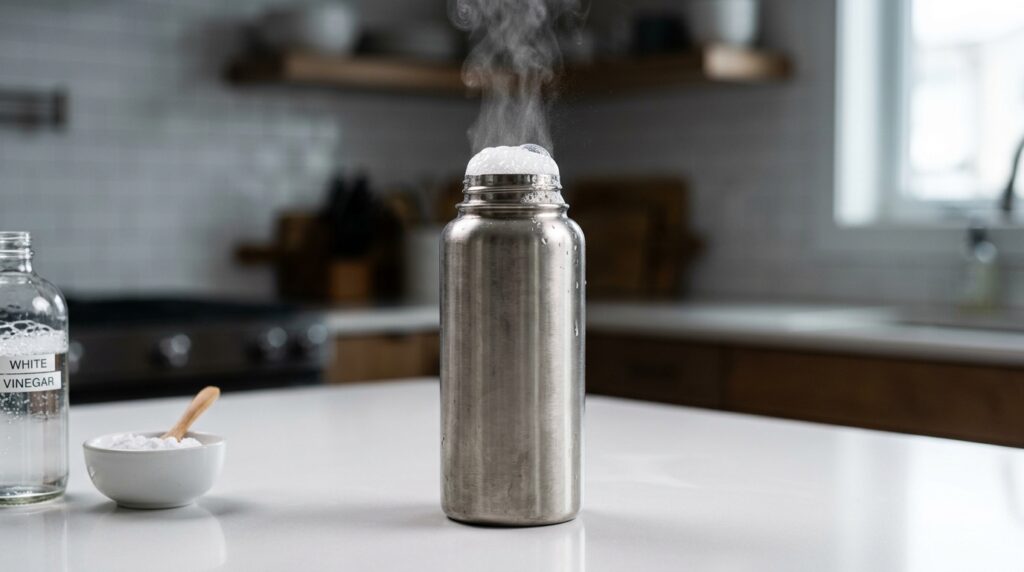
Method 2: White Vinegar Soak (Best for Mineral Deposits and Bacteria)
White vinegar contains natural acetic acid, which breaks down mineral deposits and cuts through bacteria without damaging the stainless steel surface.
How to do it:
- Mix equal parts white vinegar and warm water
- Pour the mixture into the bottle until about three-quarters full
- Seal and shake well
- Let it soak for 30 to 60 minutes (or overnight for heavy buildup)
- Pour out the solution
- Rinse several times with warm water until the vinegar smell is gone
- Air dry with the lid off
Important: Never mix vinegar and bleach together. That combination creates toxic fumes and is unsafe to use indoors.
Method 3: Baking Soda and Vinegar Combined (Best for Tough Stains)
When basic soap is not cutting through heavy residue, combining baking soda and vinegar creates a fizzing reaction that helps lift stubborn buildup.
How to do it:
- Start by scrubbing with warm soapy water and rinsing
- Add 1 to 2 tablespoons of baking soda to the bottle
- Pour in 2 to 3 tablespoons of distilled white vinegar
- The mixture will fizz — this is normal
- Fill the rest with warm water
- Shake gently, then let it sit for 10 to 15 minutes
- Scrub, rinse, and air dry
Method 4: Denture Cleaning Tablets
This method works surprisingly well for bottles that have gone a long time without a proper clean. Drop one tablet into a bottle filled with warm water, let it fizz for the time listed on the tablet’s packaging, then rinse thoroughly. The effervescent action reaches corners a brush might miss.
Method 5: Hydrogen Peroxide (Best for Mold and Sanitizing)
For bottles with visible mold or that have not been cleaned in a very long time, hydrogen peroxide offers stronger disinfecting power.
How to do it:
- Wash the bottle first with dish soap and warm water
- Add about 60ml of 3% hydrogen peroxide to the bottle
- Fill the rest with water
- Seal, shake vigorously, and let sit for a few minutes
- Pour out the solution and rinse thoroughly with cool water
- Air dry completely
Note: Always wear gloves when handling hydrogen peroxide, as it can irritate skin.
How to Clean the Lid, Straw, and Gasket
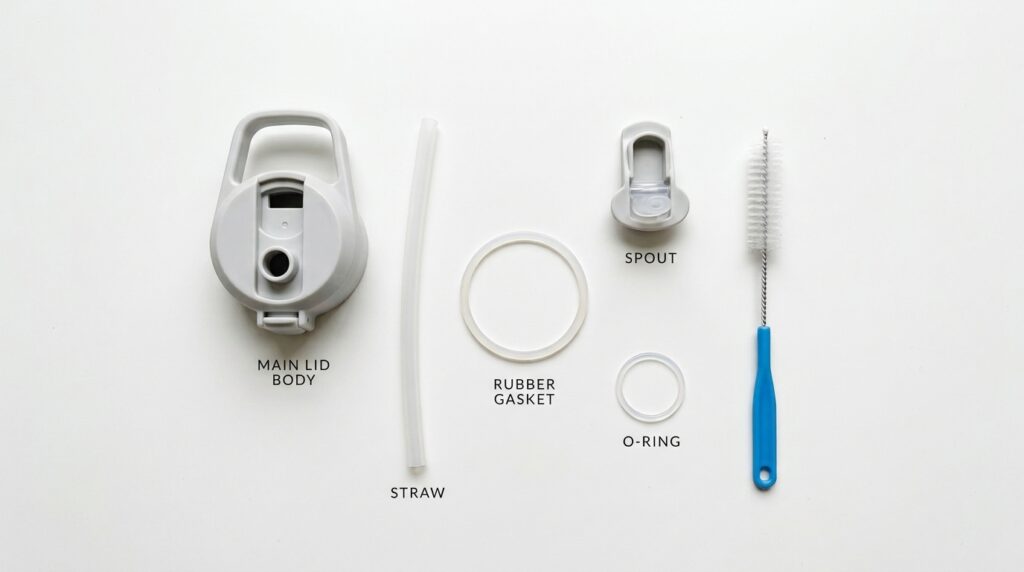
The lid, straw, and gasket are the most important parts to clean and the most commonly skipped. These are where bacteria concentrations are highest.
Cleaning the Lid
Remove all detachable parts from the lid. For most bottles, this means pulling out the gasket or O-ring that sits under the rim. This rubber ring often traps moisture and residue underneath it, which becomes a source of mold and bad odor.
Soak all lid parts in hot, soapy water for 10 to 15 minutes. Then use a small brush, an old toothbrush, or cotton swabs to scrub into the threads, vents, hinges, and spout.
A useful trick: hold the lid up to a light source. If you can see a cloudy film or dark spots, it needs more scrubbing.
Cleaning the Straw
Use a dedicated straw cleaning brush that is long and flexible enough to run the full length of the straw in both directions. Do this after every use if you are drinking anything other than plain water.
Straws have the smallest interior diameter of any bottle component, so they accumulate residue fastest. A quick 30-second scrub is all it takes.
For stubborn buildup, soak the straw in a mix of hot water and baking soda for two hours before scrubbing.
Replacing the Gasket
Gaskets and O-rings do not last forever. Over time, they stretch, crack, or discolor. If yours looks worn or you notice persistent leaking or odors even after a thorough clean, it is time to replace it. Most manufacturers sell replacement gaskets, or you can find compatible options online.
How to Remove Stubborn Odors from a Stainless Steel Water Bottle
If your bottle still smells after a regular wash, you are dealing with residue that has had time to set in. This usually happens with protein shakes, coffee, or flavored beverages.
Try these solutions:
- Overnight baking soda soak: Fill with warm water, add 2 tablespoons of baking soda, and leave overnight. Rinse in the morning.
- Vinegar soak followed by baking soda: The two-step approach works well when either method alone does not fully eliminate the smell.
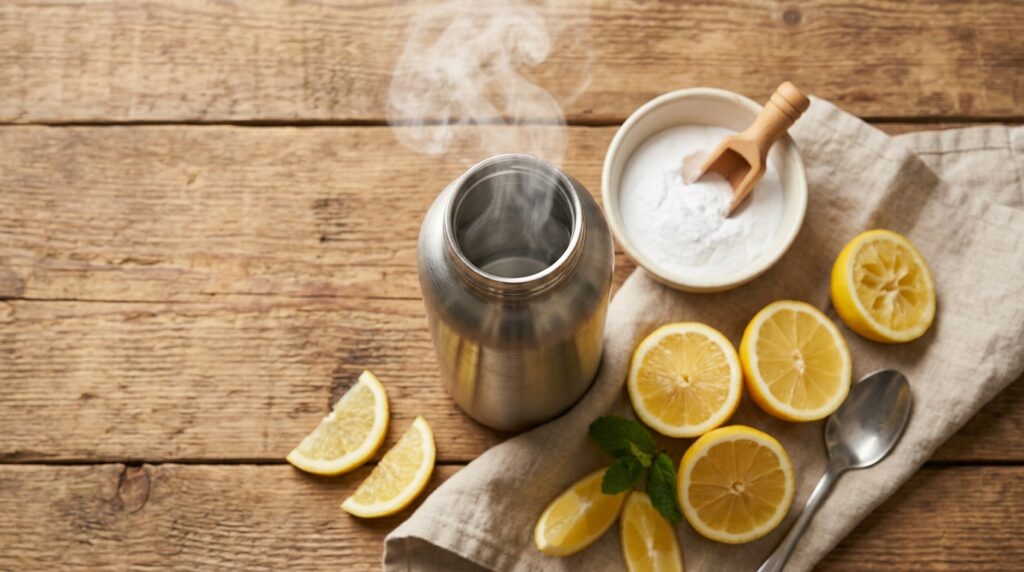
- Lemon and warm water: Squeeze half a lemon into the bottle, fill with warm water, and let sit for a few hours. The citric acid naturally deodorizes.
- Activated charcoal: Drop in a small piece of food-grade activated charcoal and fill with water for a few hours. It absorbs odors without adding any flavor.
After any odor treatment, always rinse multiple times with clean water and allow the bottle to air dry fully before closing it.
Can You Put a Stainless Steel Water Bottle in the Dishwasher?
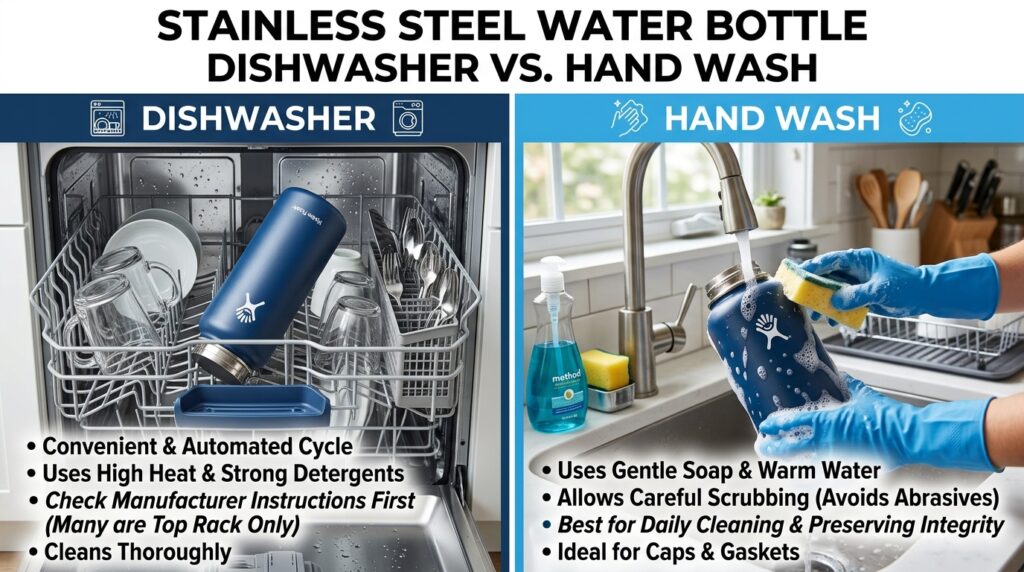
Some stainless steel bottles are labeled dishwasher-safe. Always check the manufacturer’s care instructions or the bottom of the bottle for this information.
If your bottle is dishwasher-safe, follow these guidelines:
- Place it in the top rack only — the bottom rack runs hotter and can damage the exterior coating or vacuum seal
- Skip the high-heat drying cycle — the extreme heat can weaken the vacuum insulation inside double-walled bottles over time
- Keep the lid and straw components in the utensil basket to ensure they get a thorough rinse
For insulated vacuum-sealed bottles, hand washing is almost always the better choice. The dishwasher’s heat and water pressure can gradually degrade the seal that keeps your drinks cold or hot for hours.
When in doubt, hand wash. It takes just a few extra minutes and preserves both the function and appearance of your bottle much longer.
Cleaning a Stainless Steel Bottle After Mold Appears
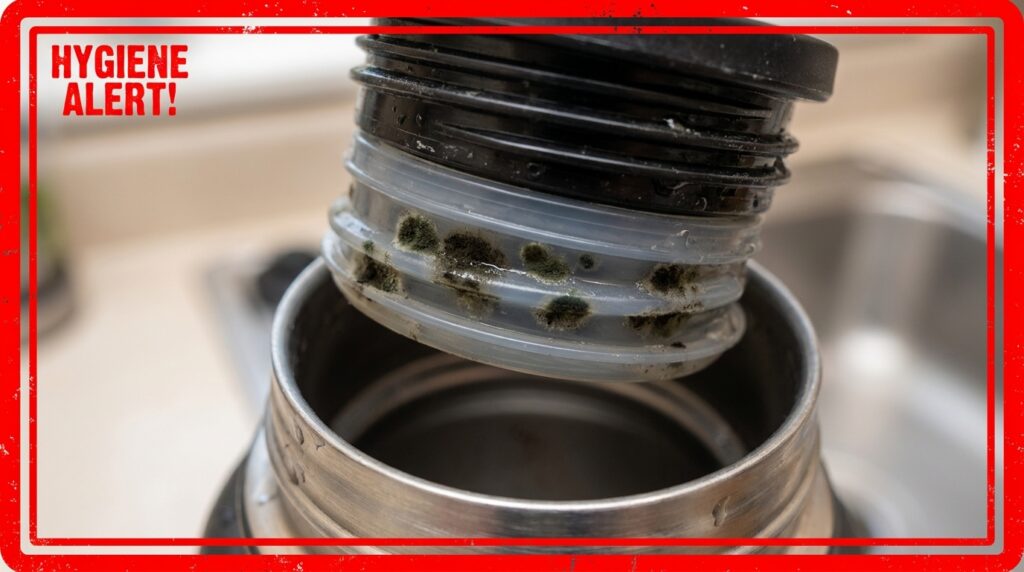
If you open your bottle and spot dark fuzz or smell something distinctly musty, mold has likely formed — usually in the lid, gasket, or straw.
Stop using the bottle immediately. Do not take another sip until you have cleaned it.
Steps to remove mold:
- Disassemble every part of the lid
- Soak all components in a 50/50 mix of hot water and white vinegar for at least one hour
- Scrub all surfaces with a brush, paying close attention to crevices, gasket edges, and straw interiors
- Wash everything with dish soap and warm water
- For the bottle body, use the hydrogen peroxide method (see above)
- Rinse extremely thoroughly and allow everything to air dry completely
- Reassemble only once every part is bone dry
If mold appears again after cleaning, replace the gasket or lid. Some mold embeds deeply in rubber seals and cannot be fully removed through cleaning alone.
Expert Tips for Keeping Your Bottle Clean Longer
These small habits make a big difference in how often you need to deep clean:
- Never close a wet bottle. After rinsing, leave the lid off until the bottle is fully dry. This one habit alone prevents most mold and odor issues.
- Store it open when not in use. If you are not using the bottle for a day or more, store it with the lid off so air can circulate inside.
- Rinse immediately after protein shakes or coffee. These drinks leave residue that dries and hardens quickly. A 30-second rinse right after finishing prevents the buildup that causes stains and smells.
- Keep your cleaning tools together. Store your bottle brush, straw brush, and a small container of baking soda in one spot near the sink. Easy access means you are more likely to actually use them.
- Set a weekly reminder. Add a recurring alarm or calendar notification for your deep clean day. Making it a scheduled habit eliminates the guesswork.
- Replace worn parts before they become a problem. Inspect gaskets and O-rings every few months. A stretched or discolored seal is a bacteria trap waiting to happen.
Cleaning Different Types of Stainless Steel Bottle Lids
Different lid styles have different cleaning needs. Here is a quick breakdown:
| Lid Type | Key Cleaning Spots | Tools Needed |
|---|---|---|
| Wide-mouth screw cap | Threads and underside of lid | Bottle brush, small brush |
| Flip-top lid | Hinge, spout, interior channel | Toothbrush, cotton swab |
| Straw lid | Straw, gasket, straw anchor hole | Straw brush, small brush |
| Chug lid | Spout opening, gasket, vent | Small brush, toothbrush |
No matter the lid type, the principle is the same: disassemble as far as possible, soak in soapy water, scrub into every crevice, rinse thoroughly, and dry completely before reassembling.
Things You Should Never Do When Cleaning a Stainless Steel Bottle
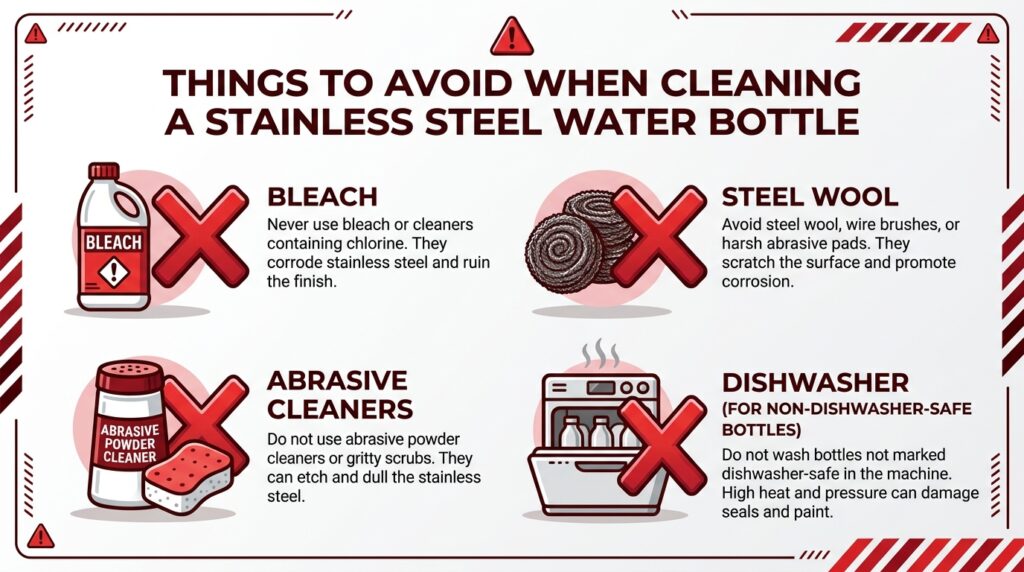
A few common mistakes can damage your bottle or make it unsafe to use:
- Using bleach: Bleach can corrode stainless steel over time and leave chemical residues inside seals that are very difficult to fully rinse out.
- Scrubbing with steel wool or abrasive pads: These scratch the interior surface. Scratches create microscopic grooves where bacteria can hide, making the bottle harder to clean in the future.
- Boiling a vacuum-insulated bottle: The extreme heat can damage the vacuum seal, reducing its ability to keep drinks hot or cold.
- Reassembling while still damp: Even a small amount of moisture trapped inside creates the perfect environment for mold.
- Using bleach and vinegar together: This combination releases toxic chlorine gas. Never mix these two cleaners in any scenario.
FAQs: How to Clean a Stainless Steel Water Bottle
How often should I clean my stainless steel water bottle?
Clean it at least every two to three days if you only drink water, and after every single use if you drink coffee, protein shakes, juice, or any beverage with sugar or dairy. A quick daily rinse with soap and a weekly deep clean is the ideal routine for most people.
Is it safe to use baking soda inside a stainless steel bottle?
Yes, completely. Baking soda is one of the safest and most effective cleaning agents for stainless steel. It neutralizes odors, lifts stains, and does not scratch the interior or damage the vacuum seal. Just rinse thoroughly after use.
How do I get the musty smell out of my water bottle?
The most effective method is an overnight baking soda soak. Add two tablespoons of baking soda, fill the bottle with warm water, seal it, and leave it overnight. Rinse thoroughly in the morning. If the smell persists, follow up with an equal-parts white vinegar and water soak.
Can stainless steel water bottles get mold?
The bottle body itself is resistant to mold because it is non-porous. However, the lid, straw, and gasket are made of rubber and silicone, which can trap moisture and develop mold over time. Regular cleaning and thorough drying are the most effective prevention measures.
What is the best way to clean a stainless steel water bottle without a brush?
You can shake a mixture of warm water, dish soap, and a tablespoon of baking soda inside the bottle vigorously to scrub the interior. For the lid, soak it in hot soapy water and use cotton swabs or a toothbrush to reach crevices. A brush is always the most effective tool, but these alternatives work for a quick clean.
Conclusion
Cleaning a stainless steel water bottle does not have to be complicated or time-consuming. A quick daily wash with warm soapy water, a weekly deep clean with baking soda or vinegar, and the habit of always letting every component dry fully before reassembling — those three habits are enough to keep your bottle fresh, odor-free, and safe to drink from every day.
The biggest mistake most people make is not the cleaning itself, but the inconsistency. A bottle that gets a quick rinse but stays damp for hours will smell far worse than one that is cleaned less frequently but dried properly every time.
Take a few minutes today to give your bottle a proper clean. Remove the lid, pull out the gasket, run a brush through the straw, and let everything dry in the open air. It takes less time than you think, and the difference you taste and smell in your water will make it worth it.
Your bottle is one of the most used items you own. Give it a little care, and it will last for years.
This article is for informational purposes only. The cleaning methods described are general guidelines and may not apply to every bottle brand or model. Always refer to your manufacturer’s care instructions before cleaning.
