

If you’ve ever stood in your kitchen wondering whether there’s a faster way to get sweet corn on your dinner plate without boiling a giant pot of water, you’re not alone. Learning how to cook corn on the cob in the microwave is one of those small kitchen skills that saves time, dishes, and patience, especially on busy weeknights.
This guide walks you through every method, from cooking with the husk still on to using a paper towel or a Ziploc bag, so you can pick whichever option fits what’s already in your kitchen.
Why Microwave Corn on the Cob Works So Well
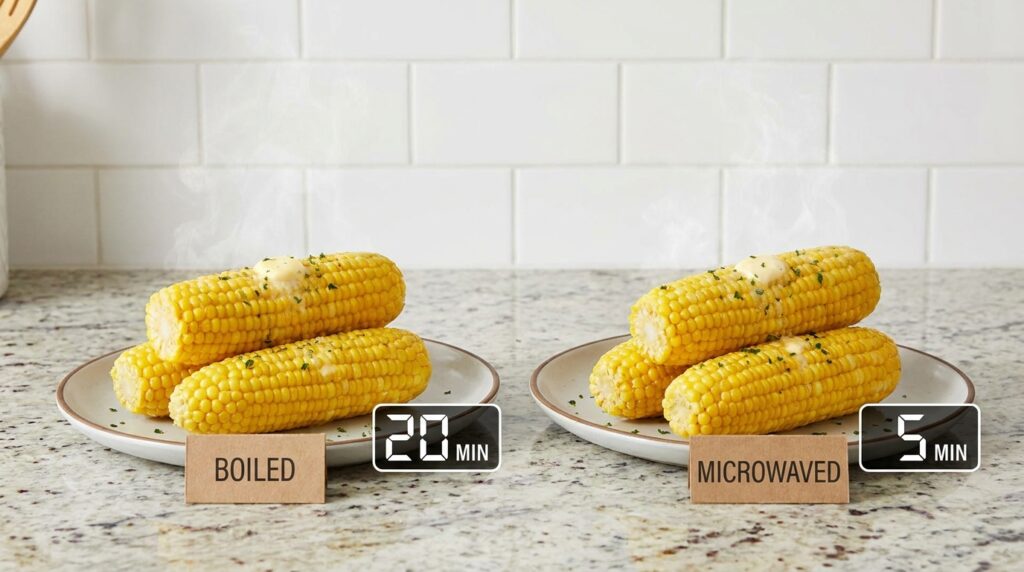
Boiling corn takes time. You need a large pot, enough water to cover the ears, and several minutes for the water to come to a boil before the corn even starts cooking. The microwave skips all of that.
Microwaves cook corn using the natural moisture trapped inside the kernels and husk. That steam builds up quickly in a small, enclosed space, which means the corn cooks through in a fraction of the time compared to boiling or grilling.
According to the USDA FoodData Central database, corn on the cob retains most of its nutritional value when cooked quickly with minimal added water, which makes microwaving a practical option for preserving flavor and nutrients alike.
What You’ll Need Before You Start
You don’t need much for this. Here’s a simple list:
- Fresh corn on the cob (husk on or off, depending on method)
- A microwave-safe plate or paper towel
- A sharp knife (for trimming ends)
- Oven mitts or a kitchen towel (the corn gets hot)
- Butter, salt, or seasoning of choice
That’s it. No giant pots, no boiling water, no extra cleanup.
How to Cook Corn on the Cob in the Microwave with Husk
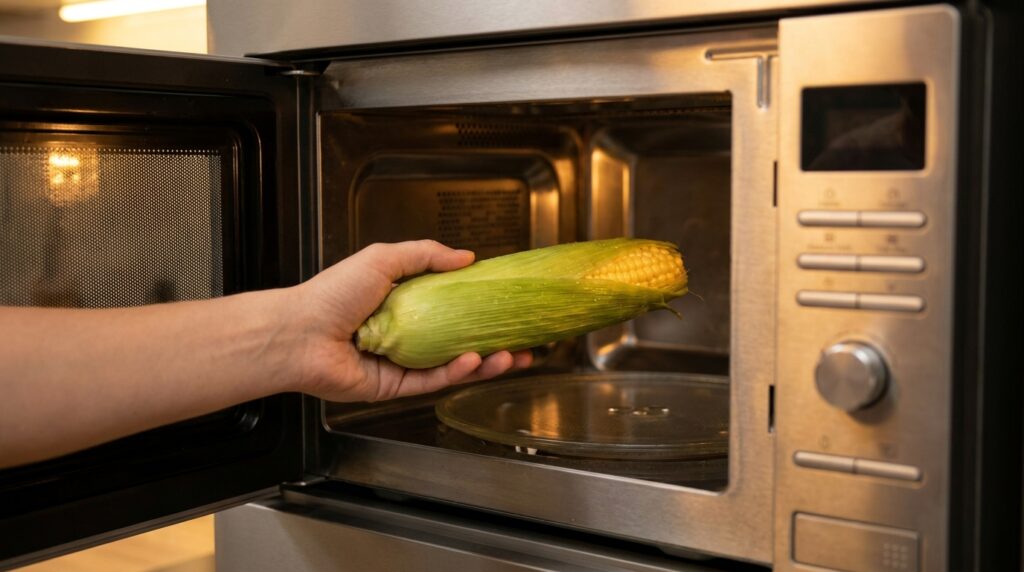
This is the easiest method, and many people prefer it because the husk locks in moisture and acts like a natural steaming wrapper.
Step-by-Step Instructions
- Leave the husk and silk completely intact. Don’t trim or peel anything yet.
- Place the whole ear directly on the microwave turntable or a microwave-safe plate.
- Microwave on high for 3 to 4 minutes for one ear of corn.
- Add 1 to 2 extra minutes for each additional ear you cook at the same time.
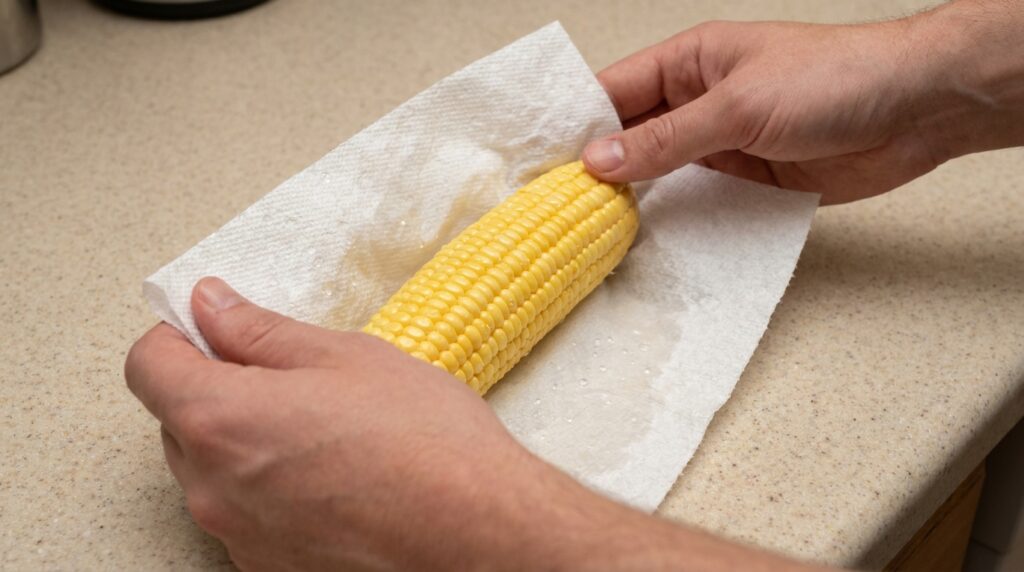
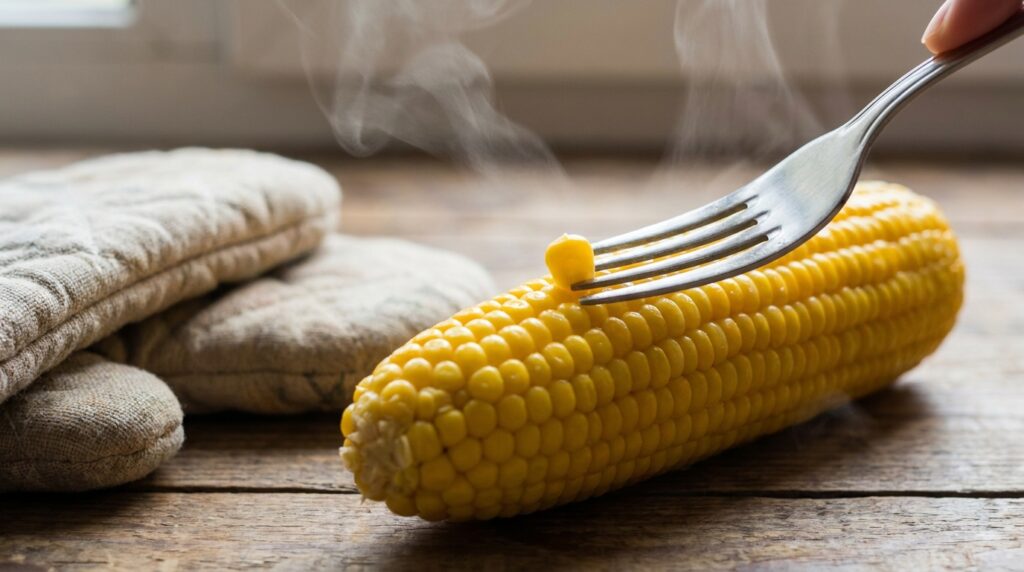
- Let the corn rest for 2 minutes after microwaving since it will be extremely hot.
- Cut off the stem end about an inch from the bottom, then squeeze gently. The cooked corn should slide right out of the husk, and the silk usually comes off with it.
This method works because the husk traps steam against the kernels, cooking them evenly without drying them out.
Why This Method Is Popular
- No need to remove silk by hand before cooking
- Less mess on your countertop
- Corn stays juicier because the husk holds in moisture
How to Cook Corn on the Cob in the Microwave Without Husk or Silk
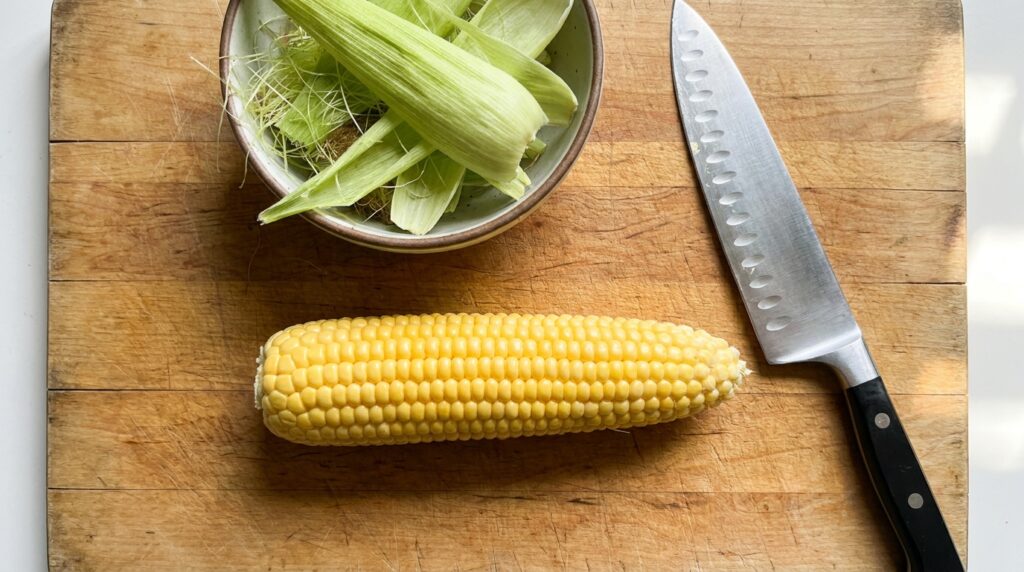
Sometimes you’ve already shucked the corn before realizing you want to microwave it instead of boiling it. That’s completely fine, you’ll just need a little extra moisture protection.
Steps
- Remove the husk and all silk strands completely.
- Rinse the corn under cool water and shake off the excess.
- Place the corn on a microwave-safe plate.
- Cover loosely with a damp paper towel or microwave-safe lid to prevent it from drying out.
- Microwave on high for 3 to 5 minutes per ear, checking at the 3 minute mark.
- Let it sit for a minute before handling, since the kernels hold heat well.
Without the husk, there’s less natural steam protection, so the damp paper towel step is important here. Skipping it can leave you with chewy or unevenly cooked kernels.
How to Cook Corn on the Cob in the Microwave with a Paper Towel
This is one of the most reliable ways to cook peeled corn because it mimics the steaming effect of the husk.
How to Do It
- Husk and clean the corn so it’s free of silk.
- Wet a paper towel under the tap so it’s damp but not dripping.
- Wrap the corn cob completely in the damp paper towel.
- Place it on a microwave-safe plate.
- Microwave on high for 3 to 4 minutes per ear.
- Carefully unwrap, since steam will escape quickly when you open the towel.
The damp paper towel creates a mini steam pocket around the corn, which keeps it tender and prevents the kernels from drying out or popping.
How to Cook Corn on the Cob in the Microwave in a Ziploc Bag
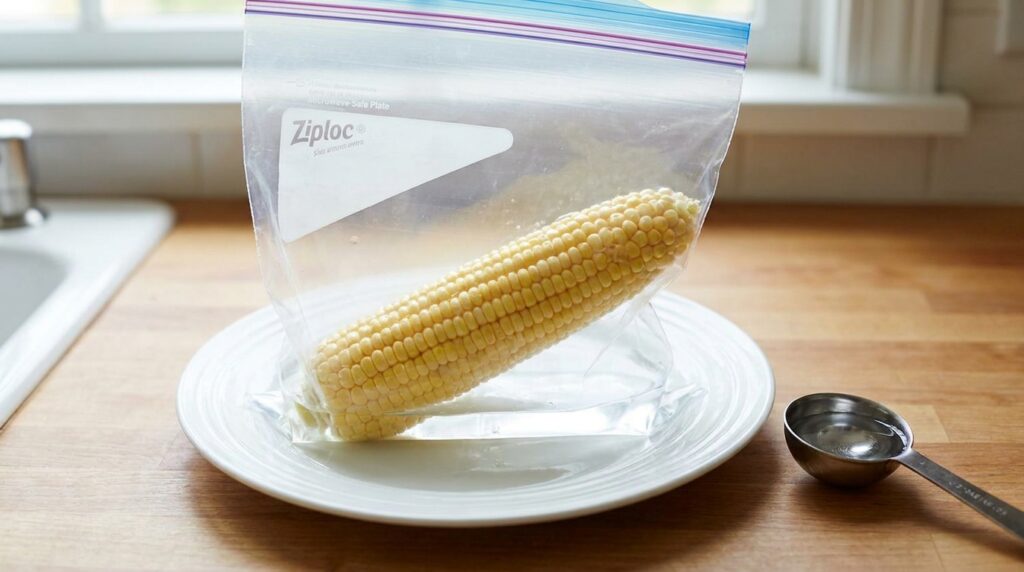
This method works well if you want a no-husk, no-paper-towel option using something you probably already have in your kitchen drawer.
Steps
- Place the husked, cleaned corn into a microwave-safe Ziploc or resealable freezer bag.
- Add 1 to 2 tablespoons of water into the bag.
- Seal the bag most of the way, leaving a small gap for steam to escape so it doesn’t build up too much pressure.
- Microwave on high for 4 to 5 minutes per ear.
- Carefully open the bag away from your face, since hot steam will release immediately.
The FDA’s guidance on microwave-safe plastics recommends checking that any bag or container is labeled microwave-safe before using it this way, since not all plastic bags are designed to handle direct heat.
How Long Do You Put Corn on the Cob in the Microwave to Cook?
This is probably the question people search for most, and the honest answer is that it depends on how many ears you’re cooking and the wattage of your microwave.
| Number of Ears | Approximate Time |
|---|---|
| 1 ear | 3 to 4 minutes |
| 2 ears | 5 to 6 minutes |
| 3 ears | 7 to 8 minutes |
| 4 ears | 9 to 10 minutes |
These times are based on a standard 1000 watt microwave. If your microwave is lower wattage, around 700 to 800 watts, add 1 to 2 extra minutes per batch.
How Long Does It Take to Cook Corn on the Cob in the Microwave Overall
On average, most people are done from start to finish, including prep and resting time, in under 10 minutes. Compare that to boiling, which usually takes 15 to 20 minutes once you factor in bringing a full pot of water to a boil.
How to Cook Corn on the Cob in the Microwave Oven Safely
Safety matters more with this method than people expect, mainly because of trapped steam.
Safety Tips
- Always use oven mitts or a thick towel when removing corn from the microwave. The husk and the corn itself hold heat far longer than you’d expect.
- Let corn rest for 1 to 2 minutes before cutting or unwrapping, since steam pressure needs a moment to release.
- Cut away from your body when removing the stem end of husk-on corn, since hot liquid can spray out.
- Never microwave corn fully sealed in an airtight bag without venting it first.
The Centers for Disease Control and Prevention also notes that proper food handling, including washing hands and surfaces before and after handling raw produce, reduces the risk of foodborne illness, which applies to corn prep just like any other vegetable.
Tips for Picking the Best Corn Before You Cook It
Good results start before the corn ever touches the microwave.
- Look for bright green, tightly wrapped husks without dry or brown patches.
- The silk at the top should feel slightly sticky and golden, not black or completely dried out.
- Gently press a kernel through the husk. It should feel firm and plump, not soft or shriveled.
- Buy corn as close to your cooking day as possible since sugar in the kernels starts converting to starch soon after harvest, which affects sweetness.
Expert Tips for Better Microwave Corn
- If your microwave has uneven heating spots, rotate the corn halfway through cooking for more even results.
- For extra flavor, brush the corn with butter or olive oil right after cooking while it’s still hot, since it absorbs better.
- If you’re cooking corn for a crowd, microwave in smaller batches of 2 ears rather than cramming 4 or more in at once, since overcrowding leads to uneven cooking.
- Always let cooked corn rest briefly before serving children, since the kernels can stay surprisingly hot even after the husk feels cool.
Pros and Cons of Microwaving Corn on the Cob
Pros
- Much faster than boiling or grilling
- Fewer dishes and less cleanup
- Works well for single servings or small batches
- Keeps the kitchen cooler since you’re not running a stovetop
Cons
- Less smoky or charred flavor compared to grilling
- Slightly less even cooking if you’re doing large batches at once
- Requires a microwave-safe wrap or container for husk-off methods
Common Mistakes to Avoid
- Microwaving corn without any moisture protection when the husk is already removed, which often leads to dry, tough kernels.
- Overcooking by guessing instead of starting with the recommended time and checking doneness.
- Skipping the resting period, then burning your hands trying to unwrap hot corn too quickly.
- Sealing a Ziploc bag completely shut, which can cause steam pressure to build up too much.
Frequently Asked Questions
Can you microwave corn on the cob with the husk still on?
Yes, and it’s actually one of the easiest methods. The husk traps natural steam, which cooks the corn evenly and keeps it moist without needing any extra water or wrapping.
How long do you microwave one ear of corn?
For a single ear in a standard 1000 watt microwave, 3 to 4 minutes is usually enough. Always check doneness with a fork before serving.
Is it safe to microwave corn in a plastic bag?
It’s safe as long as the bag is labeled microwave-safe and you leave a small gap for steam to escape instead of sealing it completely airtight.
Why is my microwaved corn chewy instead of tender?
This usually happens when the husk and silk have been removed without adding moisture protection like a damp paper towel or a few tablespoons of water in a bag.
Can you microwave frozen corn on the cob?
Yes, but it takes longer, usually 5 to 7 minutes per ear, and it helps to add a splash of water and cover it to prevent drying out during the longer cooking time.
Final Thoughts
Cooking corn on the cob in the microwave isn’t complicated once you know the basic timing and a couple of small tricks like using a damp paper towel or leaving a vent gap in a Ziploc bag. Whether you keep the husk on for convenience or peel it off first, you’ll have tender, sweet corn on your plate in well under 10 minutes.
Try one of these methods the next time you’re short on time, and adjust the cooking minutes based on your own microwave’s wattage until you find the sweet spot that works for your kitchen.
