
Key Takeaways
- Proper site planning helps minimize preventable delays, rework, and additional site costs.
- Prior to any excavation work, check boundaries, access, drainage, utilities, and permits.
- Construction traffic, drainage, and erosion control should be addressed early on.
- Only clear the areas required for active work to protect the balance of the property.
- Local excavation knowledge can be useful when rock formation, wet conditions, or access issues affect the site.
When it comes to rural building projects, pre-construction site planning starts with a basic question: where should the house be located? The answer can influence the location of the driveway, elevation of the foundation, site of the septic system, routes for utilities, and drainage paths. A parcel of land may look flat from the road, but rural land planning can reveal low areas, shallow ledges, water at particular times of the year, and slopes that may become evident only once the house is staked out.
For property owners planning construction in rural areas, an experienced excavating contractor can provide information about site preparation, foundation excavation, grading, land clearing, trenching, and septic-related groundwork. Local knowledge may also help identify practical issues involving access, rock, drainage, and soil conditions before excavation begins.
Why Site Preparation Deserves More Attention
Preparation of a site is much more than just cutting trees and digging up the soil. It helps ensure the area is clear of potential obstacles such as existing structures, utility lines, drainage features, and other conditions that could interfere with construction. Identifying these issues ahead of time can help reduce delays and costly changes during the project.
Good pre-construction site planning also gives homeowners and project professionals an opportunity to coordinate different stages of the work before equipment arrives. Decisions about access, clearing limits, drainage, utilities, and the building footprint can affect one another, so addressing them together can make the overall process easier to manage.
Step 1: Review the Property Before Work Begins

Walk the property before the equipment arrives and record any conditions that may affect the layout. Bring building plans, a survey if available, and photos from several viewpoints. Pay particular attention to:
- Property boundaries, easements, setbacks, and rights-of-way.
- Existing driveways, road entrances, gates, culverts, and turning areas.
- Low areas, visible drainage paths, streams, wetlands, and wet ground.
- Rock outcrops, steep slopes, retaining walls, fences, and nearby structures.
- Existing wells, septic systems, outbuildings, trees, and utility equipment.
This initial review can also help identify whether the proposed building location is practical before clearing or excavation changes the property.
Step 2: Confirm the Survey and Building Layout
Before carrying out excavation work, land use and architectural plans should be checked to determine whether the proposed construction complies with applicable zoning and site requirements. Surveys help establish information such as property boundaries, setbacks, and building locations.
Early review is particularly useful on undeveloped property because the available building area may be smaller than it first appears once slopes, easements, drainage, septic requirements, and access are considered.
Step 3: Locate Underground Utilities
Locating utilities must take place before site clearing, trenching, grading, and building work starts. Homeowners should follow the applicable utility-locate process to understand what notifications are needed beforehand. Public markings may not identify privately owned utility lines serving a home, carport, swimming pool, or propane system, so private utilities may require separate investigation.
- Clearly mark the planned work area.
- Request utility locations with enough time.
- Wait for responses and visible markings.
- Confirm that each listed utility operator has responded.
- Use appropriate care around marked facilities and investigate private lines separately.
Utility information should be incorporated into the site plan rather than treated as a separate issue after excavation begins.
Step 4: Plan Construction Access
Anticipate and determine the entrance and exit points before any work begins for excavators, along with routes for dump trucks, concrete mixer trucks, and material deliveries. Inspect the road and driveway to see if they can accommodate heavy traffic while also considering site drainage, low areas, and surfaces that may be affected by construction traffic.
A stabilized roadway or entrance can protect the area and help avoid ruts and tracked soil. Emergency access must always remain open, so do your best to prevent unnecessary traffic across septic areas, lawns, drainage systems, and adjacent properties.
Construction access should also account for turning space. Large trucks and equipment may require more room than ordinary vehicles, particularly where a rural driveway is narrow or has steep approaches.
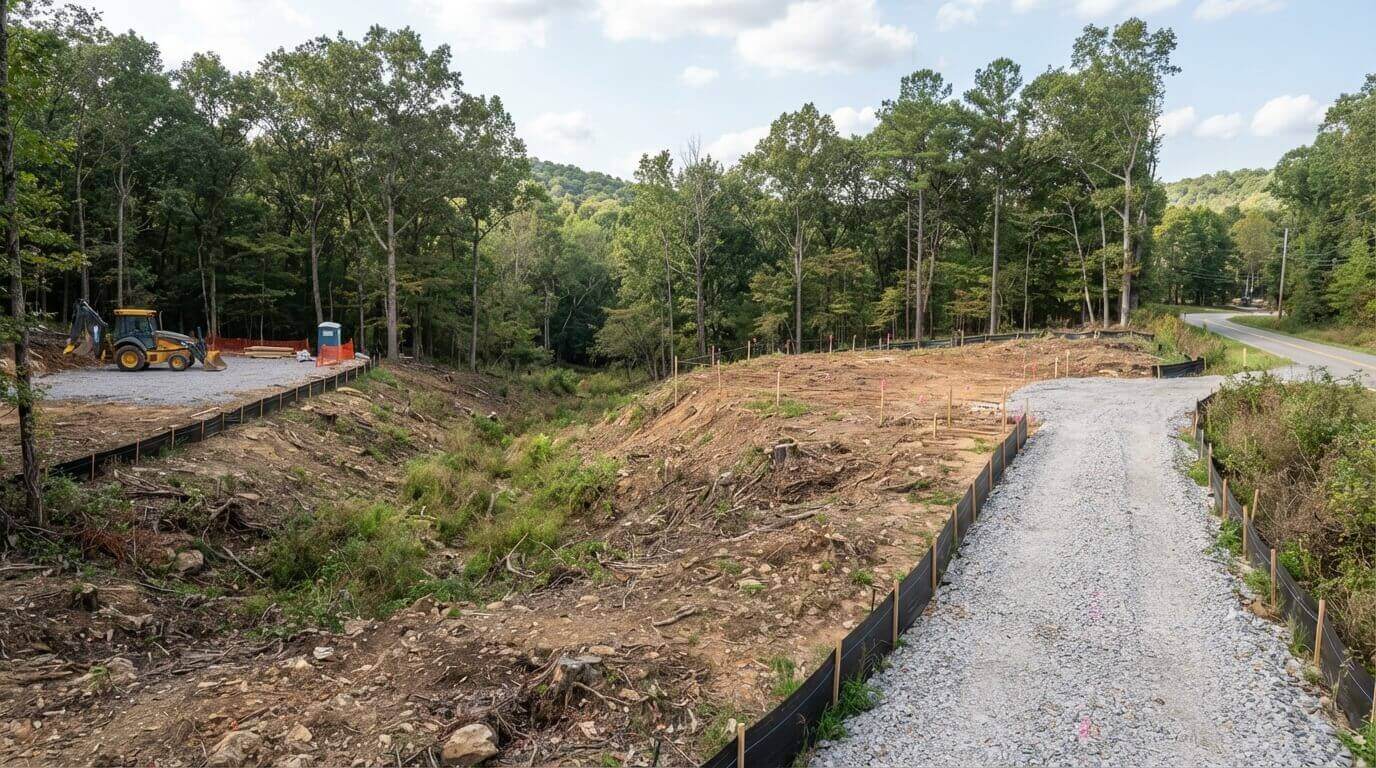
Step 5: Manage Stormwater and Erosion
Rain on bare soil can create erosion problems, carrying sediments downhill to ditches and streams. This is why drainage planning should be considered before major earthwork begins.
The design of the site may include perimeter controls, stabilized entrances, protected drain inlets, stockpiled soil, and repairs after a storm. The concepts discussed in federal construction stormwater practices help explain responsibilities related to erosion control, sediment management, soil stabilization, and dewatering.
Stormwater planning should reflect the natural direction of runoff rather than simply moving water away from one work area and creating a problem somewhere else.
Step 6: Clear Land in Manageable Phases
Only clear the areas required for the construction of the driveway, building location, utility routes, septic installation, and placement of construction equipment. Keeping undisturbed vegetation outside the active work area can help stabilize natural barriers and minimize the amount of soil exposed to rain.
Make sure to separate useful topsoil and waste materials, and include construction waste planning for trunks, logs, stones, and other materials before clearing begins.
Phased clearing can also make it easier to preserve areas that do not need to be disturbed immediately. This may reduce unnecessary soil exposure and leave more of the existing landscape intact during the earlier stages of construction.
Step 7: Coordinate Foundation, Septic, and Utility Work
The different aspects of the project, including foundation elevations, final grades, septic system planning, utility trenches, and drainage routes, should be taken into account during the planning stage.
The use of heavy machinery around septic areas should be coordinated with the appropriate project professionals. Before commencing with final grading, review quality-control procedures, approval conditions, and the order in which different aspects of the work have to be carried out.
A septic system also needs adequate space and suitable site conditions. Knowing where the tank and drainage field will be located before heavy equipment begins moving across the property can help prevent accidental damage and unnecessary rework.
Choosing the Right Excavation Partner
When assessing excavation contractors, focus on communication, equipment, experience, and the specific requirements of the property. Ask how the contractor handles rock, water, accessibility challenges, material disposal, utility conflicts, and weather-related interruptions.
It is also useful to have a written scope that explains what is included in the service, what assumptions were made before starting the project, and what types of changes could affect the work.
Rather than relying only on a general estimate, property owners can ask how the contractor expects the work to proceed from initial clearing through excavation, grading, and final site preparation.
A Simple Pre-Construction Checklist
- Survey, setbacks, and building corners reviewed
- Soil, slope, drainage, rock, and wet-area concerns discussed
- Utility locate request completed
- Construction entrance and turning area selected
- Erosion and stormwater controls planned
- Clearing limits and stockpile areas marked
- Septic, foundation, utility, and drainage work coordinated
- Permit, inspection, scope, and schedule expectations confirmed
- Construction waste and material disposal plan reviewed
A written checklist can make it easier to confirm that planning decisions have been addressed before equipment arrives. It can also provide a useful reference when several contractors or project professionals are coordinating different parts of the work.
Common Questions From Property Owners
How early should site planning begin?
Begin before building plans are final. Early site review may reveal reasons to adjust the home location, driveway route, septic area, drainage approach, or utility layout.
What if rock is found during excavation?
Rock or ledge may require different equipment, additional removal, revised grades, or changes to the excavation sequence. Discuss likely rock conditions and possible responses before work starts.
Why does rain affect earthwork?
Wet soil can be difficult to travel on, shape, and compact. Heavy rain can also damage erosion controls and move sediment, so work may pause until site conditions are suitable.
Why is septic location important during site preparation?
The location of a septic tank and drainage field can affect the available building area, equipment routes, grading, and future access. Confirming the planned septic area early can help prevent conflicts with foundation and utility work.
Conclusion
Building a simplified rural home begins well before the first shovel hits the dirt. Inspect the property thoroughly, link the plans to the site conditions, safeguard utilities and drainage patterns, and coordinate the various stages of site work.
A well-defined pre-construction site planning process can help property owners identify access, grading, utility, drainage, clearing, and septic considerations before they become construction-stage problems. Careful preparation does not eliminate every unexpected condition, but it can make the project easier to coordinate when site conditions change.

