

The turkey comes out of the oven looking perfect, everyone’s hovering near the kitchen, and then someone asks the question that decides whether dinner feels complete: is the gravy ready? Learning how to make gravy from turkey drippings isn’t complicated once you understand what’s happening in that roasting pan, and skipping this step means leaving behind the most flavorful part of the entire meal.
Those browned bits stuck to the bottom of the pan, along with the fat and juices pooled underneath the bird, hold more concentrated turkey flavor than anything you could add from a jar or bouillon cube. Turning that into gravy takes about fifteen minutes and four basic ingredients most kitchens already have.
What Are Turkey Drippings and Why They Matter
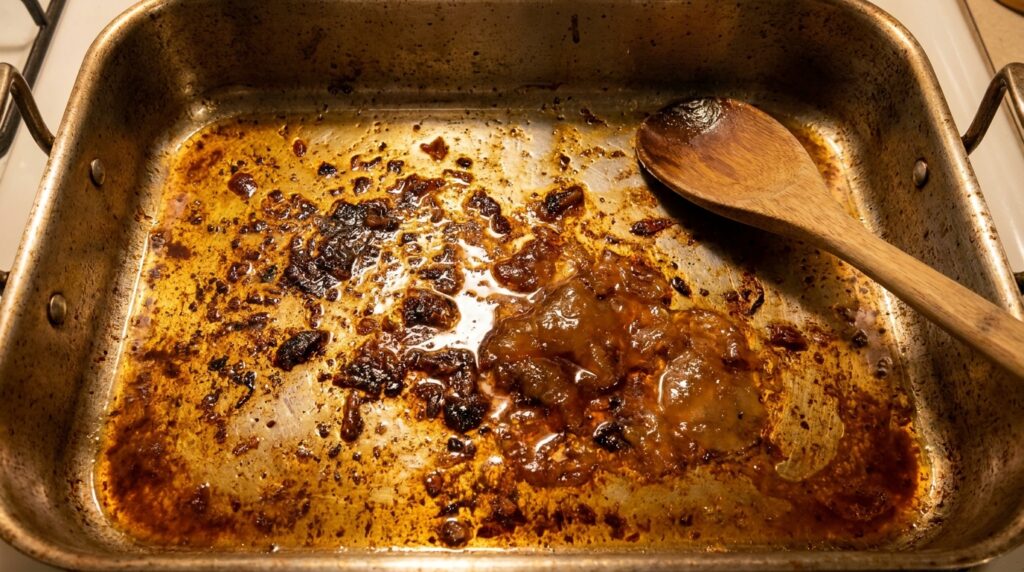
Drippings are the combination of rendered fat and meat juices that collect in the bottom of the roasting pan while the turkey cooks. As the bird roasts, its natural juices seep out along with fat, and both settle at the bottom, picking up browned, caramelized bits along the way.
Those browned bits are called fond, and they’re packed with concentrated flavor that forms the backbone of good gravy. Skipping them and using only store-bought broth produces a gravy that tastes fine but noticeably thinner in character compared to one built from the actual roasting pan.
Ingredients Needed for Turkey Gravy From Drippings
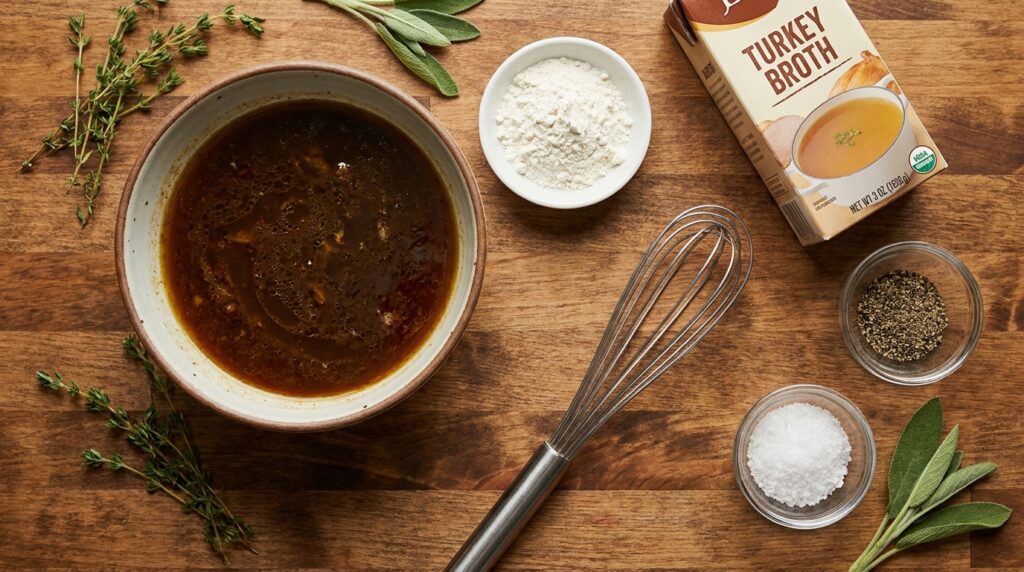
Most versions of this recipe rely on the same core components, just in slightly different ratios depending on how thick you like the final result.
- Turkey drippings (fat and juices from the roasting pan)
- All-purpose flour (or cornstarch for a gluten-free version)
- Broth or stock (chicken, turkey, or vegetable, to stretch the drippings if needed)
- Salt and pepper to taste
- Optional: a splash of wine, milk, or fresh herbs like thyme and sage
If the bird didn’t release much liquid, or if part of it got scorched, extra store-bought broth can fill the gap without hurting the final flavor.
How to Make Gravy From Turkey Drippings Step by Step
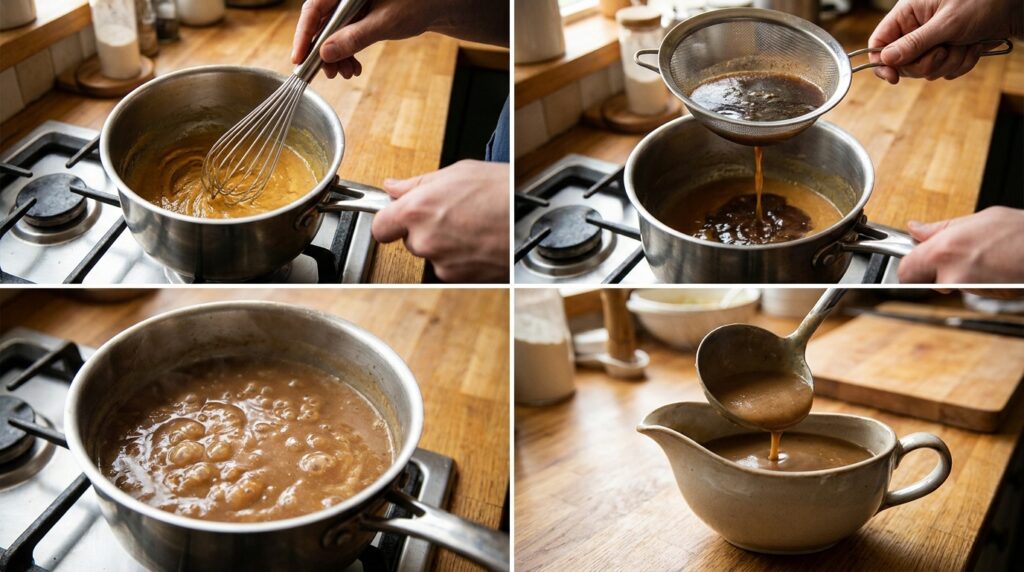
This method, sometimes called pan gravy, uses the roasting pan itself as the cooking vessel so nothing gets left behind.
Step 1: Separate the Fat From the Drippings
Pour the drippings through a fine mesh strainer into a heatproof measuring cup or bowl, catching any solid bits like herbs or skin. Let the liquid rest for a couple of minutes. The fat will rise and float to the top, making it easy to spoon or skim off separately.
Step 2: Make a Roux
In a saucepan over medium heat, combine about 3 to 4 tablespoons of the reserved fat with an equal amount of flour. Whisk continuously for one to two minutes until the mixture turns a light golden color and smells slightly nutty. This step, outlined clearly in most versions of a turkey gravy recipe, is what thickens the gravy and gives it body instead of a watery consistency.
Step 3: Add the Liquid Gradually
Slowly pour in the strained drippings along with any additional broth, whisking constantly to prevent lumps from forming. Adding the liquid in small amounts rather than all at once makes a noticeable difference in how smooth the gravy turns out.
Step 4: Simmer Until Thickened
Bring the mixture to a gentle simmer and let it cook for 5 to 8 minutes, stirring occasionally. The gravy will continue to thicken slightly as it cools, so it’s fine to pull it off the heat while it’s still a touch thinner than the final texture you want.
Step 5: Season and Strain
Taste before adding salt, since the drippings are usually already seasoned from the turkey itself. For an extra-smooth finish, pour the gravy through a fine mesh strainer one more time before serving.
Fixing Common Turkey Gravy Problems
Even experienced cooks run into a lumpy batch or gravy that won’t thicken. Here’s what usually causes each issue and how to correct it.
| Problem | Likely Cause | Fix |
|---|---|---|
| Lumpy gravy | Flour added too fast or not whisked enough | Strain through a fine mesh sieve |
| Too thin | Not enough roux, or too much liquid added | Simmer longer, or mix a bit more flour with cold water and whisk in |
| Too thick | Too much roux relative to liquid | Whisk in warm broth a little at a time |
| Greasy texture | Too much fat left in, not skimmed | Skim more fat before adding liquid next time |
| Bland flavor | Drippings didn’t have enough browned bits | Deglaze the pan with broth and scrape up fond before straining |
A gravy that turns out thinner than expected is one of the more common outcomes, and the fix follows the same logic used for thickening techniques in other sauces, where a small starch slurry or a longer simmer solves the problem without starting over.
Making Turkey Gravy Without Enough Drippings
Sometimes the bird just doesn’t release much liquid, especially with a smaller turkey or one that was brined beforehand. If drippings alone don’t add up to enough:
- Substitute melted butter for the missing fat portion of the roux.
- Use chicken or turkey broth to make up the volume difference.
- Simmer the turkey neck and giblets in water while the bird roasts to create a quick homemade stock, a method used in several traditional recipes for pan drippings gravy when the roasting pan alone doesn’t produce enough liquid.
This combination still delivers a rich, turkey-forward flavor even when the pan itself comes up a little short.
Turkey Gravy Variations Worth Trying
Once the basic method feels comfortable, small additions can change the character of the gravy without much extra effort.
- Herb gravy: Stir in fresh thyme, sage, or rosemary during the simmering stage.
- Wine-finished gravy: Deglaze the pan with a splash of dry white wine before adding broth.
- Creamy gravy: Whisk in a few tablespoons of milk or cream at the end for a softer texture.
- Giblet gravy: Add chopped, cooked giblets for a heartier, more traditional Southern-style version.
Several of these variations appear consistently across trusted holiday cooking sources, including a quick turkey gravy method that suggests a splash of sherry or minced herbs for extra depth without complicating the base recipe.
Expert Tips for the Best Turkey Gravy
- Whisk constantly while adding liquid to the roux. This single habit prevents most lump problems before they start.
- Start the gravy while the turkey rests under foil, since that resting period is usually 20 to 30 minutes and lines up perfectly with the time gravy needs.
- Keep a thermos or heatproof measuring cup nearby to hold extra hot broth, so you’re not scrambling for warm liquid mid-recipe.
- Taste before seasoning. Turkey drippings are often saltier than expected, especially if the bird was brined.
- If serving a crowd, gravy can be made a day ahead and reheated gently on the stovetop, whisking in a splash of broth to loosen it back up.
A detailed walkthrough of the roux method, including how the fat separates from the liquid, is also covered in this breakdown of a gluten-free turkey gravy recipe that explains how to measure fat accurately for consistent results every time.
Pros and Cons of Making Gravy From Scratch
| Pros | Cons |
|---|---|
| Deeper, more authentic turkey flavor | Takes more hands-on time than a packet mix |
| No preservatives or artificial thickeners | Requires straining and skimming steps |
| Easy to customize with herbs or wine | Results can vary based on how much liquid the turkey released |
| Uses ingredients already in the kitchen | Needs constant whisking to avoid lumps |
| Naturally gluten-free with cornstarch swap | Reheating requires care to avoid separating |
Storing and Reheating Leftover Turkey Gravy
Gravy is one of the more perishable Thanksgiving leftovers because of its moisture and meat content. Refrigerated gravy should be used within one to two days, and it’s best stored in a shallow, covered container so it cools quickly rather than sitting warm for an extended period.
Food safety guidance from poultry leftover storage recommendations also notes that gravy freezes well for longer storage, generally holding good quality for four to six months when sealed tightly.
To reheat, warm gravy gently on the stovetop over low heat, whisking frequently, and bring it to a full simmer before serving. Microwaving works too, but stir every 30 seconds to keep the texture even.
Frequently Asked Questions
Can I make turkey gravy ahead of time?
A base version can be made a day or two in advance using stock and pan drippings collected from a test roast or a smaller batch, then finished with fresh drippings on the day of serving for the best flavor.
Why is my turkey gravy watery?
Watery gravy usually means the roux to liquid ratio was off, or the mixture wasn’t simmered long enough. Whisking in a small slurry of flour and cold water, then simmering a few more minutes, typically solves it.
Do I need a roux to make turkey gravy?
A roux is the most common method, but cornstarch mixed with cold water works as a gluten-free alternative and thickens quickly without needing to cook out a raw flour taste.
How much gravy do I need per person?
A general guideline is about a half cup of gravy per person, so a gathering of twelve typically needs around six cups total.
Can I use the drippings if the turkey was brined?
Yes, but taste before adding salt since brined turkeys release saltier drippings. Diluting slightly with unsalted broth helps balance the seasoning.
Bringing It All Together
Turkey gravy made from real drippings doesn’t require special equipment or a long ingredient list, just a strainer, a whisk, and a little patience while it simmers. The technique stays the same whether you’re cooking for four people or twenty: separate the fat, build a roux, whisk in the liquid slowly, and let it come together over gentle heat. Once you’ve made it from scratch once, it’s hard to go back to anything from a packet.

