
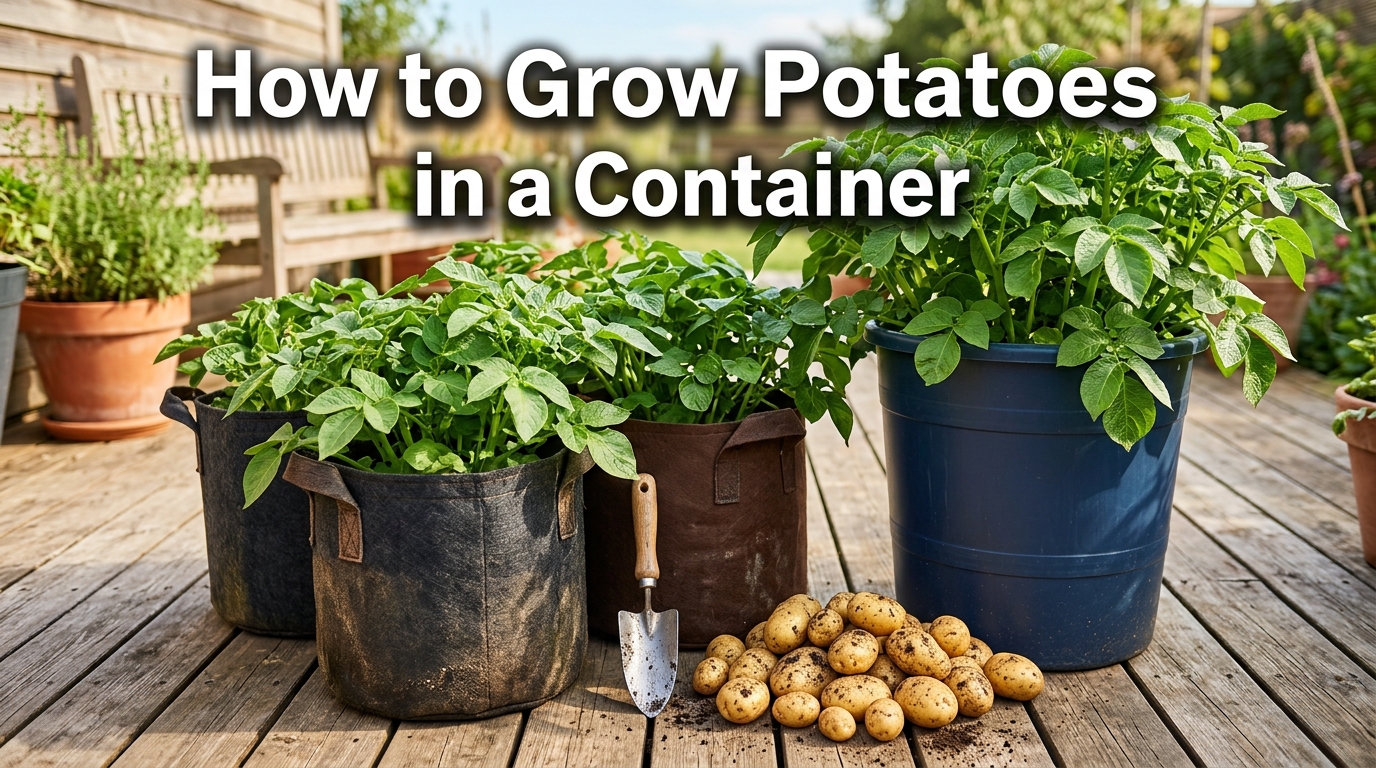
You don’t need a backyard or raised bed to pull a bucket of homegrown potatoes out of the ground this summer. A patio, balcony, or even a sunny front step is enough, and learning how to grow potatoes in a container is genuinely one of the easiest ways to start growing your own food.
The process is forgiving. Potatoes aren’t picky about soil quality the way some vegetables are, they tolerate a bit of neglect, and harvesting is almost more fun than eating them, since you get to dig through soil looking for hidden treasure. Below is everything you need, from picking a pot to solving the problems that trip up first-timers.
Why Grow Potatoes in a Container Instead of the Ground
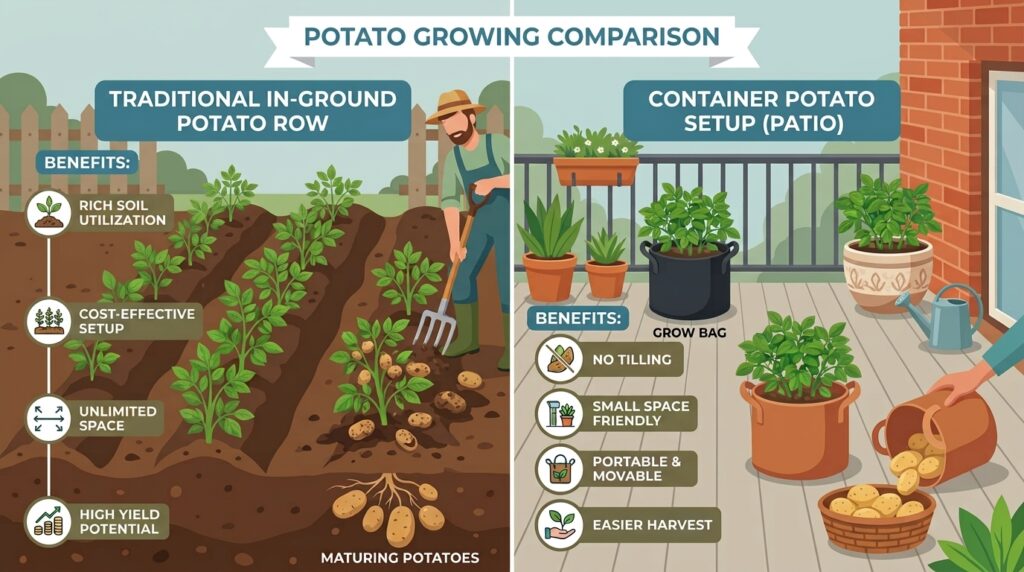
Growing in a container isn’t just a workaround for small spaces. It actually solves a few headaches that in-ground potato growers deal with every season.
- No tilling, no double-digging, no fighting compacted clay soil.
- Fewer soil-borne pests and diseases, since you control the growing medium from day one.
- Harvest day is simple: tip the container over and sift through loose soil instead of forking through a garden bed and slicing tubers by accident.
- Containers can be moved to chase sun, dodge a late frost, or come indoors when weather turns rough.
Best Container for Growing Potatoes
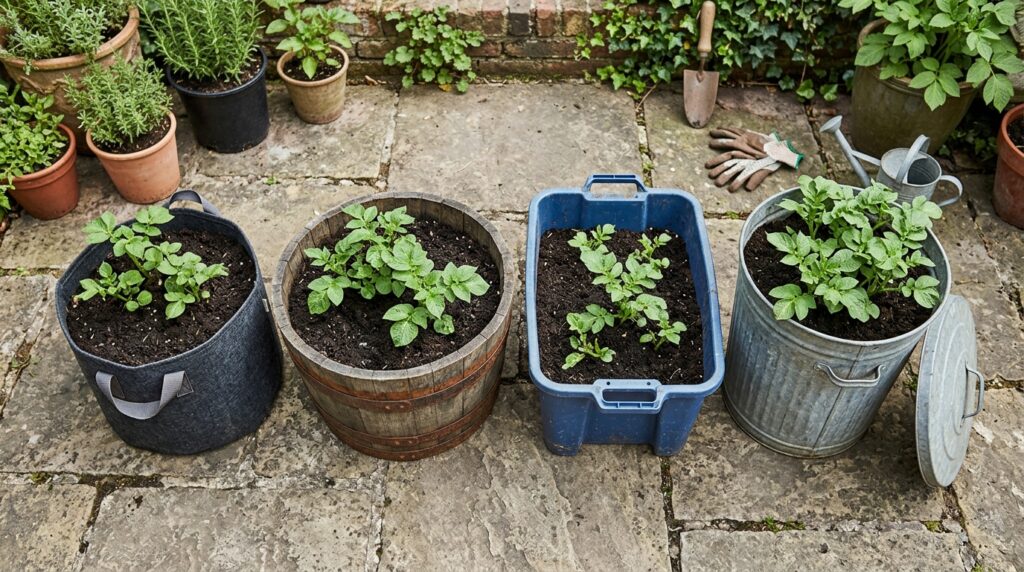
Picking the right pot matters more than people expect. Potatoes form tubers along the buried stem, so depth and volume both count.
Look for something that’s at least 15 to 20 inches deep and holds 10 to 15 gallons of soil. Anything much taller than that becomes hard to water evenly, since the top layer dries out long before the bottom does. Whatever you choose, it needs generous drainage holes, or the tubers will sit in soggy soil and rot before they ever mature.
Good container options include:
| Container Type | Pros | Cons |
|---|---|---|
| Fabric grow bags | Breathable, roots stay cooler, easy to fold flat for storage | Dries out fastest, needs frequent watering |
| Wooden half-barrels | Sturdy, good insulation, attractive on a patio | Heavy, can rot over time without a liner |
| Plastic buckets or bins | Cheap, widely available, retains moisture well | Can overheat roots in full sun if the plastic is dark |
| Metal trash cans | Very roomy, holds a big harvest | Heavy once filled, may need extra drainage holes drilled in |
The best way to grow potatoes in containers points out that opaque containers work best, since light reaching the developing tubers turns them green and bitter. Dark storage tubs, barrels, and even old chimney flues all fit the bill, as long as drainage is sorted out first.
Choosing Seed Potatoes and Soil
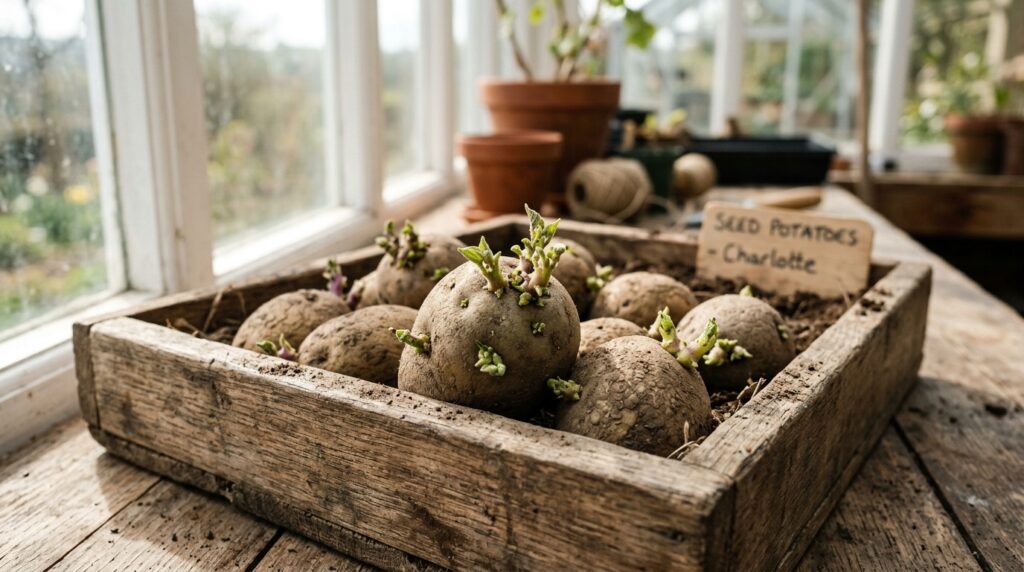
Skip grocery store potatoes if you can. They’re often treated with a sprout inhibitor and can carry disease. Certified seed potatoes from a garden center or nursery are worth the small extra cost, especially since a bag of seed potatoes will fill several containers.
Look for early or second-early varieties for container growing. They mature faster and don’t need as much root room as big main-crop russets. Reliable picks include Yukon Gold, Red Pontiac, and small fingerling types.
Before planting, let seed potatoes sit somewhere bright and cool for a week or two so they sprout short, sturdy shoots. This is called chitting, and it gives your plants a head start once they go into the container.
For soil, skip heavy garden dirt. It compacts in a container and suffocates the roots. A loose, well-draining potting mix, ideally blended with some compost, works far better and mimics the loamy soil potatoes naturally prefer.
Growing Potatoes in Containers in Layers
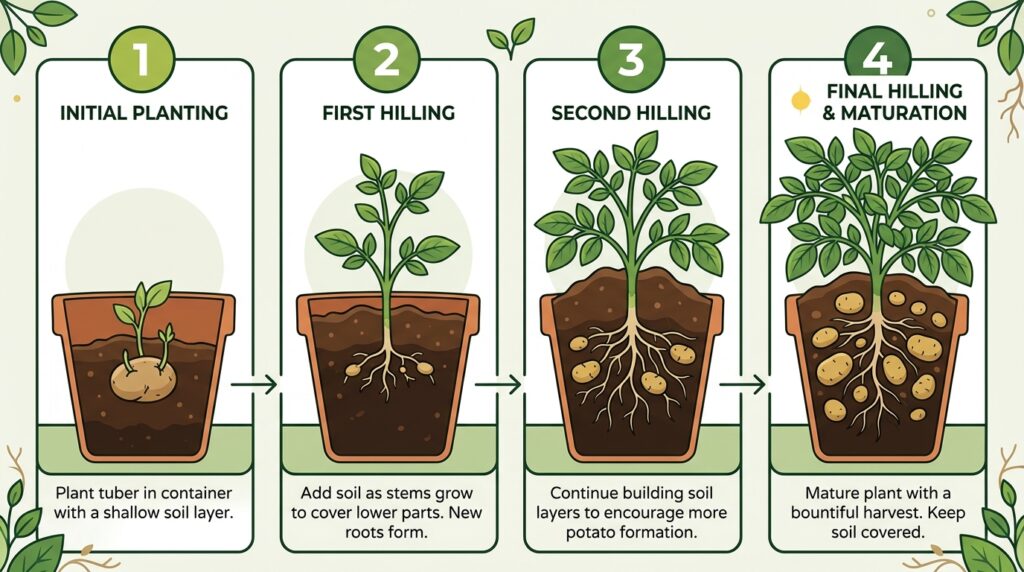
Layering, sometimes called hilling, is the classic method and the one most beginners start with. It’s simple, and it’s also how most gardeners get the biggest yield per container.
- Add 4 to 6 inches of potting mix to the bottom of your container.
- Place two or three seed potatoes on top, sprouts facing up, spaced a few inches apart.
- Cover them with another 3 to 4 inches of soil and water well.
- Once green shoots reach 6 to 8 inches tall, add more soil, burying two-thirds of the plant and leaving just the top leaves exposed.
- Repeat this hilling process every couple of weeks as the plant keeps growing, until you reach the top of the container.
Each time you bury the stem, the potato plant responds by growing new tubers along the buried section. That’s the entire secret behind growing potatoes in containers in layers: more buried stem generally means more potatoes at harvest.
Keep the top few inches of leaves showing at every stage. If you bury the plant completely, it can’t photosynthesize and growth stalls.
Growing Potatoes in Containers with Straw
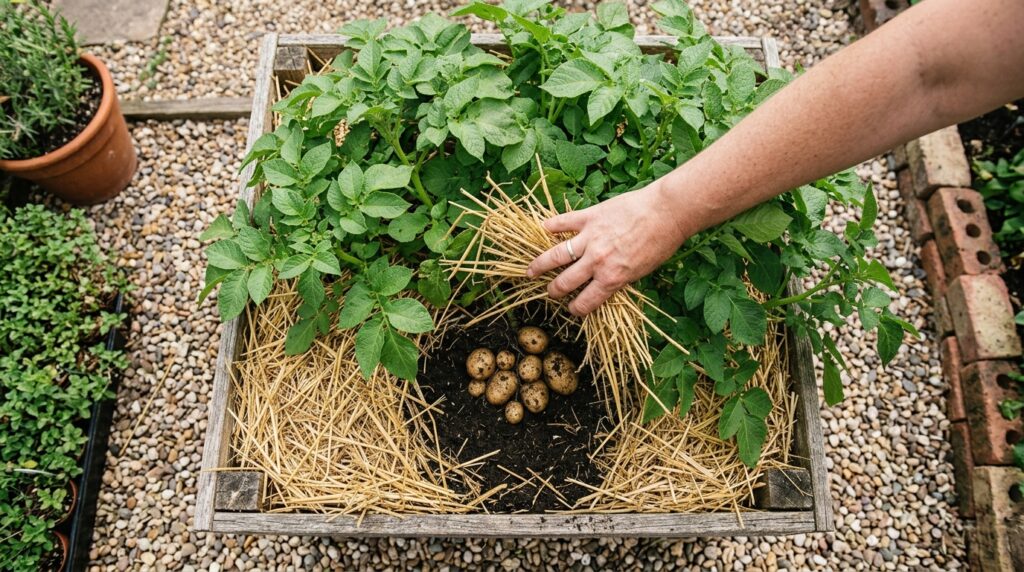
Straw is a popular alternative to soil layering, and a lot of gardeners prefer it because harvest is nearly mess-free. Instead of digging, you just pull back handfuls of straw and the potatoes are sitting right there.
To set it up, add a few inches of soil or compost to the base of the container, place your seed potatoes on top, and cover them with 4 to 6 inches of loose straw rather than more soil. As the plant grows, keep adding straw the same way you’d add soil in the layering method, always leaving the top leaves uncovered.
Container growers get the best results by giving the plants enough fertilizer and water during active growth, and by not overcrowding, ideally one plant per container when using straw as the main medium.
A couple of things to know before committing to straw:
- Straw dries out faster than soil, so you’ll water more often, sometimes daily in hot weather.
- Make sure it’s straw and not hay. Hay is full of seed heads and will sprout grass all through your container.
- Yields can be a little lower than soil-grown potatoes, but the easy harvest often makes up for it.
Sunlight, Water, and Feeding
Potatoes are sun-hungry plants. Aim for a spot that gets at least 6 to 8 hours of direct light a day. Less than that and you’ll get plenty of leafy growth but a disappointing number of tubers underneath.
Watering is where most container potatoes go wrong, in either direction. The soil should stay consistently moist, roughly like a wrung-out sponge, never bone dry and never waterlogged. During the peak growing weeks, that often means watering every day or two, especially with fabric bags or straw, which dry out fast.
Feeding matters too, since containers don’t have the natural nutrient reserves that garden soil does. A balanced vegetable fertilizer every few weeks keeps plants productive. If leaves start yellowing between the veins or growth stalls despite good watering, it’s often a sign of nutrient deficiencies rather than a watering problem, and it’s worth learning to tell the two apart before adjusting your feeding schedule.
Growing Potatoes in Plastic Containers
Plastic is one of the most common choices simply because it’s cheap, lightweight, and easy to find in almost any size. Storage totes, five-gallon buckets, and nursery pots all fall into this category.
Growing potatoes in plastic containers works well as long as you keep a few things in mind:
- Drill extra drainage holes if the container wasn’t designed for gardening. Most storage totes and buckets need more holes than they come with.
- Choose a lighter or opaque color. Black plastic left in full sun can heat the soil enough to stress the roots, especially in warmer regions.
- Plastic retains moisture better than fabric, which is helpful in hot climates but means you’ll need to watch for overwatering in cooler, wetter weather.
If you’d rather repurpose something you already own, a large plastic trash can with drilled drainage holes is one of the most popular DIY options, and it’s roomy enough to produce a genuinely impressive harvest from a single container.
Growing Potatoes in Containers in Winter
Potatoes are a cool-season crop, but they’re not frost-proof, so winter growing depends heavily on your climate.
In regions with mild winters, potatoes actually thrive when planted in the cooler months, since summer heat is what usually stresses them out. Gardeners in warmer zones often plant container potatoes in fall for a late-winter or early-spring harvest.
In colder regions, outdoor containers need real protection once temperatures drop toward freezing. A few options:
- Move containers into an unheated garage, greenhouse, or enclosed porch once frost threatens.
- Wrap containers in bubble wrap, burlap, or old blankets to insulate the root zone if they must stay outside.
- Grow in a sunny indoor spot or under grow lights, keeping soil temperature above roughly 45°F so the tubers don’t stall or rot.
Soil temperature matters more than air temperature for potatoes, so even a sheltered, sunny corner can keep a container producing through a mild cold season when an open garden bed would already be frozen solid.
Common Problems Growing Potatoes in Containers
Even with a solid setup, container potatoes run into a handful of recurring issues. Here’s how to recognize and fix the most common ones.
Small or no tubers forming. Usually caused by too little sunlight, overcrowding too many seed potatoes in one container, or too much nitrogen fertilizer pushing leafy growth instead of tuber development.
Green potatoes. This happens when tubers are exposed to light, either because they weren’t buried deep enough or straw shifted away from them. Green potatoes contain solanine and shouldn’t be eaten, so keep hilling consistently.
Soft, rotting tubers. Almost always a drainage or overwatering problem. Check that drainage holes aren’t blocked and ease off watering if the soil feels soggy at a two-inch depth.
Wilting despite moist soil. Can point to root rot from poor drainage, or occasionally a fungal issue. Pull one plant to check the roots if this happens on a hot day with damp soil.
Slow, weak growth. Often nutrient related. Container soil depletes faster than garden soil, so a mid-season feeding schedule usually solves this.
These are, by far, the most common problems growing potatoes in containers, and nearly all of them trace back to drainage, sunlight, or feeding rather than anything more complicated.
Harvesting Your Container Potatoes
You’ll know potatoes are ready when the foliage starts yellowing and dying back, usually 10 to 12 weeks after planting for early varieties. That’s your cue for a full harvest, though smaller “new potatoes” can be pulled a few weeks earlier if you want a taste test.
Harvesting from a container is genuinely one of the best parts of the whole process. Simply tip the container onto a tarp, spread the soil out, and sift through by hand. There’s no forking through packed earth and no risk of slicing tubers by accident the way you might in a garden bed.
Cure freshly dug potatoes in a cool, dark, well-ventilated spot for a week or two before storing them long-term. This toughens the skins and helps them keep much longer in storage.
Expert Tips for a Better Container Harvest
- One or two seed potatoes per 10-gallon container is usually the sweet spot. Crowding reduces yield per plant even if total output looks similar.
- Rotate your growing medium each season if possible, or refresh at least the top half with new compost, to avoid a buildup of disease in reused soil.
- Fabric grow bags are easier to store flat over winter than rigid plastic or wooden containers, which matters if storage space is limited.
- Pair early and second-early varieties if you want a staggered harvest instead of everything ready at once.
Frequently Asked Questions
How many potatoes will one container produce?
A well-managed 10 to 15 gallon container with two or three seed potatoes can typically yield 3 to 8 pounds of potatoes, though this varies by variety, sunlight, and how consistently the plant was fed and watered.
Can I reuse potting soil for potatoes next season?
It’s better to refresh at least half the soil with new compost or potting mix each season. Reused soil can carry diseases like scab or blight that build up over repeated plantings of the same crop.
Do container potatoes need a bigger pot than tomatoes?
Not necessarily bigger, but depth matters more for potatoes since tubers form along the buried stem. A pot that’s at least 15 to 20 inches deep tends to outperform a shallow, wide container of the same volume.
Why are my container potato leaves turning yellow?
Yellowing leaves usually point to either overwatering, root crowding, or a nutrient shortfall. Check drainage first, since soggy roots are the most common cause in containers specifically.
Can I grow potatoes in a container on a balcony with only partial sun?
Potatoes will survive with 4 to 5 hours of direct sun, but tuber production drops noticeably below the ideal 6 to 8 hours. Expect a smaller harvest rather than no harvest at all.
Final Thoughts
Container potato growing rewards patience more than expertise. Pick a roomy, well-draining pot, keep the soil consistently moist, hill or straw the stems as they grow, and feed the plants through the season. That’s really the whole formula.
Start with one or two containers this season, track what worked, and expand next year based on what your specific space, sunlight, and climate allow. Few vegetable projects feel as satisfying as tipping over a grow bag and finding a pile of potatoes you grew yourself.

