
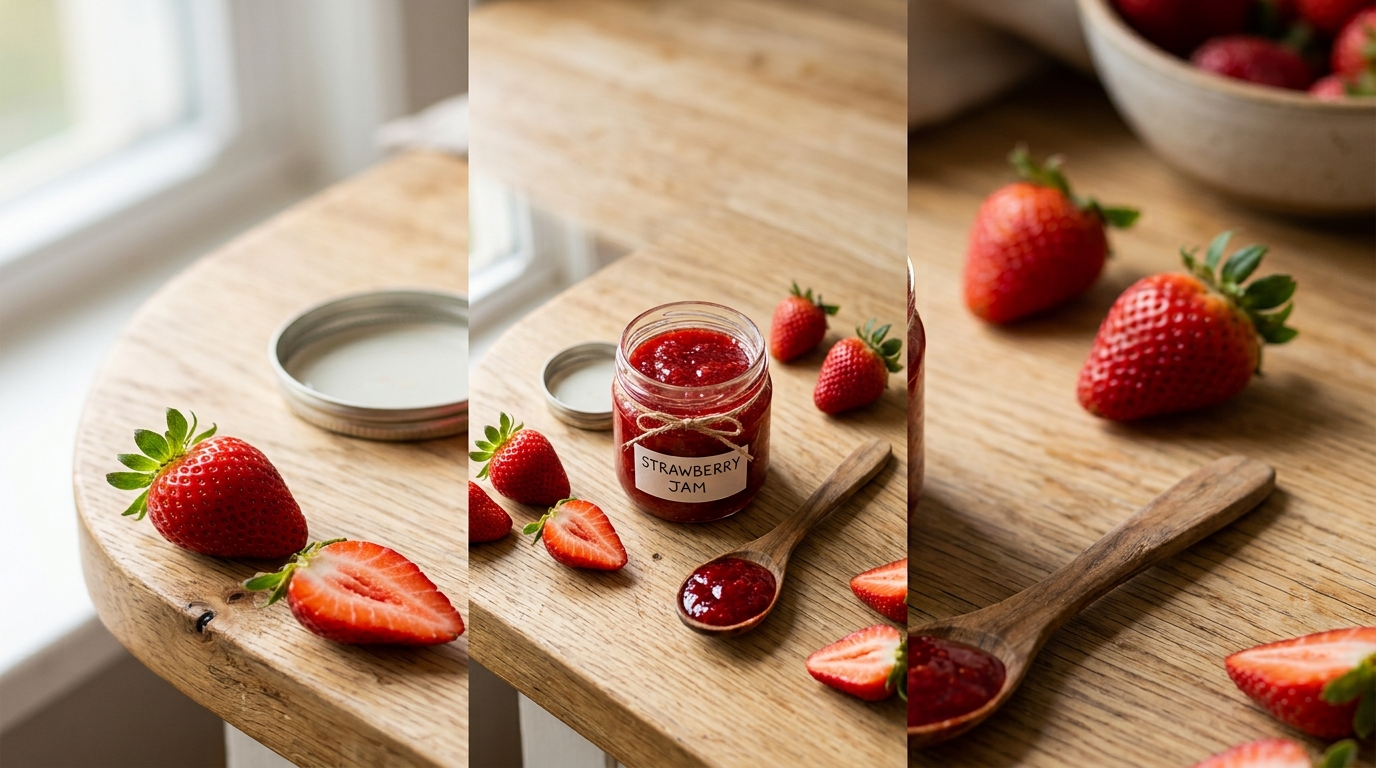
If you have ever wondered how to make strawberry jam that actually tastes like real strawberries instead of sugary syrup, the process is simpler than most people expect. At its core, strawberry jam only needs three things: ripe strawberries, sugar, and an acid like lemon juice. You cook them together until the mixture thickens, then either store it in the fridge or process it in jars for longer shelf life. This guide walks through the entire method from picking the right berries to fixing jam that will not set, so you end up with a batch that holds together, spreads well, and keeps safely.
Strawberries are naturally low in pectin, the substance that helps jams gel, which is why so many recipes either cook the fruit longer, add lemon juice, or use commercial pectin. We will cover all three approaches so you can pick the one that fits your kitchen and your time.
What You Need Before You Start
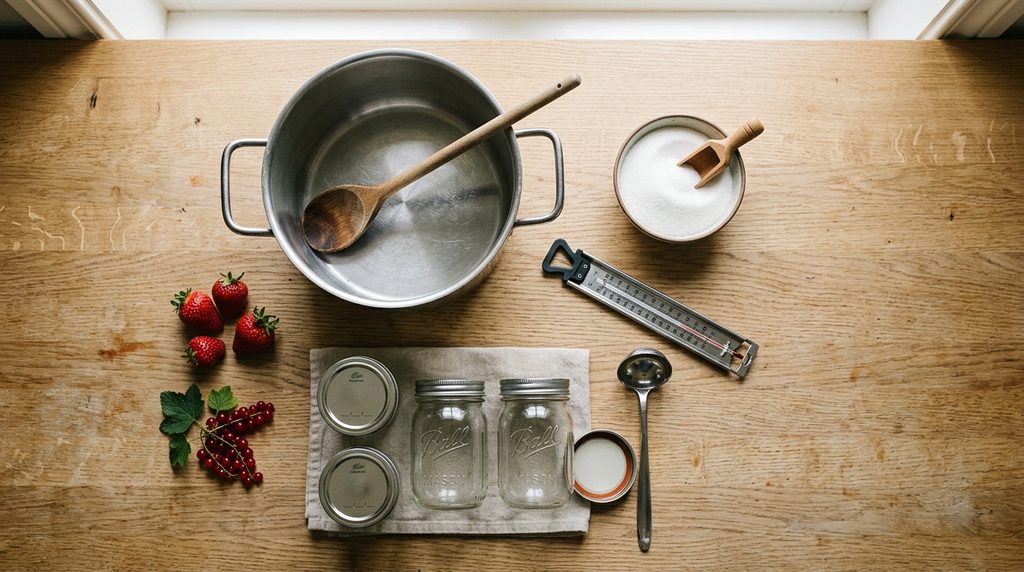
Before touching a single berry, it helps to gather your equipment and ingredients so the cooking process goes smoothly. Jam can go from perfectly cooked to scorched in a couple of minutes, so having everything ready in advance matters more than it does for most recipes.
Basic equipment:
- A large, heavy-bottomed pot or Dutch oven (this prevents scorching)
- A potato masher or immersion blender for crushing the fruit
- A candy or instant-read thermometer (optional but helpful)
- Clean glass jars with lids, whether you plan to can or simply refrigerate
- A ladle and a wide-mouth funnel for filling jars neatly
- A water bath canner, or a large stockpot with a rack, if you plan to can the jam for pantry storage
Core ingredients:
- Fresh or frozen strawberries
- Granulated sugar
- Lemon juice (fresh or bottled)
- Pectin, if you are using a pectin-based method
Choosing and Preparing the Right Strawberries
The quality of your jam depends heavily on the fruit you start with. Overripe strawberries taste sweeter but contain less natural pectin, which makes the jam harder to set. Slightly underripe berries, mixed in with ripe ones, actually improve the set because they carry more natural pectin. According to the National Center for Home Food Preservation, strawberries naturally contain little pectin, so using about a quarter underripe fruit or adding acid and sugar helps compensate.
If you are shopping for berries rather than picking your own, look for firm, deeply colored fruit without soft spots or mold. This is a similar skill to picking other fruit at peak ripeness, and the same logic that applies when you check how to tell if watermelon is ripe carries over here: color, firmness, and smell all matter more than size.
To prepare the berries, rinse them under cool water, remove the green caps, and either slice, quarter, or mash them depending on the texture you want in your finished jam. Chunkier jam keeps small fruit pieces intact, while a smoother jam is mashed more thoroughly before cooking.
How to Make Strawberry Jam From Fresh Strawberries
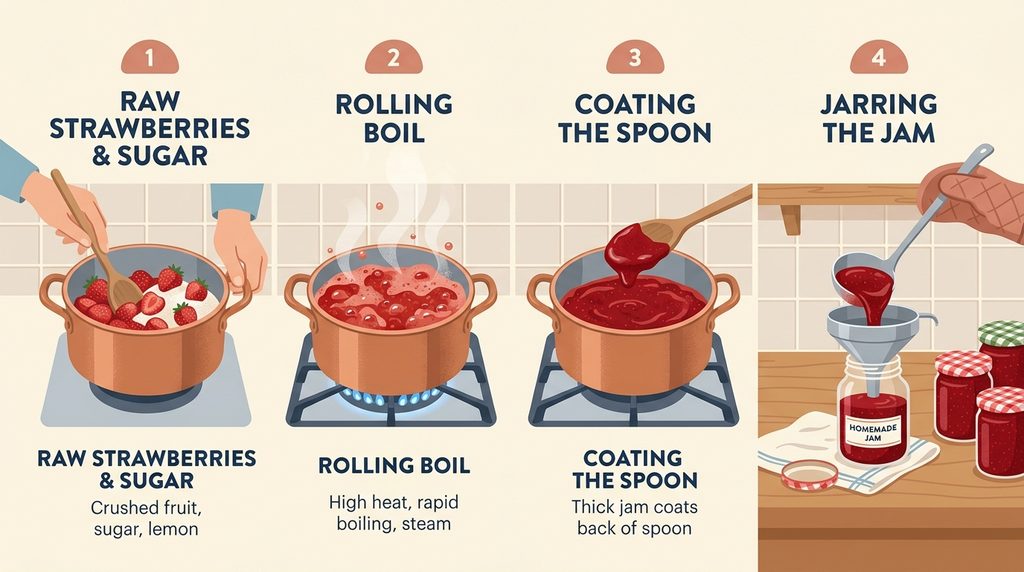
This is the most common starting point, and it works well whether you plan to use pectin or skip it entirely.
- Wash and hull about 2 pounds of strawberries, then hull them and slice or quarter them depending on your preferred texture.
- Crush the fruit with a potato masher until you have roughly 4 cups of crushed strawberries, leaving some texture if you like a chunkier jam.
- Combine the crushed strawberries with 2 to 4 cups of sugar and 2 to 3 tablespoons of lemon juice in a heavy-bottomed pot. The exact sugar amount depends on the sweetness of your berries and whether you are using pectin, which usually calls for more sugar to activate the gel.
- Cook over medium-high heat, stirring often, until the mixture comes to a full rolling boil that does not stop bubbling when stirred.
- If using pectin, follow the package instructions closely, since store-bought pectin brands vary in how much sugar and boiling time they require.
- If skipping pectin, continue boiling and stirring for 20 to 40 minutes, until the mixture thickens and coats the back of a spoon. A thermometer reading of around 220°F at sea level is a reliable sign the jam has reached the gel point, since this is roughly 8 degrees above the boiling point of water.
- Test the set by placing a small spoonful on a chilled plate. If it wrinkles slightly when pushed with a finger after a minute in the freezer, it is ready.
- Remove from heat, skim off any foam, and ladle the hot jam into clean, hot jars, leaving about a quarter inch of headspace if you plan to process the jars in a water bath canner.
How to Make Strawberry Jam From Frozen Strawberries
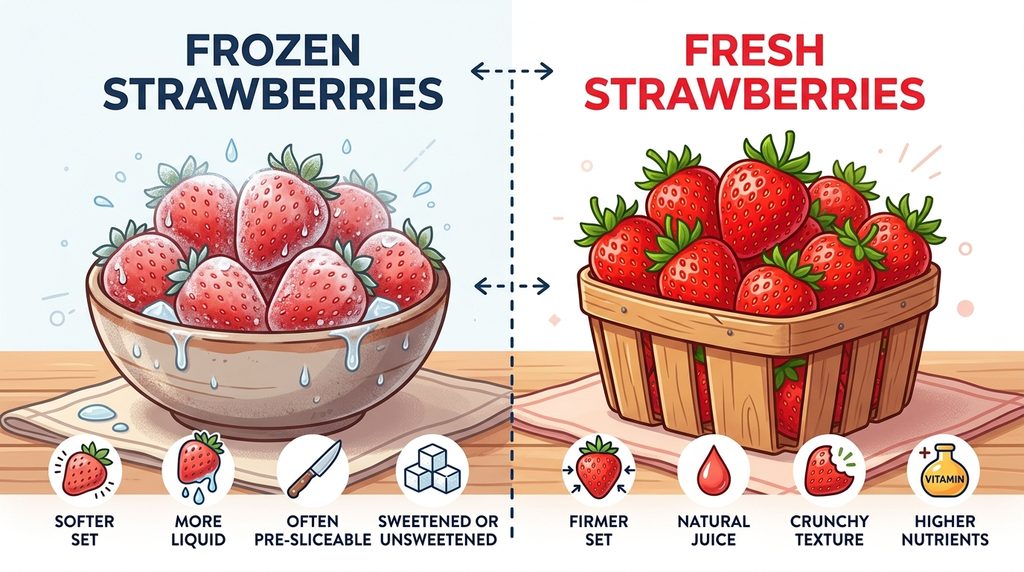
Making strawberry jam from frozen strawberries follows nearly the same process, with a few adjustments because frozen fruit releases more liquid and contains less natural pectin after thawing.
- Thaw the strawberries partially in a colander over a bowl to catch excess juice, or use them still partly frozen for less liquid loss.
- Measure the fruit and juice together, since the released liquid still contributes to the final jam and should not be discarded.
- Cook the fruit down slightly longer than you would with fresh berries to evaporate the extra liquid before adding sugar, which helps the jam thicken properly.
- Add sugar, lemon juice, and pectin if using it, following the same boiling and testing steps described above for fresh strawberries.
- Expect a slightly softer set compared with fresh-fruit jam, since freezing breaks down some of the fruit’s cell structure and reduces natural pectin. If the set feels too soft, a pectin-based recipe will give a more predictable, firmer result than a no-pectin approach.
Frozen strawberries work well for jam year-round and are a practical option when fresh berries are out of season or your fresh batch did not get used in time.
Pectin vs No-Pectin Jam: Which Should You Choose
Both methods produce good jam, but they differ in texture, time, and predictability. The table below breaks down the practical differences so you can decide which approach fits your situation.
| Factor | With Added Pectin | Without Added Pectin |
|---|---|---|
| Cooking time | Shorter, usually 5 to 10 minutes at a boil | Longer, often 20 to 40 minutes |
| Set consistency | Firmer and more predictable | Softer, can vary batch to batch |
| Sugar needed | Often more, unless using low-sugar pectin | Can use less sugar, but less sugar also means a softer set |
| Fruit flavor | Slightly diluted by the added sugar volume | More concentrated, cooked-down flavor |
| Best for beginners | Yes, more forgiving | Requires more attention to avoid scorching |
| Shelf life once canned | Same, if processed correctly | Same, if processed correctly |
Canning Your Strawberry Jam Safely
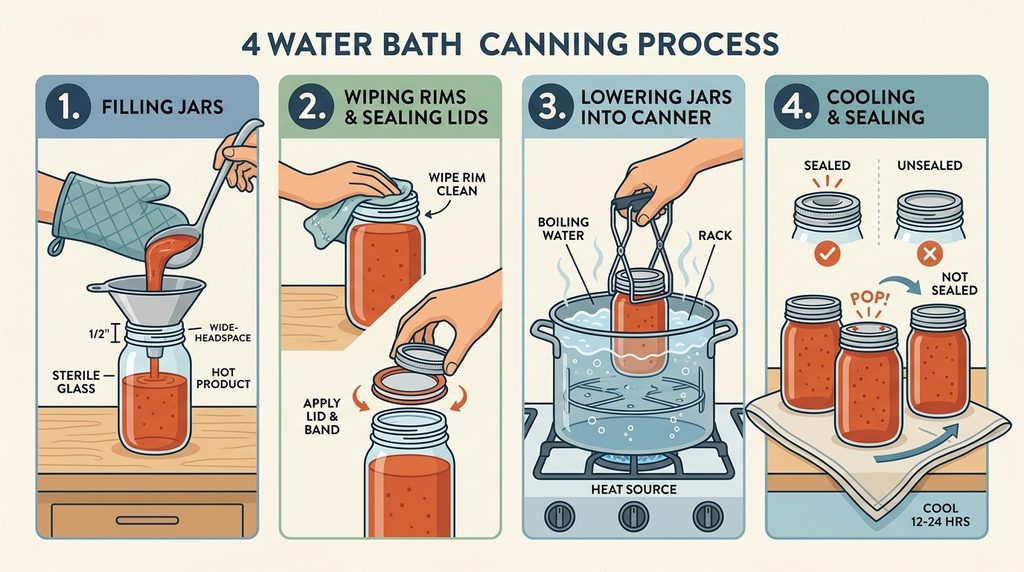
If you want your jam to sit on a pantry shelf rather than in the fridge, you need to process it in a boiling water bath canner. Strawberry jam is a high-acid product, which means it falls safely within the range for water bath canning rather than requiring a pressure canner, as long as you follow a tested recipe and do not reduce the sugar or acid significantly.
Here is the general process, based on guidance from university extension food preservation programs:
- Sterilize jars if your processing time will be less than 10 minutes, and keep lids warm in hot water.
- Fill hot jars with hot jam, leaving a quarter inch of headspace, then wipe the rims clean before sealing with two-piece lids.
- Process half-pint or pint jars in a boiling water canner. Guidance from a tested strawberry jam canning recipe and similar university programs generally calls for a short boiling water process, with additional time added at higher altitudes.
- Increase your processing time if you live above 1,000 feet in elevation, since water boils at a lower temperature there and needs more time to fully seal and treat the jars.
- Let jars cool undisturbed for 12 to 24 hours, then check that each lid has sealed by pressing the center. It should not flex up and down.
Home canning safety matters because improperly processed low-acid foods can support the growth of Clostridium botulinum, the bacteria responsible for botulism. Jam’s high sugar and acid content make it much safer than low-acid vegetables, but jars should still be inspected before use. Established food safety guidance recommends discarding any jar that appears bulging, leaking, or has an off odor when opened, without tasting it first.
Disclaimer: Home canning guidance can vary by altitude, recipe, and equipment. This article provides general information and is not a substitute for a tested, published recipe from a recognized food safety authority. If you are new to canning, consult a current university extension resource or the USDA’s official canning guide before processing jars for shelf storage.
Common Mistakes That Ruin Homemade Jam
Even experienced cooks run into these issues. Knowing them ahead of time saves a wasted batch.
- Using overripe fruit only. Pectin content drops as strawberries ripen, so an all-overripe batch is more likely to stay runny.
- Cutting the sugar too much. Sugar is not just for sweetness. It helps the pectin gel and acts as a preservative, so reducing it significantly changes both texture and shelf life.
- Skipping the acid. Lemon juice adjusts the pH and helps activate pectin, whether natural or added. Leaving it out often results in a jam that never fully sets.
- Not stirring enough. Sugar and fruit mixtures scorch quickly on the bottom of the pot, which adds a burnt taste that cannot be fixed once it happens.
- Overfilling the pot. Jam bubbles up significantly as it boils, so a pot that is more than half full risks a dangerous boilover.
- Skipping the plate test. Relying only on a timer instead of checking the actual set can leave you with jam that is either too thin or overcooked and gummy.
Troubleshooting: Why Your Strawberry Jam Did Not Set
If your finished jam is thinner than you expected, a few fixes can help before you give up on the batch.
- Let it rest. Some jams continue to firm up over 24 to 48 hours in the refrigerator, especially no-pectin batches.
- Recook with more acid or pectin. If it is still too loose after resting, return the jam to the pot, add a small amount of lemon juice or a pectin product designed for remaking soft jam, and bring it back to a boil for a few minutes.
- Check your fruit ratio. If you used mostly overripe or previously frozen berries, low natural pectin is the likely cause, and a commercial pectin will give a more reliable result next time.
- Use it as a sauce instead. If the batch still will not thicken, it still works beautifully as a topping for pancakes, yogurt, or ice cream, so nothing needs to go to waste.
How to Store Homemade Strawberry Jam
Storage depends on whether the jam was properly processed in a water bath canner or simply cooked and jarred for short-term use.
- Refrigerator jam (not canned): Store in a clean, airtight jar in the refrigerator for up to 3 weeks.
- Freezer jam: Store in freezer-safe containers, leaving room for expansion, for up to 1 year in the freezer or about 3 weeks in the fridge once thawed.
- Properly canned jam: Store sealed, unopened jars in a cool, dark pantry for up to 1 year. Once opened, refrigerate and use within 3 weeks.
- Signs it has spoiled: Mold on the surface, a fermented or off smell, or a lid that has lost its seal all mean the jar should be discarded rather than used.
Flavor Variations Worth Trying
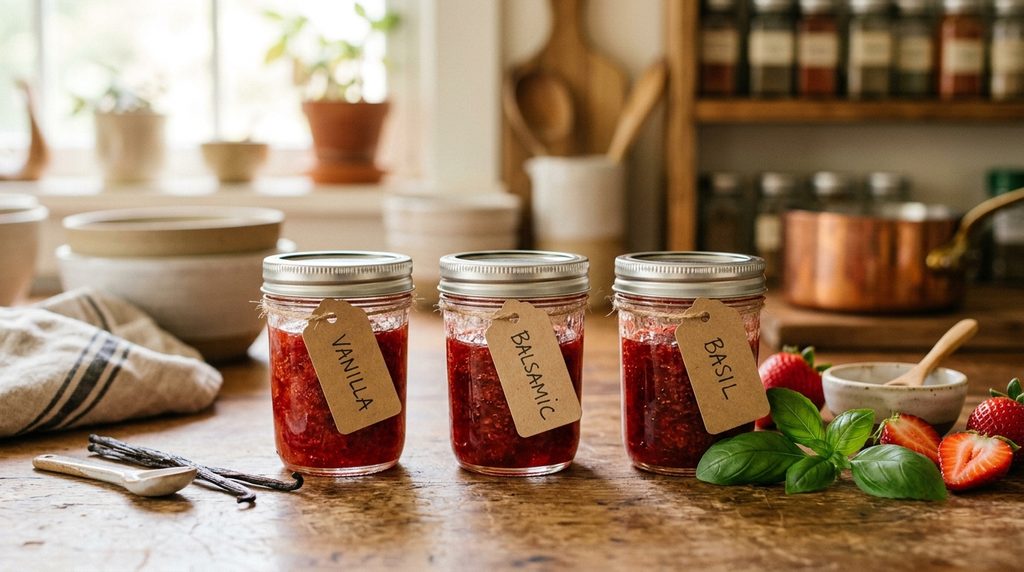
Once you are comfortable with the base recipe, small additions can change the character of the jam without affecting the basic method.
- Add a split vanilla bean or a teaspoon of vanilla extract near the end of cooking for a warmer flavor.
- Stir in a tablespoon of balsamic vinegar for a slightly tangy, more complex jam that pairs well with cheese boards.
- Mix in a few tablespoons of chopped fresh basil or mint just before jarring for a bright, herbal note.
- Combine strawberries with rhubarb or raspberries in a roughly equal ratio for a different fruit balance and natural pectin boost.
Frequently Asked Questions
How long does homemade strawberry jam last?
Refrigerator jam typically lasts about 3 weeks, while properly water-bath canned jam can be stored unopened in a cool pantry for up to a year. Once any jar is opened, keep it refrigerated and use it within 3 weeks for the best quality and safety.
How to make strawberry jam from fresh strawberries without a candy thermometer?
You can test doneness with the cold plate method instead of a thermometer. Chill a small plate in the freezer, drop a spoonful of jam onto it, wait about a minute, then push it with your finger. If it wrinkles and holds its shape rather than running back together, the jam is ready.
How to make strawberry jam from frozen strawberries taste as good as fresh?
Cook the mixture a little longer to evaporate the extra liquid released by thawing, and add a full portion of lemon juice, since frozen fruit tends to taste flatter than fresh. Choosing berries that were frozen at peak ripeness, rather than fruit that sat in the freezer for many months, also helps preserve flavor.
Do I need pectin to make strawberry jam?
No, pectin is optional. Strawberries contain a small amount of natural pectin, and cooking the mixture longer with enough sugar and acid can produce a good set without any added pectin, though the texture will be softer than a pectin-based jam.
Can I reduce the sugar in a strawberry jam recipe?
You can reduce sugar in recipes designed for low-sugar or no-sugar-needed pectin, but reducing sugar in a standard recipe changes both the set and the shelf life, since sugar helps preserve the jam. If you want less sugar, use a recipe and pectin product specifically formulated for that purpose rather than simply cutting sugar from a standard recipe.
Why is my strawberry jam too runny even after boiling it a long time?
This usually points to low natural pectin in the fruit, not enough acid, or fruit that was very ripe when picked. Letting the jam rest in the fridge for a day sometimes helps it firm up, and if it is still thin, recooking it with added lemon juice or a small amount of pectin usually solves the problem.
Is it safe to can strawberry jam without a pressure canner?
Yes, because strawberry jam is a high-acid, high-sugar product, it is safe to process using a boiling water bath canner rather than a pressure canner, which is reserved for low-acid foods like most vegetables and meats. Always follow a tested recipe and correct processing time for your altitude to ensure the jars seal properly.
Final Thoughts
Making strawberry jam at home comes down to balancing fruit, sugar, and acid, then cooking the mixture until it reaches the right consistency for your taste. Whether you are working with a fresh summer haul or a bag of frozen berries pulled from the freezer, the same core principles apply, and a little troubleshooting knowledge goes a long way if your first batch does not set perfectly. Once you have the basic method down, it becomes one of the easiest ways to turn a simple ingredient into something you will reach for all year.
If you enjoyed learning this process, you might also like exploring other seasonal food preparation guides, including tips on how long to steam green beans for perfecting texture with garden produce. Try the recipe this week while strawberries are at their best, and share how your batch turned out.

