

Introduction
Picture this: It’s late February. You’ve carefully planted your tomato seeds in fresh potting mix, set them on a sunny windowsill, and waited. And waited. Two weeks pass and… nothing. No sprouts. No signs of life.
Sound familiar?
Nine times out of ten, the culprit isn’t the seeds — it’s the temperature. Most vegetable and flower seeds need warm soil to germinate, and a cold windowsill in winter simply doesn’t cut it. That’s exactly where a seedling heat mat changes everything.
Whether you’re growing vegetables, herbs, or flowers from seed, a heat mat could be the missing piece in your setup. In this guide, you’ll learn exactly what a seedling heat mat is, how it works, when to use one, and how to get the best results — even if you’ve never started seeds indoors before.
Let’s dig in.
What Is a Seedling Heat Mat?
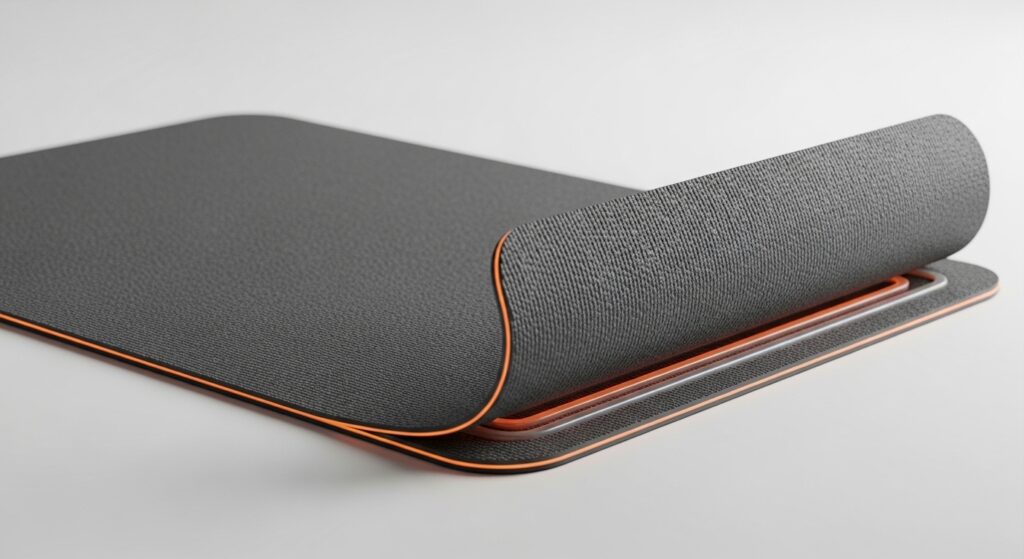
A seedling heat mat (also called a seed heat mat, germination mat, or plant heating mat) is a thin, waterproof electric pad designed to warm the soil inside seed trays and germination flats from below.
Think of it like a heated blanket — but for your seeds.
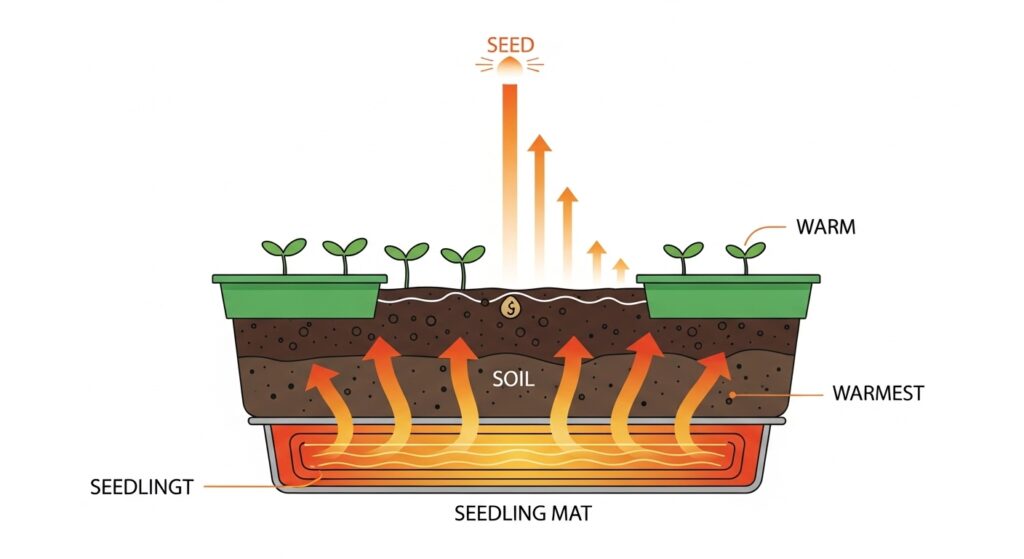
The mat sits underneath your seed tray and gently raises the soil temperature, typically by 10–20°F above ambient room temperature. That warmth signals to dormant seeds that conditions are right for germination, triggering the biological processes that push a seedling up through the soil.
Unlike grow lights, which provide light from above, a seedling heat mat works entirely beneath the soil. Its job is simple: keep the root zone warm enough for germination to happen quickly and reliably.
Most heat mats are made from durable, water-resistant materials and draw very little electricity — many run on just 15 to 20 watts, similar to a standard lightbulb. They’re designed to run continuously for days or weeks at a time.
How Does a Seedling Heat Mat Work?
The science behind a germination heating pad is straightforward. Seeds are dormant embryos. They contain everything needed for a new plant — but they wait for the right environmental signal to activate.
For most seeds, that signal is warmth. When the soil temperature hits the ideal range for that species, enzymes inside the seed activate, stored energy is mobilized, and germination begins.
Here’s how the mat makes that happen:
- Resistive heating elements embedded in the mat convert electrical energy into steady, gentle heat
- That heat is conducted upward through the mat surface into the seed tray and soil
- The soil temperature rises to the target range (usually 70–85°F / 21–29°C for most vegetable seeds)
- Seeds detect the warmth and begin the germination process
A basic seed heat mat without a thermostat raises the soil temperature by a fixed amount — typically 10–20°F above room temperature. Thermostat-equipped models let you dial in a specific target temperature, which gives you much more precision and prevents overheating.
According to research from the University of California Cooperative Extension, soil temperature has a direct and measurable effect on germination speed and germination rate. Seeds germinated in optimal warm soil can sprout 2–3 times faster than those in cold conditions.
Why Soil Temperature Matters More Than Air Temperature
This is one of the most misunderstood parts of seed starting. Most gardeners check the air temperature in their growing space — but seeds only care about one thing: the temperature of the soil they’re sitting in.
Your room might feel warm at 68°F, but the soil in a plastic seed tray sitting near a drafty window could be significantly colder. Cold floors, concrete surfaces, and poor air circulation all rob heat from seed trays faster than you’d expect.
The Old Farmer’s Almanac notes that tomatoes, for example, germinate best with soil temperatures between 70–90°F. Below 50°F, tomato seeds may not germinate at all — they just sit there, waiting for warmth that never comes.
Here’s a quick look at optimal soil temperature ranges for common crops:
| Crop | Minimum Soil Temp | Optimal Range | Days to Germinate (Optimal) |
|---|---|---|---|
| Tomatoes | 50°F | 70–85°F | 5–10 days |
| Peppers | 60°F | 75–85°F | 7–14 days |
| Basil | 65°F | 70–85°F | 5–10 days |
| Cucumbers | 60°F | 70–95°F | 3–10 days |
| Eggplant | 60°F | 75–85°F | 7–14 days |
| Lettuce | 35°F | 60–65°F | 2–10 days |
| Marigolds | 65°F | 70–75°F | 4–14 days |
Notice that lettuce actually prefers cooler soil — not every seed benefits from maximum heat. This is why understanding your specific crops is important before dialing up the thermostat.
Types of Seedling Heat Mats
Not all heat mats are the same. Once you start shopping, you’ll quickly find there are a few different styles. Here’s what you need to know:
Standard Heat Mats (No Thermostat)
The most common and affordable option. These plug in and simply raise the soil temperature by a fixed amount — typically 10–20°F above room temperature. They’re simple, durable, and effective for most home gardeners.
Best for: Gardeners who keep their growing space at a consistent room temperature (65–72°F).
Limitation: You can’t control the exact temperature, which can be a problem in very warm rooms or for seeds that need precise heat.
Thermostat-Controlled Heat Mats
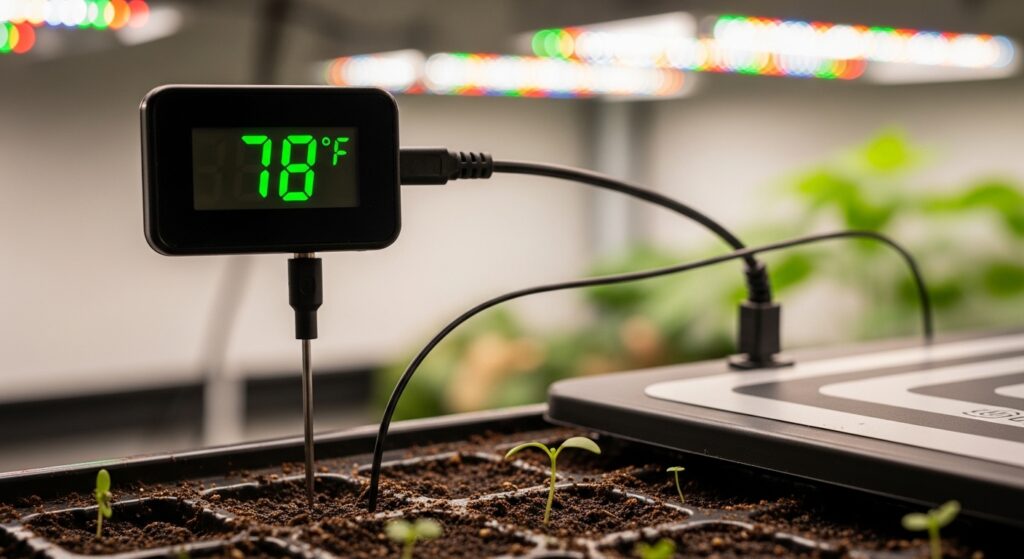
A step up from the basic model, these come paired with a digital thermostat that lets you set a precise soil temperature. A probe sits inside the soil and monitors temperature in real time, turning the mat on and off to maintain your target.
Best for: Serious seed starters, gardeners growing heat-sensitive crops like peppers and eggplant, or anyone in a room with fluctuating temperatures.
Popular options include the VIVOSUN Heat Mat with Digital Thermostat and similar setups that are widely reviewed in the gardening community.
Multi-Tray / Commercial Heat Mats
Larger mats designed to hold multiple seed trays simultaneously. These are ideal for gardeners starting large volumes of seeds at once — think market gardeners, nurseries, or serious homesteaders.
Sizes Available
Heat mats come in several sizes to match common seed tray dimensions:
- 10″ x 20″ — Fits one standard 1020 flat
- 10″ x 48″ — Fits three standard flats
- 20″ x 48″ — Fits six standard flats
- 24-cell seed heating pad — Compact format, fits smaller propagation setups
Do Seed Mats Actually Work?

Yes — seed heat mats genuinely work, and the evidence is both scientific and widely reported by home gardeners.
The National Gardening Association has long noted that consistent bottom heat is one of the most reliable ways to improve germination rates and reduce germination time for heat-loving crops.
Here’s what the data suggests:
- Pepper seeds germinated in optimal soil temperatures (80–85°F) can sprout in as few as 7 days. The same seeds in cold soil (60°F) might take 25+ days — or fail entirely.
- Tomato seeds at 70–85°F typically germinate in 5–10 days. At 55°F, that stretches to 2–4 weeks.
- Basil, one of the most heat-demanding herbs, often fails to germinate at all in soil below 65°F.
The difference isn’t subtle. Many experienced gardeners describe switching to a heat mat as one of the single biggest improvements they made to their seed-starting setup.
That said, a heat mat isn’t magic. You’ll still need quality seeds, appropriate seed-starting mix, proper moisture, and — once sprouts emerge — good light. A heat mat is one important piece of a complete system.
How to Use a Seedling Heat Mat (Step-by-Step)
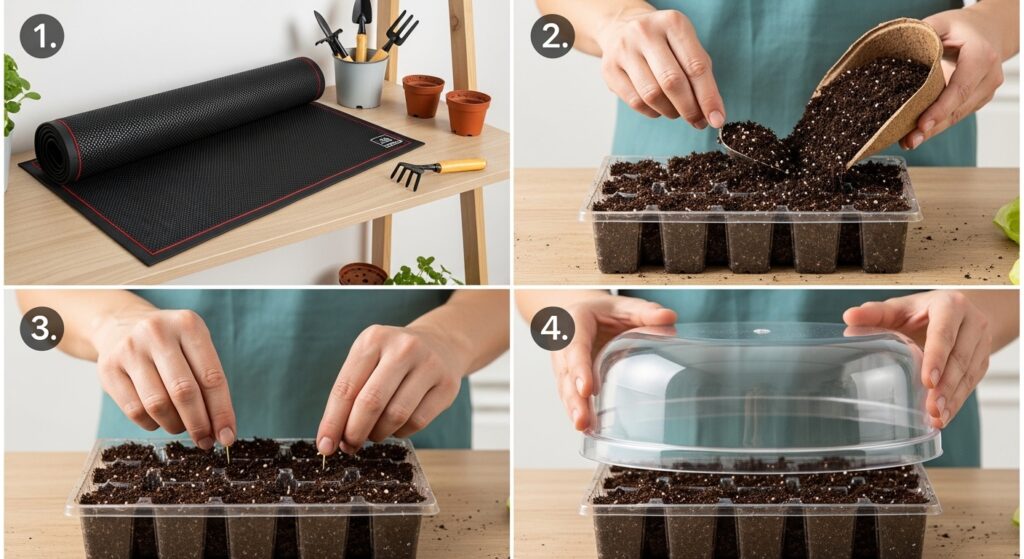
Getting started with a germination heating pad is simple. Here’s a practical walkthrough:
Step 1: Set Up Your Space
Choose a flat, stable surface. Avoid carpet or insulating materials that might trap heat. A plastic or wood shelf works well. Make sure you have a power outlet nearby.
Step 2: Place the Mat
Lay the heat mat flat on your surface. Never fold or roll it while in use — this can damage the heating elements and create hot spots.
Step 3: Fill Your Seed Tray
Use a quality seed-starting mix (not regular potting soil). Seed-starting mixes are lighter and drain better, which prevents overwatering and root rot. Espoma Organic Seed Starter Mix is a popular choice among home gardeners.
Moisten the mix thoroughly before filling your tray — it should feel like a wrung-out sponge.
Step 4: Plant Your Seeds
Follow the planting depth on the seed packet. Most small seeds are planted at a depth of ¼ to ½ inch. Cover lightly, then gently press down.
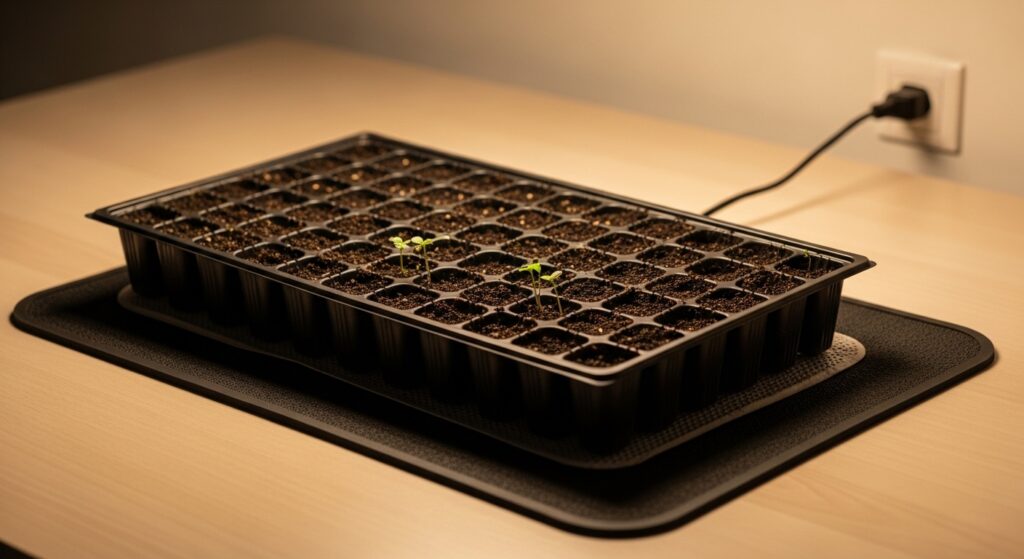
Step 5: Set the Tray on the Mat
Place your seed tray directly on the heat mat. If using a thermostat, insert the temperature probe into the soil near the center of the tray, about 1 inch deep.
Step 6: Cover for Humidity (Optional but Recommended)
Use a clear humidity dome or plastic wrap to trap moisture. This prevents the soil from drying out between waterings. Don’t seal it completely — leave a small gap for airflow.
Step 7: Monitor and Water
Check the tray daily. The soil should stay consistently moist but not waterlogged. Water gently with a spray bottle or bottom-watering method.
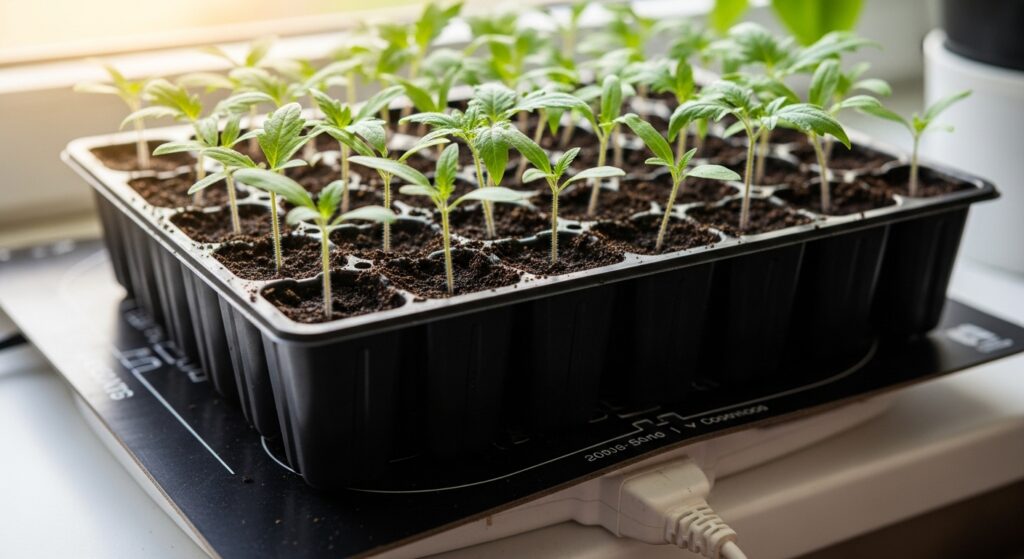
Step 8: Watch for Sprouts
Most heat-loving seeds will show their first signs of life within 5–14 days when kept at the right temperature. The moment you see sprouts emerging, it’s time to reconsider the heat mat setup.
When to Remove Heat Mat from Seedlings
This is one of the most common questions new seed starters ask — and the answer matters more than you might expect.
Remove the heat mat once the majority of your seeds have germinated and seedlings have emerged.
Here’s why: after germination, most seedlings no longer need elevated soil temperatures. In fact, leaving the mat on too long can cause problems:
- Soil dries out faster — warm soil loses moisture more quickly, making it easy to accidentally stress young seedlings
- Legginess — excessively warm soil without enough light can encourage rapid, weak stem growth
- Root stress — some crops (like cool-weather vegetables) actively prefer cooler root zones once established
As a general rule:
- Tomatoes & Peppers: Remove the mat once 70–80% of seeds have sprouted — typically after 5–10 days
- Herbs: Remove once sprouts appear and the first true leaves are developing
- Peppers (especially hot varieties): Some growers leave the mat on for 1–2 extra weeks since peppers are especially cold-sensitive at the seedling stage
After removing the mat, move your seedlings under grow lights if they aren’t already. At this point, light becomes the most critical variable for healthy growth.
Are Seedling Heat Mats Safe?
This is a fair question, especially if you’re leaving a plugged-in device running unattended for weeks at a time.
The short answer: Yes — purpose-built seedling heat mats are safe when used correctly.
Reputable heat mats designed specifically for seed starting are:
- UL Listed or ETL certified, meaning they’ve been independently tested for electrical safety
- Designed to operate at low wattage (typically 15–45 watts) — far below levels that cause fire risk
- Made from waterproof materials that handle incidental water contact
- Engineered to run continuously without overheating
However, there are important safety practices to follow:
Do use heat mats on hard, flat, non-flammable surfaces
Do make sure the mat is in good condition — no fraying wires or cracks
Do use a thermostat if possible, to prevent runaway heat
Do keep the mat away from standing water (spraying, flooding)
Don’t fold or bunch the mat while plugged in
Don’t place the mat on carpet, wood shavings, or hay
Don’t use heat mats designed for reptile tanks — they are not certified for use with water and plants
Don’t use homemade or cheap, uncertified heating devices
Underwriters Laboratories (UL) maintains safety standards for heating devices used in residential settings. Always check for certification marks when purchasing.
Pros and Cons of Using a Seedling Heat Mat
Before you invest, here’s an honest look at both sides:
Pros
- Dramatically speeds up germination for heat-loving crops
- Improves germination rates — fewer failed seeds, more consistent results
- Extends your growing season by allowing you to start seeds earlier indoors
- Affordable — basic models start around $15–$25
- Energy-efficient — uses about as much power as a nightlight
- Reusable — quality mats last for many seasons
- Versatile — works for vegetables, herbs, flowers, and cuttings
Cons
- Not necessary for all seeds — cool-season crops (lettuce, spinach, brassicas) don’t need extra heat
- Adds cost — thermostat models can run $40–$80+
- Soil dries faster, requiring more frequent monitoring
- Doesn’t replace grow lights — seedlings still need adequate lighting after germination
- Takes up space — especially if you’re running multiple mats
Seedling Heat Mat vs. Other Germination Methods
Some gardeners use alternative approaches to warm their seeds. Here’s how heat mats stack up:
| Method | Cost | Control | Reliability | Notes |
|---|---|---|---|---|
| Seedling heat mat | $15–$80 | High (with thermostat) | Excellent | Purpose-built, most reliable |
| Top of refrigerator | Free | None | Low | Heat is inconsistent; varies by model |
| Near a radiator or vent | Free | None | Low | Temperature spikes can damage seeds |
| Heated propagator | $30–$100 | Medium | Good | Combines mat + dome + sometimes light |
| Sunny windowsill | Free | None | Low | Soil temp often too cold in winter |
| Grow room with space heater | Varies | Medium | Moderate | Risk of overheating entire space |
For most home gardeners, a basic seedling heat mat offers the best balance of cost, reliability, and control. Adding a thermostat takes it to the next level if you’re growing peppers, eggplant, or other heat-demanding crops.
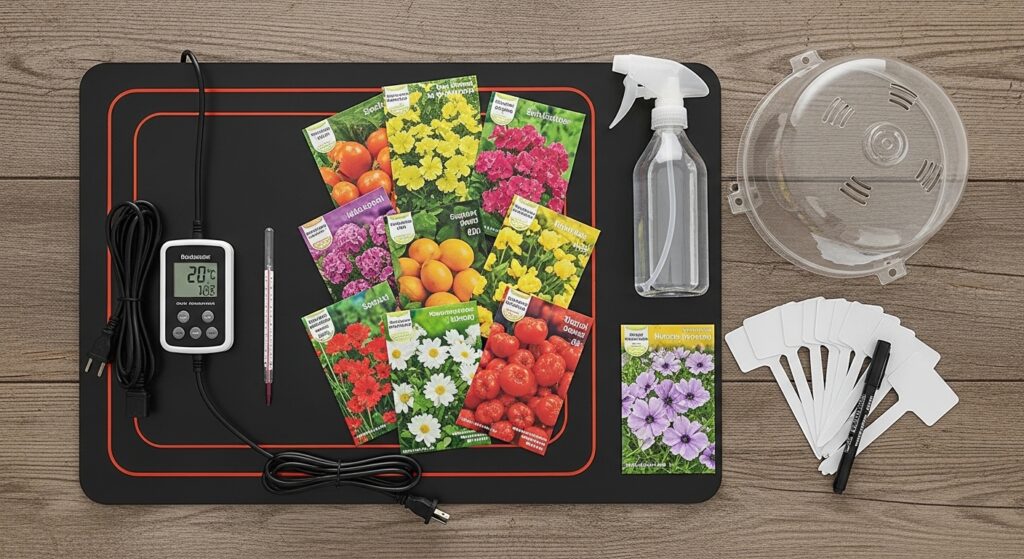
Choosing the Best Heat Mat for Seeds: What to Look For
With dozens of options on the market, here’s what to prioritize:
1. Size
Match the mat to your seed tray size. The most common size is 10″ x 20″, which fits a standard 1020 propagation flat. If you’re starting multiple trays, look at multi-tray sizes or buy multiple individual mats.
2. Thermostat Compatibility
If you’re buying a basic mat, make sure it’s thermostat-compatible — meaning you can buy a separately sold thermostat controller and pair it with the mat later. This gives you flexibility as your setup grows.
3. Wattage
Higher wattage means more heat output — useful in cold spaces. For most homes:
- 17–20 watts: Adequate for room temperatures 65°F and above
- 40–48 watts: Better for cool basements or garages (55–65°F ambient)
4. Water Resistance
Look for mats rated as waterproof or water-resistant. Seed starting involves watering — you want a mat that handles the occasional splash without shorting out.
5. Certification
Always choose mats with UL, ETL, or CE certification. Avoid cheap, uncertified products — these can be fire hazards and may not perform consistently.
6. Warranty
Reputable manufacturers (like Vivosun, Hydrofarm, and iPower) offer 1–3 year warranties. A warranty signals product confidence and protects your investment.
Tips From Experienced Seed Starters
These are real-world insights from gardeners who’ve dialed in their seed-starting setups over multiple seasons:
Tip 1: Always use a thermostat Even if your room stays at 70°F, a thermostat prevents overheating on warmer days. The investment of $20–$30 for a controller is almost always worth it.
Tip 2: Bottom-water your trays Instead of watering from above, set your tray inside a shallow pan of water and let the soil absorb moisture from below. This prevents disturbance to seeds and reduces the risk of damping-off fungal disease.
Tip 3: Stagger your plantings If you have one mat and many crops to start, stagger your planting schedule. Start peppers 10–12 weeks before last frost (they need the longest lead time), then move trays to a cooler shelf once they’ve germinated, freeing the mat for the next batch.
Tip 4: Label everything It sounds obvious, but in the excitement of seed starting, it’s easy to mix up trays. Use waterproof plant labels or masking tape with a Sharpie.
Tip 5: Keep a soil thermometer handy A simple soil thermometer (usually under $10) lets you verify actual soil temperature rather than relying on guesses. Soil temperature can vary significantly from what the mat’s built-in indicator suggests.
Tip 6: Don’t skip hardening off After your seedlings are ready to transplant, gradually expose them to outdoor conditions over 7–14 days before planting in the ground. This “hardening off” process prevents transplant shock. Cooperative Extension resources from your state university often provide crop-specific hardening schedules.
Common Mistakes to Avoid with Heat Mats
Even experienced gardeners make these mistakes. Learn from them before you start:
Leaving the mat on after germination Once your seedlings are up, continued heat can stress the plants and dry out the soil. Check daily and unplug once the majority have sprouted.
Overwatering because the soil looks dry on top Warm soil loses surface moisture quickly, but the deeper root zone may still be moist. Always check moisture an inch below the surface before watering.
Using a reptile or fermentation heating mat These aren’t certified for plant use, operate at different temperatures, and can damage seeds or create safety hazards. Only use mats specifically designed for seed germination.
Placing the mat on an insulating surface Foam, carpet, and wood shavings can prevent heat from dissipating properly, causing hot spots and uneven warming. Always use a solid, flat surface.
Skipping the humidity dome A heat mat will dry out your seed tray much faster than cold-germination methods. Without a dome or cover, you may find yourself watering twice a day — and still struggling with uneven moisture.
Planting cool-season seeds on a heat mat Lettuce, spinach, kale, and other brassicas prefer cool germination temperatures. Running them on a heat mat set to 80°F can actually inhibit germination.
Heat Mats for Specific Crops: Quick Reference
Not sure which of your seeds will benefit most from a germination mat? This table has you covered:
| Crop Type | Use a Heat Mat? | Ideal Soil Temp | Notes |
|---|---|---|---|
| Tomatoes | Yes | 70–85°F | Big difference in germination speed |
| Peppers | Strongly recommended | 75–85°F | Slowest germinators; heat essential |
| Eggplant | Yes | 75–85°F | Similar to peppers |
| Basil | Yes | 70–85°F | Fails easily in cold soil |
| Cucumbers | Yes | 70–95°F | Very responsive to heat |
| Squash | Yes | 70–95°F | Germinates well with heat |
| Melons | Yes | 75–95°F | Needs warmth to start |
| Lettuce | Use with caution | 60–65°F | Prefers cool; mat may inhibit |
| Spinach | Usually not | 45–75°F | Cool-season; no mat needed |
| Kale/Broccoli | Usually not | 45–85°F | Germinates fine at room temp |
| Marigolds | Helpful | 70–75°F | Speeds up germination |
| Petunias | Yes | 70–80°F | Tiny seeds; benefit from warmth |
Frequently Asked Questions (FAQs)
1. What temperature should a seedling heat mat be set to?
For most vegetables and herbs, aim for a soil temperature of 70–80°F (21–27°C). Peppers and eggplant prefer it slightly warmer — around 80–85°F (27–29°C). Cool-season crops like lettuce prefer 60–65°F (15–18°C) and usually don’t need a heat mat at all. If your mat doesn’t have a thermostat, check the soil temperature with a thermometer to ensure you’re in the right range.
2. How long should seeds stay on a heat mat?
Seeds should stay on the heat mat until the majority have germinated — typically 5–14 days depending on the crop. Once you see sprouts emerging from most of your cells, it’s time to remove the mat and move seedlings under a grow light. Leaving the mat on too long can dry out the soil rapidly and cause unnecessary stress to young plants.
3. Can I use a heating pad instead of a seedling heat mat?
Standard household heating pads are not recommended for seed starting. They aren’t designed for continuous use, aren’t waterproof, and can’t maintain consistent temperatures suited to seed germination. Purpose-built seed heat mats are UL-certified for extended use and specifically engineered to deliver consistent, plant-safe heat. Using an uncertified substitute also creates fire and electrical hazards.
4. Do I need a thermostat with my heat mat?
A thermostat isn’t strictly required, but it’s strongly recommended — especially if you’re growing peppers, eggplant, or other precise-temperature crops. Without one, the soil temperature is influenced heavily by room temperature, which can fluctuate throughout the day and night. A thermostat keeps soil within a 1–2°F range of your target, which makes a real difference in germination consistency. Many experienced growers consider a thermostat a must-have rather than an optional accessory.
5. Are seedling heat mats safe to leave on overnight?
Yes — quality seedling heat mats are designed to run continuously, including overnight and for days at a time. They draw very little power and include safety features to prevent overheating. That said, always use mats that are UL or ETL certified, place them on flat non-flammable surfaces, and pair them with a thermostat to prevent any temperature spikes. Inspect your mat periodically for damage to cords or the mat surface.
Conclusion: Is a Seedling Heat Mat Worth It?
If you’re serious about starting seeds indoors — especially heat-loving crops like tomatoes, peppers, eggplant, or basil — a seedling heat mat is one of the most impactful, affordable investments you can make.
It solves the single most common cause of germination failure: cold soil. By maintaining the warm, consistent root-zone temperature that seeds need, a good heat mat can turn weeks of waiting and frustration into reliable, fast germination results.
For beginners, a basic mat in the $15–$25 range paired with a simple humidity dome is a great starting point. If you’re growing peppers or running a more serious seed-starting operation, add a digital thermostat controller and you’ll have a professional-grade setup for under $60.
The seed-starting season is short. Give your seeds the best possible start — and a heat mat makes that easier than almost anything else you can add to your setup.
