

There’s something quietly powerful about growing your own food.
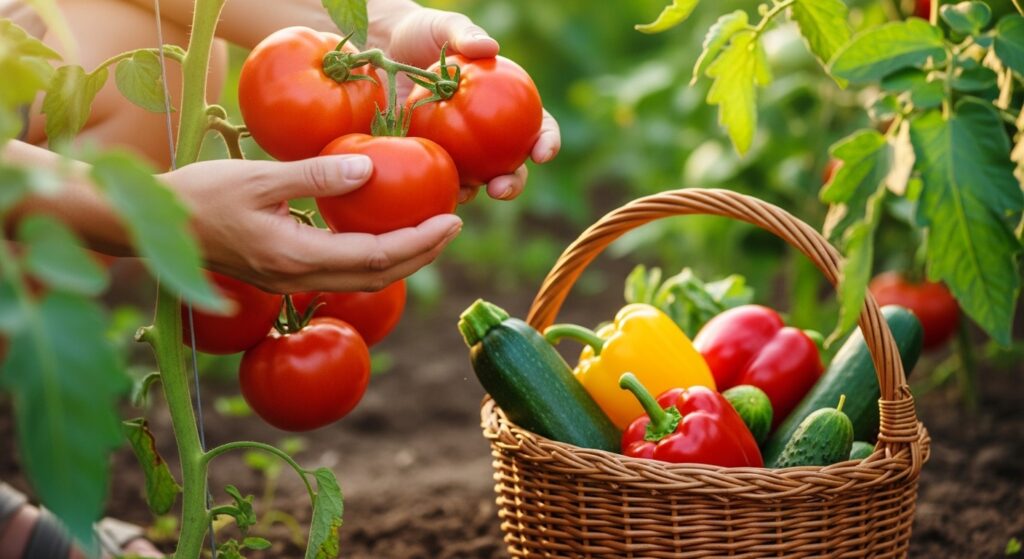
Maybe it starts with a single ripe tomato you pull off the vine on a warm summer morning — still warm from the sun, smelling like nothing you’ve ever bought at a grocery store. Or maybe it’s the first time you hand your kids a carrot they helped plant weeks ago, watching their faces light up with that specific kind of pride that only comes from making something real.
Whatever draws you to it, starting a vegetable garden is one of the most rewarding things you can do with a patch of soil and a little free time. And here’s the truth most beginners need to hear: it’s not nearly as complicated as it looks on Pinterest.
This guide breaks everything down — from picking your first spot to harvesting your first crop — in a way that’s honest, practical, and actually useful. Whether you’re working with a sprawling backyard or a few containers on a balcony, you’ll find what you need here to get started with confidence.
Why Start a Vegetable Garden? (The Real Reasons)
Before we dig into the how, let’s talk about the why — because it matters more than most gardening guides admit.
According to the National Gardening Association, food gardening participation in the United States has grown significantly in recent years, with millions of households growing some of their own food at home. And that number keeps climbing.
Why? A few reasons:
- Cost savings. Growing your own vegetables can dramatically reduce your grocery bill. The University of California Cooperative Extension estimates that a well-maintained vegetable garden can yield hundreds of dollars’ worth of produce per season.
- Nutritional value. Freshly harvested vegetables retain more nutrients than store-bought produce that’s been shipped and stored for days. Research published in the Journal of the Science of Food and Agriculture has shown that nutrient degradation in vegetables begins almost immediately after harvest.
- Mental health benefits. A growing body of research supports the connection between gardening and reduced anxiety, lower cortisol levels, and improved overall mood. A study published in the Journal of Health Psychology found that gardening outperformed reading as a stress-relieving activity.
- Food security. Knowing you can grow part of your own food supply, even a small part, creates a sense of self-reliance that’s hard to put a price on.
And honestly? Fresh vegetables just taste better. That alone is worth it.
Step 1: Choose the Right Location for Your Vegetable Garden
This is the single most important decision you’ll make as a beginner gardener. Get the location right, and everything else becomes easier.
Sunlight Is Non-Negotiable
Most vegetables need 6 to 8 hours of direct sunlight per day to thrive. This isn’t a suggestion — it’s biology. Crops like tomatoes, peppers, cucumbers, squash, and beans are sun lovers. Without enough light, they grow slowly, produce poorly, and become far more susceptible to disease.
The Old Farmer’s Almanac recommends spending a full day watching how sunlight moves across your yard before committing to a spot. What looks sunny in the morning might sit in afternoon shade from a nearby building or tree.
Quick sunlight test: Stand in your potential garden spot at 9 AM, noon, and 3 PM. If you’re in shade at any of those times, that spot gets fewer than 6 hours of direct sun.
What If You Don’t Have Full Sun?
If your available space only gets 4–6 hours of sun, you still have options. Focus on cool-season crops and leafy greens — these are more shade-tolerant:
- Lettuce
- Spinach
- Kale
- Swiss chard
- Arugula
- Herbs like parsley and cilantro
Proximity to Water
Your garden should be close to a water source. Walking 200 feet with a heavy watering can every day in July gets old very fast. Being close to an outdoor spigot or hose connection makes the routine sustainable.
Avoid These Problem Spots
- Under trees: Root competition, shade, and fallen debris will suffocate your garden.
- Low-lying areas: Water pools here after rain, leading to root rot.
- Near black walnut trees: These trees release a chemical called juglone that’s toxic to many vegetable plants, according to Penn State Extension.
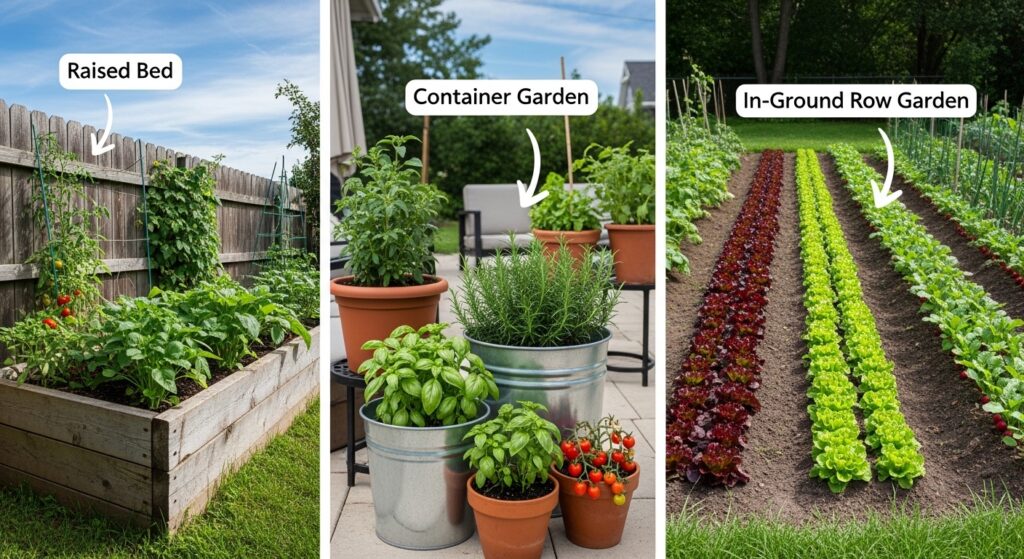
Step 2: Decide What Type of Garden You Want
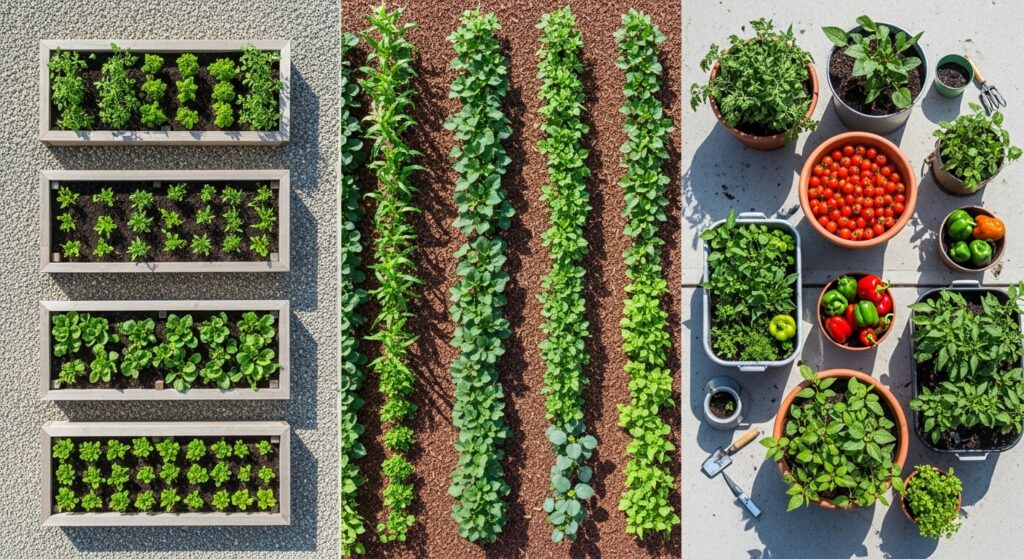
Once you’ve found your location, you need to decide on your garden’s structure. There are three main approaches, each with its own strengths.
In-Ground Gardens
The classic approach — you’re planting directly into your existing soil. It’s the lowest upfront cost and works well if your native soil is reasonably healthy.
Pros:
- Lowest startup cost
- No containers or materials to buy
- Easier to scale up
Cons:
- Heavily dependent on native soil quality
- May require significant amendment if soil is poor
- More weeding in most cases
Raised Bed Gardens
Raised beds are elevated planting areas — typically wooden frames filled with a curated soil mix. They’ve become the most popular option for home vegetable gardening for good reason.
Pros:
- Excellent drainage
- You control the soil quality completely
- Fewer weeds
- Easier on your back (less bending)
- Warms up faster in spring
Cons:
- Higher initial cost (materials + soil)
- Requires watering more frequently (dries out faster)
- Limited depth for deep-rooted crops
The University of Vermont Extension recommends raised beds as the top choice for beginning gardeners because of the control they offer over growing conditions.
Container Gardens
Perfect for patios, balconies, or small yards. Any large container with drainage holes can become a vegetable garden.
Pros:
- Works in almost any space
- Highly portable
- No in-ground soil problems
Cons:
- Requires frequent watering (sometimes twice daily in summer)
- Limited root space restricts what you can grow
- Soil dries and depletes faster
Best vegetables for containers: Tomatoes (compact varieties), peppers, herbs, lettuce, spinach, radishes, and green onions.
Step 3: Start Small — The Biggest Beginner Mistake
Here’s the mistake every enthusiastic beginner makes: they start too big.
They till up half the backyard in March, buy 40 seedlings, and then wonder in June why they’re overwhelmed, behind on weeding, and questioning all of their life choices.
Start with a 4×8 foot raised bed or a 4×4 foot in-ground plot. That’s it. Really.
That size is manageable, productive enough to feel rewarding, and small enough that you can actually stay on top of maintenance while you’re learning.
Cornell University Cooperative Extension consistently advises new gardeners to start with a small plot and expand only after they’ve had a full season of experience. You’ll learn your climate, your soil, your watering habits, and your actual available time — all of which are impossible to fully predict before you start.
A 4×8 foot bed can realistically grow:
- 1–2 tomato plants
- 2 pepper plants
- A row of lettuce or spinach
- A few herb plants
- A cucumber or squash (vertical on a trellis)
That’s a genuinely productive garden that won’t consume your weekends.
Step 4: Understand and Improve Your Soil
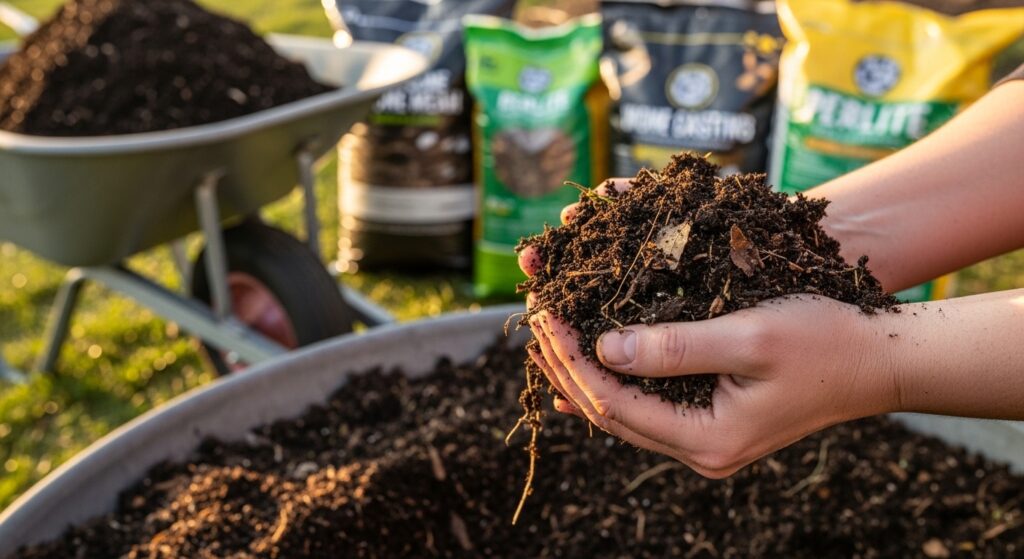
Experienced gardeners say it constantly, and it’s completely true: grow the soil, and the soil will grow the vegetables.
Vegetable plants are heavy feeders. They need soil that drains well, holds moisture, is rich in organic matter, and has a balanced pH. Most native backyard soils need improvement before they’ll support a productive vegetable garden.
Test Your Soil First
Before you amend anything, get a soil test. Many gardeners skip this, and it’s one of the most consequential mistakes you can make.
A basic soil test tells you:
- pH level (ideal for most vegetables: 6.0–7.0)
- Nutrient levels (nitrogen, phosphorus, potassium)
- Organic matter content
You can get an inexpensive test kit at most garden centers, or send a sample to your local Cooperative Extension office for a more detailed analysis. Extension soil labs often cost $15–$30 and give you precise recommendations for what your specific soil needs.
The Perfect Vegetable Garden Soil Formula
For raised beds, the most commonly recommended mix is:
| Ingredient | Proportion | Purpose |
|---|---|---|
| Topsoil or native soil | 60% | Base structure |
| Compost | 30% | Nutrients + microbial life |
| Coarse sand or perlite | 10% | Drainage |
The famous “Mel’s Mix” from Square Foot Gardening uses equal thirds of compost, peat moss (or coconut coir), and coarse vermiculite — a premium blend worth considering for raised beds.
Amending In-Ground Soil
If you’re planting in the ground, work in at least 3–4 inches of compost before planting. This is the single most effective improvement you can make.
Additional amendments to consider:
- Lime: Raises pH in acidic soil
- Sulfur: Lowers pH in alkaline soil
- Aged manure: Adds nitrogen and organic matter
- Worm castings: Premium organic fertilizer
The USDA Natural Resources Conservation Service provides free resources on understanding and improving soil health — a genuinely useful starting point for any new gardener.
Step 5: Choose What to Grow (And When)
This is the fun part. But it’s also where beginners can get overwhelmed fast. Walking into a seed store or scrolling through an online catalog with hundreds of options is exciting — until it becomes paralyzing.
Start With These Beginner-Friendly Vegetables
These crops are forgiving, productive, and well-suited to new gardeners:
Easy to grow from seed:
- Lettuce and salad greens
- Radishes (ready in as little as 25 days)
- Beans (bush beans especially)
- Zucchini / summer squash
- Sunflowers (great companion plant)
- Peas
Easier to start as transplants (buy seedlings from a nursery):
- Tomatoes
- Peppers
- Eggplant
- Broccoli and cauliflower
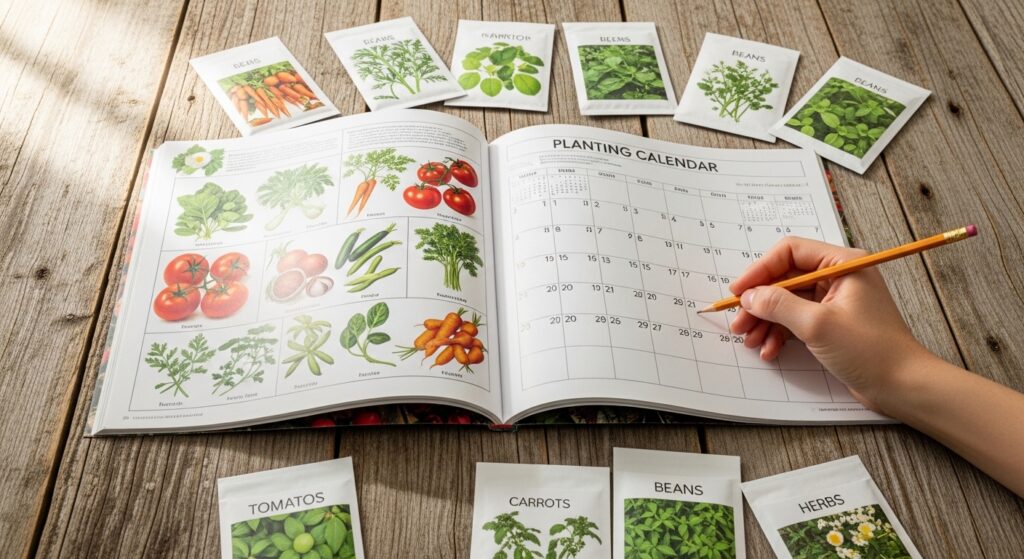
Know Your Hardiness Zone
Before you plant anything, you need to know your USDA Plant Hardiness Zone. This tells you your average minimum winter temperature, which determines what you can grow and when your last frost date occurs.
Your last frost date is the most critical date in your gardening calendar. Planting warm-season crops (tomatoes, peppers, cucumbers) before the last frost can kill them overnight.
The Farmer’s Almanac Frost Date Calculator lets you enter your zip code and get your specific last frost date — use it every year.
Cool-Season vs. Warm-Season Crops
Understanding this distinction will save you from common mistakes:
Cool-season crops (thrive in spring and fall, tolerate light frost):
- Lettuce, spinach, kale, arugula
- Broccoli, cabbage, Brussels sprouts
- Peas, carrots, beets, radishes
Warm-season crops (planted after last frost, need heat to thrive):
- Tomatoes, peppers, eggplant
- Cucumbers, squash, melons
- Beans, corn
A productive garden often includes both — cool-season crops planted in early spring, then warm-season crops filling in as temperatures rise.
Step 6: Plan Your Garden Layout
Companion Planting: The Basics
Not all vegetables make good neighbors. Companion planting — strategically placing compatible crops near each other — can improve yields, deter pests, and make better use of space.
Beneficial pairings:
| Plant | Good Neighbors | Avoid |
|---|---|---|
| Tomatoes | Basil, carrots, parsley | Fennel, cabbage |
| Beans | Carrots, cucumbers, squash | Onions, garlic |
| Lettuce | Carrots, radishes, strawberries | Celery |
| Peppers | Basil, tomatoes, carrots | Fennel |
| Cucumbers | Beans, peas, sunflowers | Aromatic herbs |
The National Sustainable Agriculture Information Service (ATTRA) maintains excellent resources on companion planting strategies if you want to go deeper.
Spacing Matters
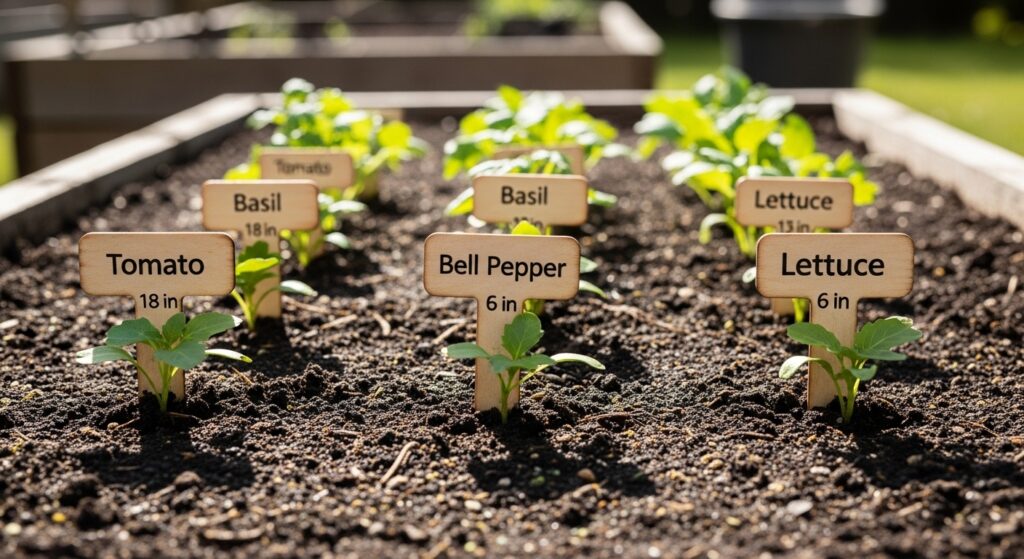
Overcrowding is the most common cause of poor yields and disease in beginner gardens. Good airflow between plants reduces fungal disease and allows each plant to access adequate nutrients and water.
General spacing guidelines:
- Tomatoes: 24–36 inches apart
- Peppers: 18–24 inches apart
- Lettuce/greens: 6–8 inches apart
- Cucumbers: 12 inches apart (vertical growing reduces this)
- Zucchini: 24–36 inches (these get enormous)
- Carrots: 2–3 inches apart
- Beans: 4–6 inches apart
Always check the seed packet or plant tag — it contains the most accurate spacing information for that specific variety.
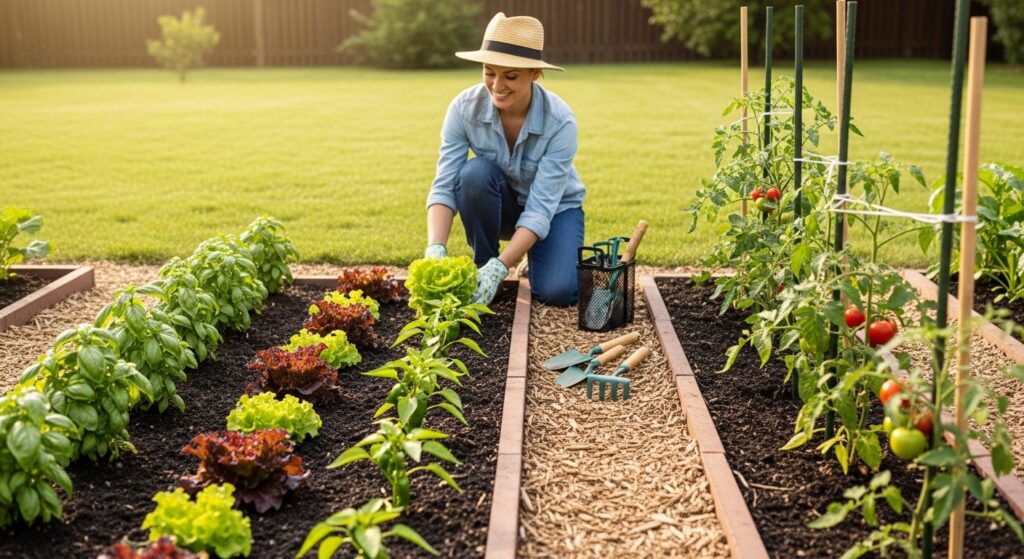
Step 7: Plant Your Garden

Starting From Seeds vs. Buying Transplants
Both approaches work well — the choice depends on your timeline and resources.
Starting from seed:
- Cheaper (seed packets typically cost $2–$5 each)
- More variety selection
- Requires planning ahead (many seeds need 6–8 weeks indoors before transplanting)
- Requires grow lights or a very sunny window
Buying transplants:
- More expensive (typically $3–$8 per plant)
- Convenient — just plant and go
- Shorter time to harvest
- Best for crops that are slow-starting (tomatoes, peppers, broccoli)
For most beginners, a hybrid approach works well: buy transplants for slow-growing crops (tomatoes, peppers) and direct-sow fast-growing crops (beans, lettuce, carrots, radishes) directly into the garden.
How to Plant Transplants Correctly
- Water the transplant thoroughly before removing it from its container
- Dig a hole slightly wider and slightly deeper than the root ball
- Remove the transplant gently, keeping the root ball intact
- Place in the hole — tomatoes can be buried deeply (they root along their stem)
- Backfill with soil and firm gently around the base
- Water immediately and thoroughly after planting
- Add a layer of mulch around the base (not touching the stem)
Direct Sowing Seeds
- Use your finger or a pencil to create a small furrow at the correct depth (check seed packet — usually 2–3x the diameter of the seed)
- Place seeds at the recommended spacing
- Cover lightly with soil
- Water gently — a gentle shower setting, not a blast that moves the seeds
- Keep soil moist until germination (usually 5–14 days depending on crop)
- Thin seedlings to the recommended spacing once they reach 2 inches tall — this is painful but necessary
Step 8: Water the Right Way
Overwatering kills more vegetable gardens than underwatering. This is one of the most consistent observations from extension gardening educators across the country.
How Much Water Do Vegetables Need?
Most vegetable gardens need approximately 1 inch of water per week — from rainfall, irrigation, or both. During hot, dry weather, this can increase to 2 inches.
The best way to measure this: place an empty tuna can in your garden while you water. When it’s full, that’s roughly 1 inch.
When to Water
Morning is best. Watering in the morning allows foliage to dry during the day, which dramatically reduces fungal disease. Avoid watering at night whenever possible.
How to Water
- Water at the base of plants — not overhead on the leaves. Wet foliage promotes disease.
- Water deeply and less frequently — this encourages deep root growth that makes plants more drought-tolerant.
- Check soil moisture before watering — push your finger 2 inches into the soil. If it’s moist, skip watering that day.
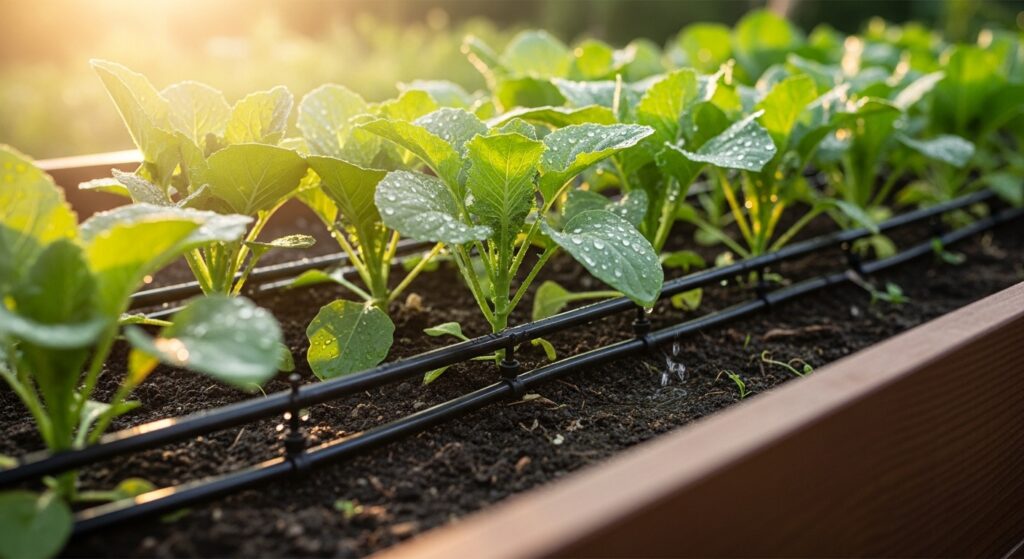
Best Watering Methods for Beginners
Drip irrigation is considered the gold standard for vegetable gardens. It delivers water directly to the root zone, minimizes evaporation, and keeps foliage dry. Basic drip systems from brands like DripWorks or those available at hardware stores are surprisingly affordable and easy to install.
Soaker hoses are a more affordable alternative that work on a similar principle.
A simple timer attached to your spigot can automate this entirely — a major time saver once your garden is established.
Step 9: Fertilize to Fuel Growth
Even rich, well-amended soil gets depleted as plants grow. Fertilizing is what keeps your garden producing at its peak through the season.
Understanding Fertilizer Labels
Every fertilizer bag shows three numbers — the N-P-K ratio:
- N (Nitrogen): Promotes leafy, green growth
- P (Phosphorus): Supports root development and fruiting
- K (Potassium): Strengthens stems and overall plant health
For vegetable gardens, the approach changes by crop type:
- Leafy greens (lettuce, spinach, kale): Higher nitrogen
- Fruiting crops (tomatoes, peppers, cucumbers): Balanced or higher P-K once flowering begins — too much nitrogen leads to lots of leaves but little fruit
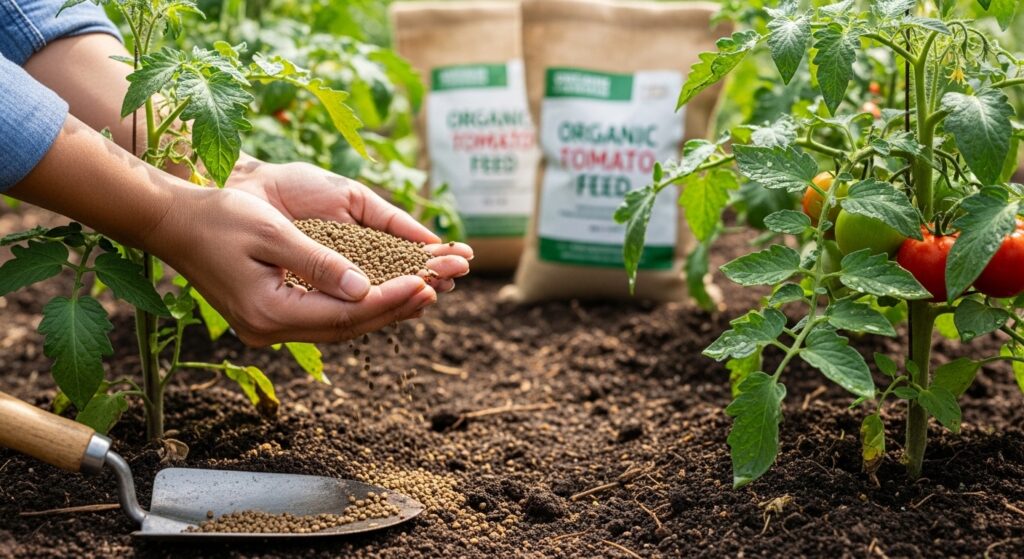
Organic vs. Synthetic Fertilizers
Organic fertilizers (compost, fish emulsion, worm castings, blood meal, bone meal):
- Release nutrients slowly and steadily
- Improve soil biology over time
- Lower risk of burning plants
- USDA National Organic Program guidelines cover certified organic inputs
Synthetic fertilizers:
- Act faster
- More precise
- Can burn plants if over-applied
- Don’t build soil health
For most home vegetable gardeners, a combination works well: top-dress with compost at the start of the season, then use a balanced liquid fertilizer like fish emulsion every 2–3 weeks once plants are actively growing.
Step 10: Manage Pests and Disease Without Panicking
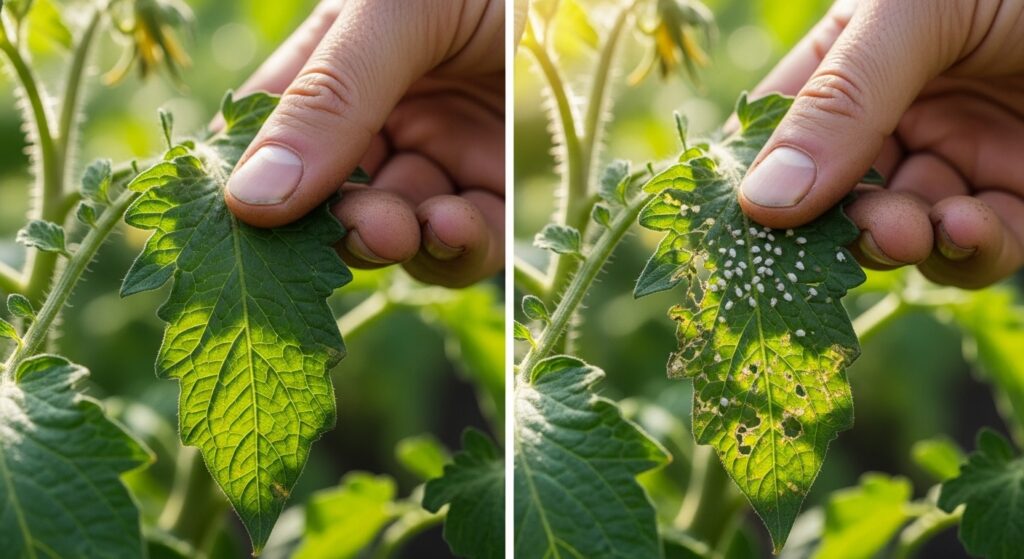
Every garden deals with pests and disease. This is normal. The goal isn’t to eliminate all insects — it’s to maintain a healthy balance where your plants thrive despite occasional challenges.
The Most Common Vegetable Garden Pests
Aphids: Tiny, soft-bodied insects clustered on stems and new growth. Spray off with a strong water jet or apply insecticidal soap.
Tomato hornworms: Large green caterpillars that can strip a tomato plant overnight. Hand-pick them — they’re harmless to humans.
Squash vine borers: A major pest for zucchini and squash. Look for wilting vines and small entry holes at the base of stems.
Slugs and snails: Active at night and in wet conditions. Copper tape, diatomaceous earth, or beer traps are effective deterrents.
Cabbage worms: White butterflies lay eggs that hatch into green caterpillars on brassicas. Row covers prevent egg-laying.
Integrated Pest Management (IPM)
The EPA’s Integrated Pest Management approach prioritizes the least toxic solutions:
- Prevention: Healthy soil, proper spacing, crop rotation
- Monitoring: Regular inspection so you catch problems early
- Biological controls: Encourage beneficial insects (ladybugs, lacewings, parasitic wasps)
- Mechanical controls: Hand-picking, row covers, traps
- Organic sprays: Neem oil, insecticidal soap, BT (Bacillus thuringiensis)
- Synthetic pesticides: Last resort only
Common Diseases to Know
Blight (early and late): Affects tomatoes and potatoes. Water at the base, improve airflow, and remove affected leaves immediately.
Powdery mildew: White powdery coating on leaves. Improve airflow, avoid overhead watering, and apply a baking soda spray (1 tablespoon per gallon of water) at first sign.
Damping off: Seedling collapse at soil level, caused by fungal pathogens. Use sterile seed-starting mix and avoid overwatering seedlings.
Step 11: Mulch — The Gardener’s Best Friend
Mulch is often called the single most impactful thing you can do for a vegetable garden after watering and fertilizing. A 2–3 inch layer of organic mulch around your plants:
- Retains soil moisture (reduces watering frequency by up to 50%)
- Suppresses weeds dramatically
- Regulates soil temperature
- Breaks down over time and feeds the soil
Best mulch options for vegetable gardens:
- Straw: Light, affordable, excellent moisture retention (avoid hay, which contains weed seeds)
- Shredded leaves: Free if you have trees — let them dry before using
- Wood chips: Better for pathways between beds than directly around vegetables
- Compost: Can double as both mulch and fertilizer
Apply mulch after planting but keep it a few inches away from plant stems to prevent rot and discourage pests.
Step 12: Harvest at the Right Time
Here’s something that surprises most new gardeners: the more you harvest, the more the plant produces.
Many vegetables — particularly beans, cucumbers, zucchini, and peppers — will slow or stop producing if you leave ripe fruit on the plant. Regular harvesting signals to the plant that it needs to keep producing.
General Harvest Timing Guidelines
| Vegetable | Harvest When… |
|---|---|
| Tomatoes | Fully colored and slightly soft to the touch |
| Zucchini | 6–8 inches long (don’t let them become baseball bats) |
| Cucumbers | Dark green, firm, before they yellow |
| Beans | Pods are firm and snap cleanly |
| Lettuce | Leaves are full-sized but before the plant bolts |
| Peppers | Can harvest green or let ripen to red/yellow/orange |
| Carrots | Check one — if it’s the right size and color, harvest |
Check your garden every 1–2 days during peak season. Things grow faster than you expect in summer heat.
Expert Tips from Experienced Vegetable Gardeners
After dozens of conversations with experienced home gardeners and reviewing guidance from Cooperative Extension programs across the country, these expert-level tips come up again and again:
1. Keep a garden journal. Write down what you planted, when, what worked, and what didn’t. A single season’s notes become invaluable the following year. Apps like GrowVeg’s Garden Planner can digitize this process.
2. Don’t skip crop rotation. Avoid planting the same family of vegetables in the same spot two years in a row. This breaks pest and disease cycles and prevents soil nutrient depletion. The UC Davis Vegetable Research and Information Center provides detailed rotation guides.
3. Feed your soil, not just your plants. Adding compost every season is the long-term strategy that separates thriving gardens from struggling ones. The Rodale Institute, one of the leading organic farming research organizations, consistently documents how soil organic matter drives plant health.
4. Learn to identify beneficial insects. Ladybugs, lacewings, ground beetles, parasitic wasps, and bees are your allies. Broad-spectrum pesticide use kills them. The Xerces Society has an excellent guide to beneficial garden insects.
5. Water in the morning and mulch deeply. Two habits that solve more problems than almost anything else.
6. Accept imperfection. Your first garden won’t be perfect. Neither will your second. Experienced gardeners have all killed plants, battled mystery pests, and watched entire crops fail. It’s part of the process — and each failure makes you a better grower.
Beginner Vegetable Gardening: Common Mistakes to Avoid
Even with a solid guide, a few mistakes are predictably common among first-time vegetable gardeners. Here’s what to watch for:
Starting too big. Already covered, but worth repeating. Start small and expand when you’re ready.
Planting before the last frost date. One overnight frost after you’ve planted your tomatoes is a heartbreaking lesson. Know your last frost date.
Overwatering. More plants die from wet roots than from drought. The finger-in-soil test is your best tool.
Skipping soil amendment. Planting directly into hard, depleted, clay, or sandy native soil is setting yourself up for failure. Always amend before planting.
Ignoring plant labels. Seed packets and plant tags contain all the critical information — spacing, depth, days to maturity, light requirements. Read them.
Not thinning seedlings. It feels wrong to pull out perfectly healthy seedlings, but overcrowded plants are weak, disease-prone, and unproductive. Thin ruthlessly.
Fertilizing at the wrong time. Too much nitrogen when tomatoes are flowering sends energy into leaves rather than fruit. Match your fertilizer to what the plant is actually doing.
Vegetable Gardening Tools You Actually Need
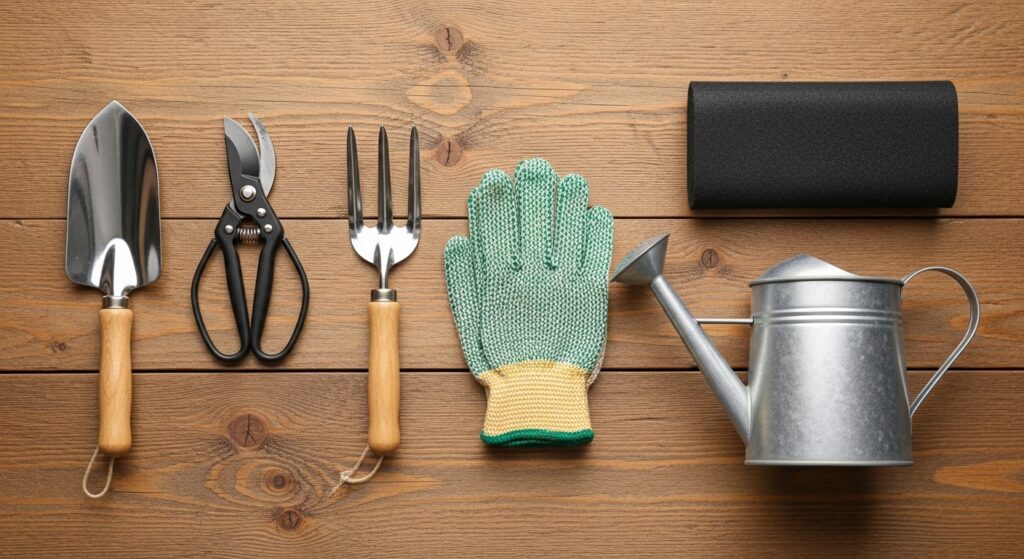
You don’t need an expensive collection of tools to start gardening well. A small set of quality basics is all you need:
Essential tools:
- Hand trowel: For transplanting and digging small holes
- Garden fork or hoe: For loosening soil and incorporating amendments
- Pruning shears / hand pruners: For harvesting, deadheading, and general plant maintenance
- Watering can or hose with adjustable nozzle: For seedlings especially
- Gardening gloves: Protect your hands and improve grip
Nice to have:
- Garden kneeling pad (your knees will thank you)
- Soil thermometer (useful for knowing when to plant)
- Plant labels / garden markers
- Drip irrigation timer
Avoid: Cheap tools that break quickly. A quality hand trowel from a brand like Fiskars or Radius Garden will outlast a dozen cheap alternatives. Buy quality once.
Seasonal Vegetable Garden Calendar
This is an approximate guide — always adjust to your specific zone and last frost date.
| Season | What to Do |
|---|---|
| Late Winter | Order seeds, start slow-growing crops indoors (tomatoes, peppers) |
| Early Spring | Prepare beds, amend soil, plant cool-season crops outside |
| Mid Spring | Harden off transplants, direct sow warm-season crops indoors |
| After Last Frost | Plant warm-season transplants outside |
| Early Summer | Mulch, water regularly, begin fertilizing |
| Peak Summer | Harvest frequently, monitor for pests, succession plant if desired |
| Late Summer | Begin planning fall garden, direct sow fall crops |
| Fall | Plant cool-season crops again, harvest and clear beds |
| Winter | Review garden journal, plan next year, order seeds early |
Frequently Asked Questions (FAQs)
1. How do I start a vegetable garden as a complete beginner?
Start by choosing a sunny spot (at least 6 hours of direct sun daily), decide on a small 4×4 or 4×8 raised bed, amend your soil with compost, and choose 4–6 beginner-friendly crops like tomatoes, lettuce, beans, and herbs. Water at the base of plants, mulch well, and fertilize every 2–3 weeks. Starting small is the most important decision you can make — you can always expand next season.
2. What is the best time of year to start a vegetable garden?
It depends on where you live and what you’re growing. Cool-season crops (lettuce, peas, spinach) can be planted 4–6 weeks before your last frost date in spring. Warm-season crops (tomatoes, peppers, cucumbers) should go in the ground after your last frost. Use the Farmer’s Almanac Frost Date Calculator to find your specific dates.
3. How much space do I need to start a vegetable garden?
You can grow a productive vegetable garden in as little as 4×4 feet — or even in containers on a balcony. More space allows more variety, but a small, well-maintained garden is far more productive than a large, neglected one. Start with what you can realistically manage.
4. What vegetables are easiest to grow for beginners?
The easiest vegetables for new gardeners include: zucchini, lettuce, radishes, green beans, cherry tomatoes, herbs (basil, parsley, chives), and cucumbers. These crops are fast-growing, forgiving, and rewarding. Avoid starting with notoriously difficult crops like celery, melons, or artichokes until you have a season or two under your belt.
5. How do I know if my vegetable garden is getting enough water?
The most reliable method is the finger test: push your finger 2 inches into the soil near your plants. If the soil is dry at that depth, it’s time to water. If it’s still moist, wait and check again tomorrow. Most vegetable gardens need the equivalent of 1 inch of water per week. Installing a simple rain gauge near your garden helps you track rainfall and adjust supplemental watering accordingly.
Conclusion: Your First Garden Is Closer Than You Think
Starting a vegetable garden doesn’t require a green thumb, a big yard, or years of experience. It requires a patch of sun, some decent soil, a few good seeds, and the willingness to pay attention.
The learning curve is real — you will make mistakes, deal with pests, and probably lose a few plants along the way. Every experienced gardener has a story about the season that humbled them. What separates successful gardeners from those who give up isn’t talent; it’s just showing up consistently.
Start small. Learn your soil. Water at the root. Harvest often. And take notes.
Your first tomato pulled straight from the vine, still warm from the afternoon sun, will make every bit of effort worth it.
Ready to get growing?
Download a free garden planning worksheet, explore seed catalogs at Baker Creek Heirloom Seeds or Johnny’s Selected Seeds, and check in with your local Cooperative Extension office for region-specific planting guides. They offer free advice tailored to exactly where you live.
The soil is waiting. Go dig something.
