
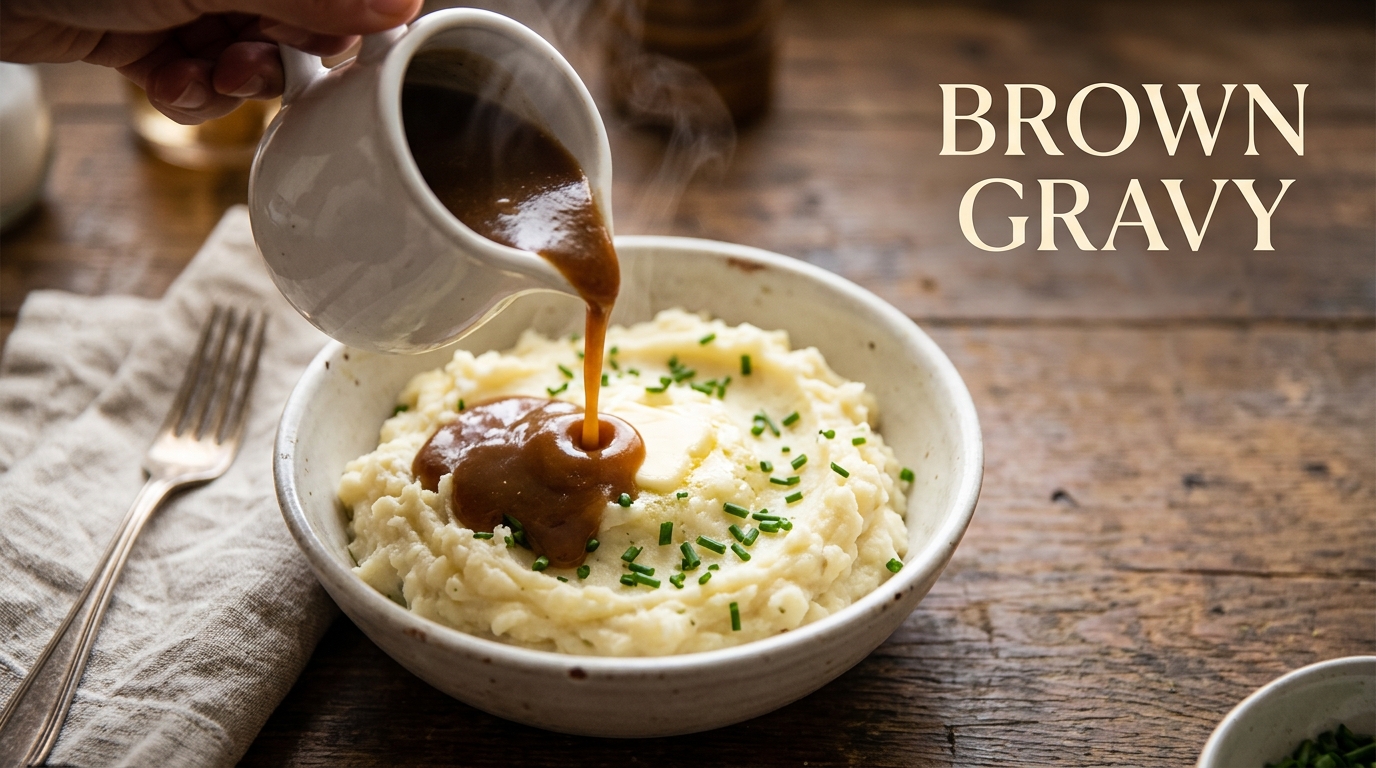
If your roast didn’t leave behind any pan drippings, or you just want a fast, reliable sauce for a weeknight dinner, you can still learn how to make brown gravy that tastes rich and homemade. All you really need is fat, flour, and a good stock or broth. In fact, a basic batch comes together in about 15 minutes using nothing more than butter, flour, and beef broth, so you don’t need a roast in the oven to enjoy a proper gravy boat on the table.
This guide walks through the classic roux method, a couple of no-drippings shortcuts, the difference between thickening with flour and cornstarch, and how to fix gravy that turns out lumpy, thin, or pale. There’s also a section on storing leftovers safely, since gravy is one of those foods that spoils faster than people expect.
What Is Brown Gravy, Exactly?
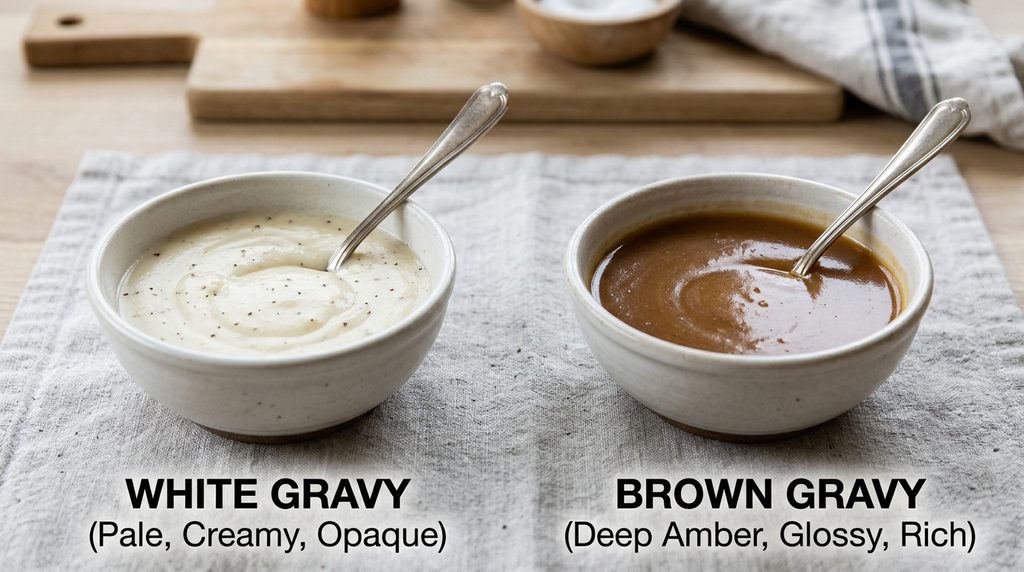
Brown gravy is a savory sauce built on a base of fat and flour that has been cooked until it darkens slightly, then loosened with a liquid like beef broth, chicken stock, or pan drippings. The browning step is what separates it from a plain white sauce or bechamel. Cooking the flour a bit longer toasts the starch and proteins, which gives the finished sauce a deeper color and a faint nutty flavor instead of a raw, pasty taste.
It’s traditionally served over roasted meats, mashed potatoes, meatloaf, biscuits, or open-faced sandwiches. Unlike a pan gravy made strictly from drippings, brown gravy from scratch can be made anytime, with pantry staples, whether or not you happen to be roasting something that day.
What You Need to Make Brown Gravy From Scratch
You only need a handful of ingredients, and most of them are things most kitchens already have on hand.
| Ingredient | Amount (makes ~2 cups) | Purpose |
|---|---|---|
| Unsalted butter or pan drippings | 4 tablespoons | Base fat for the roux |
| All-purpose flour | 4 tablespoons | Thickener |
| Beef broth or stock | 2 cups | Main liquid and flavor |
| Salt | To taste | Seasoning |
| Black pepper | To taste | Seasoning |
| Worcestershire sauce (optional) | 1 teaspoon | Adds color and umami depth |
| Onion or garlic powder (optional) | 1/4 teaspoon each | Extra savoriness |
A whisk is non-negotiable here. Whisking constantly is what keeps the flour from clumping as it hits hot liquid, and it’s the single biggest factor in whether your gravy turns out silky or lumpy.
How to Make Brown Gravy Step by Step
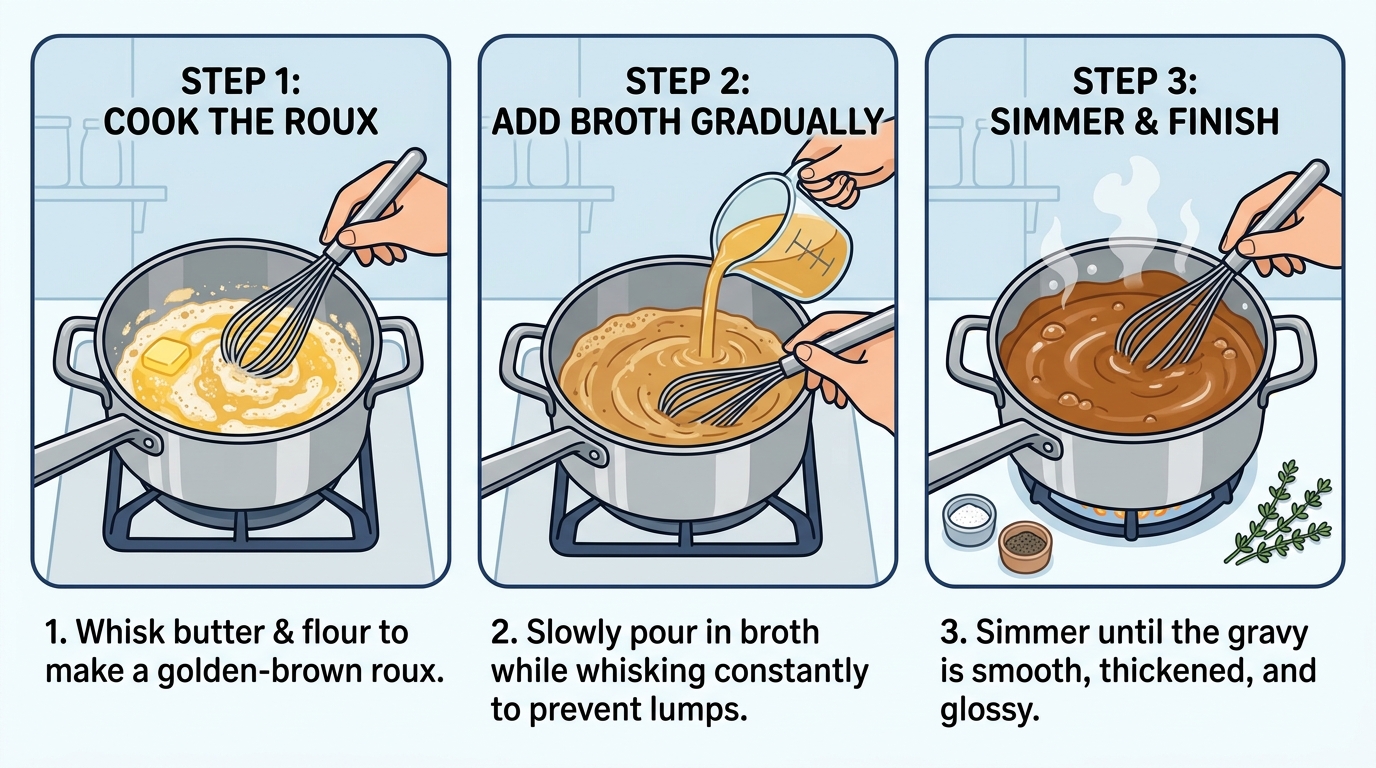
This is the classic roux-based method, and it’s the one most cooks reach for because it produces a stable, freezer-friendly gravy with good body.
Step 1: Build the Roux
Melt the butter in a saucepan or skillet over medium heat. Once it’s fully melted and just starting to foam, whisk in the flour all at once. Keep whisking for two to four minutes. The mixture will look pasty at first, then gradually turn a light golden or amber color and start to smell toasted rather than raw. This is the roux, and cooking it properly here is what cooks off the starchy flavor before any liquid gets added.
Step 2: Add the Liquid Gradually
Pour in the broth in small splashes rather than all at once, whisking after each addition. Adding liquid slowly, especially at the start, helps the roux absorb it smoothly instead of seizing into clumps. Once about half the broth is incorporated and the mixture looks smooth, you can add the rest more quickly.
Step 3: Simmer and Season
Bring the gravy to a gentle simmer and let it cook for three to five minutes, stirring often, until it coats the back of a spoon. Taste, then adjust with salt, pepper, and Worcestershire sauce if using. If it’s thicker than you’d like, whisk in a splash more broth or water. If it’s too thin, let it simmer a bit longer; gravy also continues to thicken slightly as it cools.
Two Ways to Make Brown Gravy Without Drippings
Not every meal produces pan drippings, and that’s fine. These two approaches skip the roast entirely.
Butter and Broth Method
This is essentially the roux method above, using store-bought beef or chicken broth instead of drippings. Since broth has less natural fat and gelatin than drippings, using a full-bodied stock (rather than a thin broth) gives a noticeably richer result. Adding a teaspoon of Worcestershire sauce or a splash of soy sauce also helps replace the savory depth that drippings would normally contribute.
Bouillon and Cornstarch Method
For a faster, roux-free version, dissolve a beef bouillon cube or a tablespoon of bouillon paste in hot water, then thicken it with a cornstarch slurry (equal parts cornstarch and cold water, whisked smooth before adding). Bring it to a simmer, whisking constantly, until it thickens and turns glossy. This method is quicker and doesn’t require cooking a roux, but the texture is thinner and glossier than a flour-based gravy, and it’s less forgiving when reheated.
If you happen to have turkey drippings on hand instead, from a holiday roast, for example, the technique changes slightly since drippings already carry fat and flavor that a roux built from plain butter doesn’t have. A closer look at how to build gravy directly from turkey drippings walks through that version step by step, including how much fat to skim and how to deglaze the pan properly.
Flour vs. Cornstarch: Which Thickener Should You Use?
Both work, but they behave differently, and the right choice depends on what you’re serving and whether you plan on reheating leftovers.
| Factor | Flour (Roux) | Cornstarch (Slurry) |
|---|---|---|
| Appearance | Opaque, traditional matte finish | Glossy, slightly translucent |
| Flavor | Nutty if browned properly | Neutral |
| Thickening power | About half as strong per tablespoon | Roughly twice as strong as flour |
| Reheats well? | Yes, holds texture | Can turn stringy or thin when reheated |
| Gluten-free? | No | Yes |
| Best for | Traditional pan gravy, make-ahead batches | Quick weeknight gravy, gluten-free needs |
Flour has roughly half the thickening power of pure starches like cornstarch because the protein in flour dilutes its starch content, while cornstarch granules absorb liquid and expand more efficiently, giving a more translucent finish. That’s a useful rule of thumb if you’re substituting one for the other mid-recipe: use about twice as much flour as the cornstarch a recipe calls for, or half as much cornstarch as the flour.
Common Mistakes That Ruin Brown Gravy
- Adding flour directly to hot liquid. This is the number one cause of lumps. Flour needs to be mixed with fat (a roux) or cold water (a slurry) before it meets heat.
- Undercooking the roux. A roux that’s only cooked for thirty seconds still tastes like raw flour, no matter how much salt you add afterward.
- Adding all the liquid at once. This shocks the roux and encourages clumping. Go slow, especially for the first cup.
- Not whisking constantly. Gravy needs near-continuous attention for the few minutes it’s on the heat.
- Over-salting with bouillon. Bouillon cubes and canned broths are often high in sodium already, so taste before adding extra salt.
- Boiling cornstarch-thickened gravy too long. Cornstarch can break down and thin back out if it’s simmered aggressively for too long after it thickens.
Troubleshooting: Lumpy, Thin, or Pale Gravy
Even careful cooks run into these issues occasionally. Here’s how to fix each one without starting over.
| Problem | Likely Cause | Fix |
|---|---|---|
| Lumpy texture | Flour added too fast or liquid too hot | Strain through a fine-mesh sieve, or blend briefly with an immersion blender |
| Too thin | Not enough thickener, or undercooked | Simmer longer, or whisk in a small cornstarch slurry |
| Too thick | Too much flour, or over-reduced | Whisk in warm broth a splash at a time |
| Pale color | Roux wasn’t cooked long enough, or no browning agent used | Cook the roux a minute or two longer, or add a small splash of soy sauce or a browning-and-seasoning sauce |
| Tastes flat | Under-seasoned, or broth was weak | Add Worcestershire sauce, a bouillon cube, or a splash of vinegar to brighten it |
How to Store and Reheat Brown Gravy Safely
Homemade gravy is a low-acid, high-moisture food, which means it can support bacterial growth if it sits at room temperature too long. The Food Safety and Inspection Service notes that bacteria multiply fastest in the “danger zone” between 40°F and 140°F, so gravy should never be left out on the counter for more than two hours.
Once cooked, cool the gravy quickly by transferring it to a shallow container rather than a deep pot, then refrigerate it. Gravy and meat broth should generally be used within one to two days of refrigeration, which is a shorter window than many other leftovers like soups or casseroles. If you want to keep it longer, freeze it in an airtight container for up to about two months; flour-thickened gravy tends to hold its texture in the freezer better than cornstarch-thickened gravy does.
When reheating, A guidance recommends bringing sauces and gravies back to a full, rolling boil, or heating them until they reach an internal temperature of 165°F, to make sure any bacteria that developed during storage are destroyed. If the gravy separates or looks grainy after freezing, a quick whisk over low heat, with a splash of fresh broth, usually brings it back together.
Flavor Variations and Add-Ins
Once the base technique is down, brown gravy is easy to customize:
- Onion gravy: Cook thinly sliced onions in the butter until deeply caramelized before adding the flour.
- Mushroom gravy: Sauté sliced mushrooms first, then build the roux around them.
- Peppered gravy: Add extra coarsely cracked black pepper for a Southern-style, sausage-adjacent flavor.
- Herb gravy: Whisk in fresh thyme or a bay leaf while simmering, then remove it before serving.
- Wine-finished gravy: Deglaze the pan with a splash of dry red wine before adding broth for extra depth.
Gravy is one of those sauces that pairs naturally with a big bowl of mashed potatoes, and since potatoes are the most common partner on the plate, it’s worth knowing the warning signs that a potato has gone bad before you cook it, especially if it’s been sitting in the pantry for a few weeks.
Brown Gravy for Special Diets
Gluten-free: Swap the flour for cornstarch, arrowroot starch, or a 1:1 gluten-free flour blend. Use about half as much cornstarch as the flour called for, mixed with cold water into a slurry first.
Dairy-free: Replace the butter with a neutral oil, dairy-free margarine, or the rendered fat from meat drippings if available. The texture stays essentially the same since butter’s main role here is carrying the flour, not adding creaminess.
Lower sodium: Use a low-sodium or no-salt-added broth as the base, and season with pepper, herbs, and a small splash of vinegar or lemon juice instead of extra salt or bouillon. Current federal dietary guidance, summarized in CDC data, recommends that most adults keep sodium intake under 2,300 milligrams a day, and a single cup of regular canned broth or bouillon can already account for a large share of that, so it’s worth checking labels if gravy is a regular part of your meals.
If butter is part of your gravy routine, it’s also worth knowing how long butter can safely sit out on the counter before it should go back in the fridge, since softened butter is often left out ahead of cooking.
Frequently Asked Questions
What is the best thickener for brown gravy?
Flour is the traditional choice because it gives gravy its classic opaque look and holds up well when reheated. Cornstarch works faster and is a good gluten-free option, but it produces a glossier, more translucent sauce and doesn’t reheat quite as smoothly.
Can I make brown gravy without any drippings?
Yes. A roux made from butter and flour, loosened with beef or chicken broth, produces a fully flavored gravy without any drippings at all. Adding Worcestershire sauce or a splash of soy sauce helps mimic the savory depth drippings normally add.
Why does my gravy taste like raw flour?
The roux wasn’t cooked long enough before the liquid was added. Cook butter and flour together for at least two to three minutes, until it smells toasted and looks slightly golden, before whisking in any broth.
How do I fix lumpy gravy?
Pour the gravy through a fine-mesh strainer, pressing the lumps through with the back of a spoon, or blend it briefly with an immersion blender. Whisking constantly while adding liquid in the first place is the best way to avoid lumps altogether.
How long does homemade gravy last in the fridge?
Generally one to two days when stored in a shallow, airtight container in the refrigerator. It’s a shorter window than many other leftovers, so plan to use it or freeze it promptly.
Can I freeze brown gravy?
Yes, especially flour-based gravy, which freezes and reheats more predictably than cornstarch-thickened gravy. Store it in an airtight, freezer-safe container for up to about two months, and whisk it over low heat with a splash of fresh broth after thawing.
What’s the difference between brown gravy and beef gravy?
Beef gravy is typically made specifically with beef stock or beef drippings, giving it a stronger, meatier flavor. Brown gravy is a broader term that can be made with beef, chicken, or a combination, and gets its color primarily from the browned roux rather than the type of stock used.
Can I make brown gravy ahead of time for a holiday meal?
Yes, and it’s a common time-saver. Make it up to two days ahead, cool it quickly, refrigerate it in a shallow container, and reheat it to a rolling boil before serving, whisking in a splash of broth if it has thickened too much in the fridge.
Final Thoughts
Once you understand the roux, the ratios, and a few of the common pitfalls, learning how to make brown gravy stops being intimidating and turns into a five-minute habit you can lean on for weeknight dinners or a holiday table. Start with the basic butter, flour, and broth method, taste as you go, and don’t be afraid to adjust the thickness with a little extra liquid or a longer simmer. If your first batch comes out too thin or a bit lumpy, that’s completely normal. Try one of the troubleshooting fixes above, take note of what worked, and it’ll come together more easily the next time you make it.

